Introduction
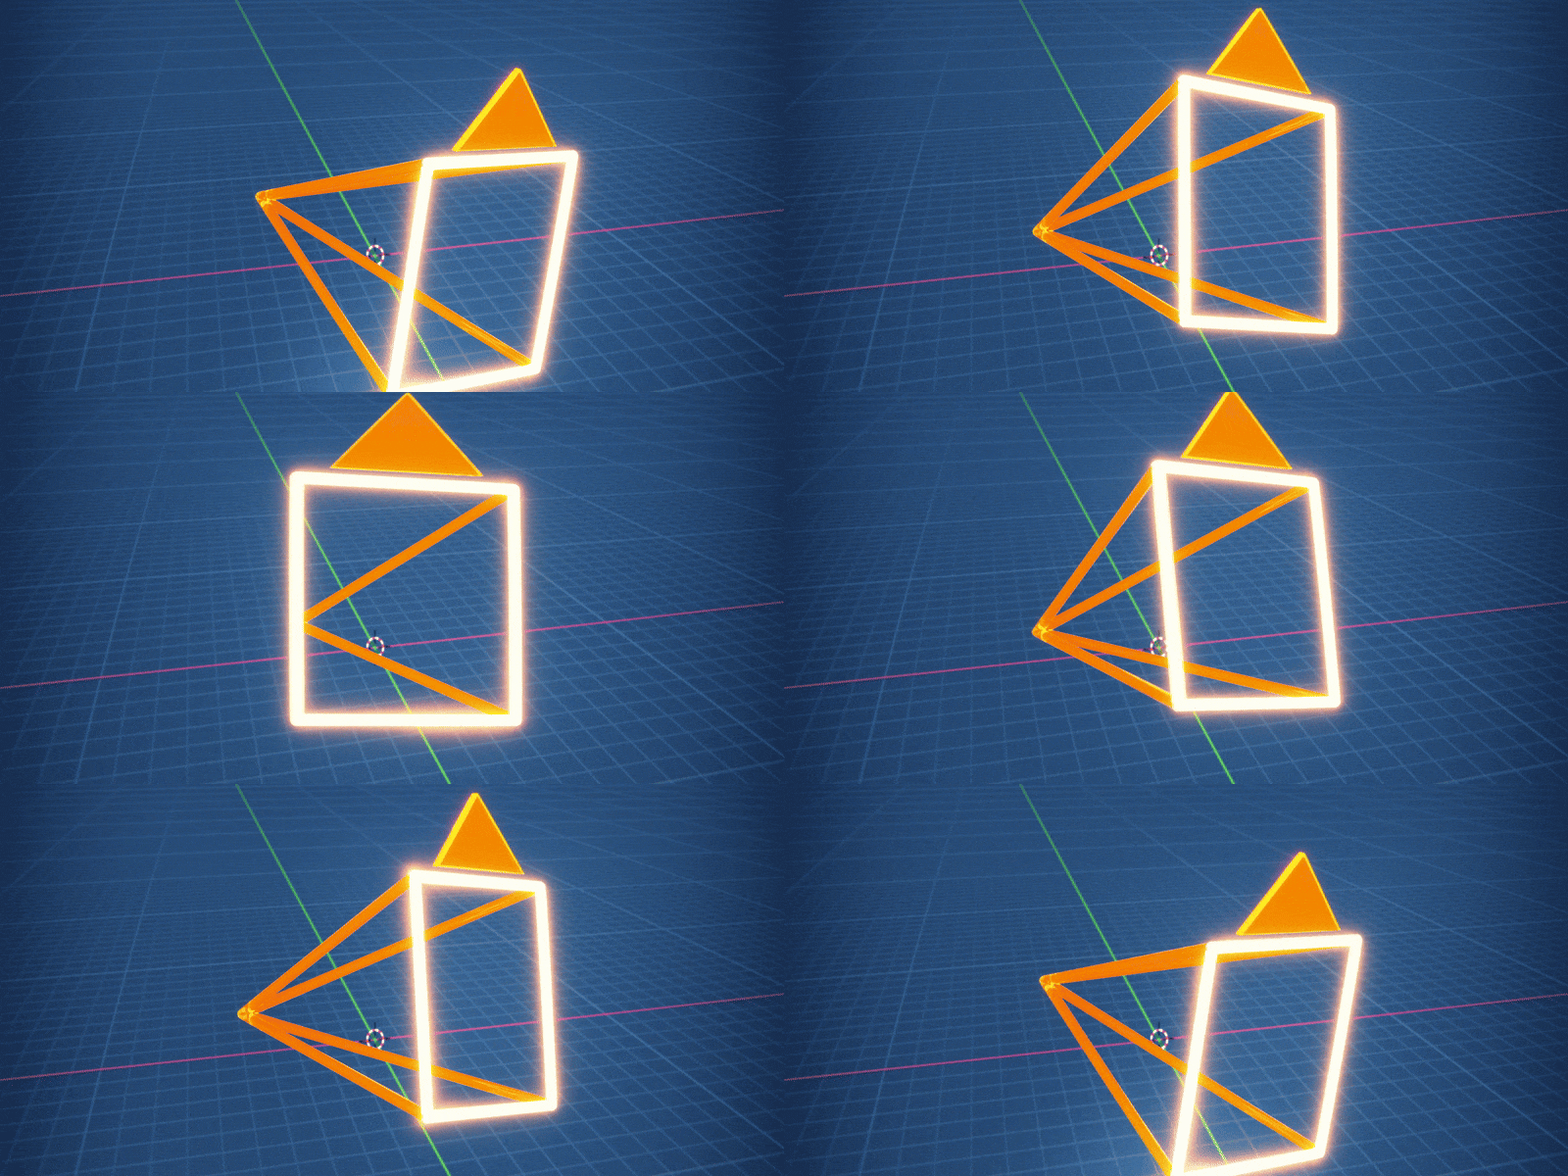
Creating dynamic 3D animations and cinematic scenes in Blender often hinges on one essential skill: seamlessly switching between 3D cameras while adjusting settings like focal length and viewport composition. While many Blender artists still rely on traditional methods like adding markers or changing the active camera in setting, these workflows can feel repetitive. Especially when switching between multiple complex camera setups, such as transitioning from a tracking or dolly shot to a drone shot.
This is where Blender add-ons like The View Keeper shine. A handy tool that simplifies camera switching in an animation. It even goes further by allowing each Blender camera to have its own custom settings. This add-on eliminates the need to constantly select a camera, activate it, and manually reset or change its settings, making it ideal for animating polished video sequences or realistic camera animations.
In this guide, we’ll compare two workflows: the built-in manual approach (using Timeline markers, Binding and setting tweaks) and The View Keeper’s streamlined functionality. Which lets you save camera setups, reuse them when needed, and switch between them in an animation. You’ll learn how to achieve quick camera switching during an animation and how to save time when rendering multiple camera setups in one take.
Whether you’re crafting a short film with dynamic shots or working on 3D geometry and need to view it from multiple angles, this breakdown will help you choose the best method for your project.
Understanding Manual Camera Switching
Manual camera switching is Blender’s built-in method for using duplicated or multiple cameras to capture different angles in an animation without any add-ons. It’s like setting up every camera and tripod as you shape the shots for your animation. Manual camera switching is one of the more popular methods, as evidenced by the many videos showing this on YouTube. However, it requires patience and is not as simple or straightforward as those videos might suggest. Let’s break down how it works and where it shines (or stumbles).
The Manual Workflow
Step 1: Add the Cameras
Press Shift + A to add as many cameras as your scene requires. Each camera can be positioned at a unique angle or distance, depending on the shot you want to capture. Place each one strategically. Maybe a wide zoom for establishing shots or a tight shot for dramatic close-ups.
Step 2: Markers and Binding
Go to the timeline, click the marker menu at the top, and select Add Marker. This camera will be attached to this marker.
Step 3: Bind Camera to Marker
After adding the marker, select the first camera. Then, go to the marker menu at the top and click Bind Camera to Marker.
Pro Tip: Name your markers and cameras (e.g. “Shot_1_CamA”) when adding them to the timeline. Otherwise, your timeline can become a chaotic and confusing list of unnamed markers. The names also serve as useful comments in the timeline, reminding you of each marker’s function.
Step 4: Repeat for All Cameras
Once the first camera is set up, move the timeline to where you want the switch to happen, then repeat steps 1 and 2 for every new camera.
Limitations of Manual Switching
Tedious Setup
Manually setting up and adjusting multiple cameras involves a lot of repetitive work especially in larger or more advanced projects. Every time you need a different camera angle, you must duplicate the camera or add a new one. This quickly piles up, as you also have to create and connect each duplicated camera to its own marker. It’s a slow, tedious process.
Outliner Chaos
Manual switching fills your scene with too many cameras. Soon, your workspace becomes cluttered, making it hard to remember which camera does what. You might also find yourself clicking on the wrong camera more often.
Art-Direction Nightmares
Simple changes in art direction can lead to multiple adjustments across many cameras, which is unnecessary. For example, if a client wants a wider shot in an action scene. Not knowing they would later decide to revert to the previous shot. You could end up redoing clipping distances, focal lengths, and transform locations on five to ten different cameras for example. There’s no “undo” for that sinking feeling when the client says, “Let’s go back to how it was before.”
Risk of Inconsistency
When you adjust settings for each camera individually, it’s easy to make mistakes. Even a small error like using 0.1 instead of 0.01 can result in poor renders. These mistakes might only become apparent after hours or even days of rendering, leaving you stuck fixing the scene, adjusting settings, and re-rendering everything, which takes a lot of time.
Limited Access
Manual camera switching in Blender relies on the timeline’s current frame. To view your scene from a different camera, you have to move the current frame to a point on the timeline where that camera is active. This works fine if you’re only animating the camera. However, if your scene contains other animations (like a character rig), changing the frame also changes the character’s pose, making it hard to check how the pose looks from another camera’s angle.
You can manually switch the active camera to avoid this, but you must do it every single time you want to check a different angle. In 3D, scenes need to look good from multiple angles, meaning you’ll waste a lot of time repeating the same operation.
The situation worsens when baked simulations (such as physics or particles) exist in your scene. Blender has to recalculate these simulations every time you move the frame, causing lag all because you want to view your scene from a different camera.
Understanding The View Keeper
The View Keeper is a lightweight Blender camera management plugin designed specifically to streamline the management of multiple camera setups. It offers an intuitive interface in the N-panel that simplifies saving, switching, reusing, and rendering various camera configurations.
The View Keeper allows you to store different camera views and angles and easily switch between them with a single click. Unlike manual camera switching, it does not rely on the timeline. This means that no matter how many animations are in your scene, switching cameras causes zero lag. You can also switch cameras at any time with just one click.
In addition to saving and switching between cameras, The View Keeper lets you save and make settings unique to a particular camera. These settings include both render and camera settings. For example, camera rotation, position, aspect ratio, depth of field, render format, file location, lens settings, sensor settings, and so much more.
The View Keeper also lets you save multiple angles for one camera. This means you can move or rotate the camera and capture as many angles as you want using a single camera. This functionality offers a whole different mode of camera control and significantly reduces the number of cameras needed in your scene, keeping things neat and organized.
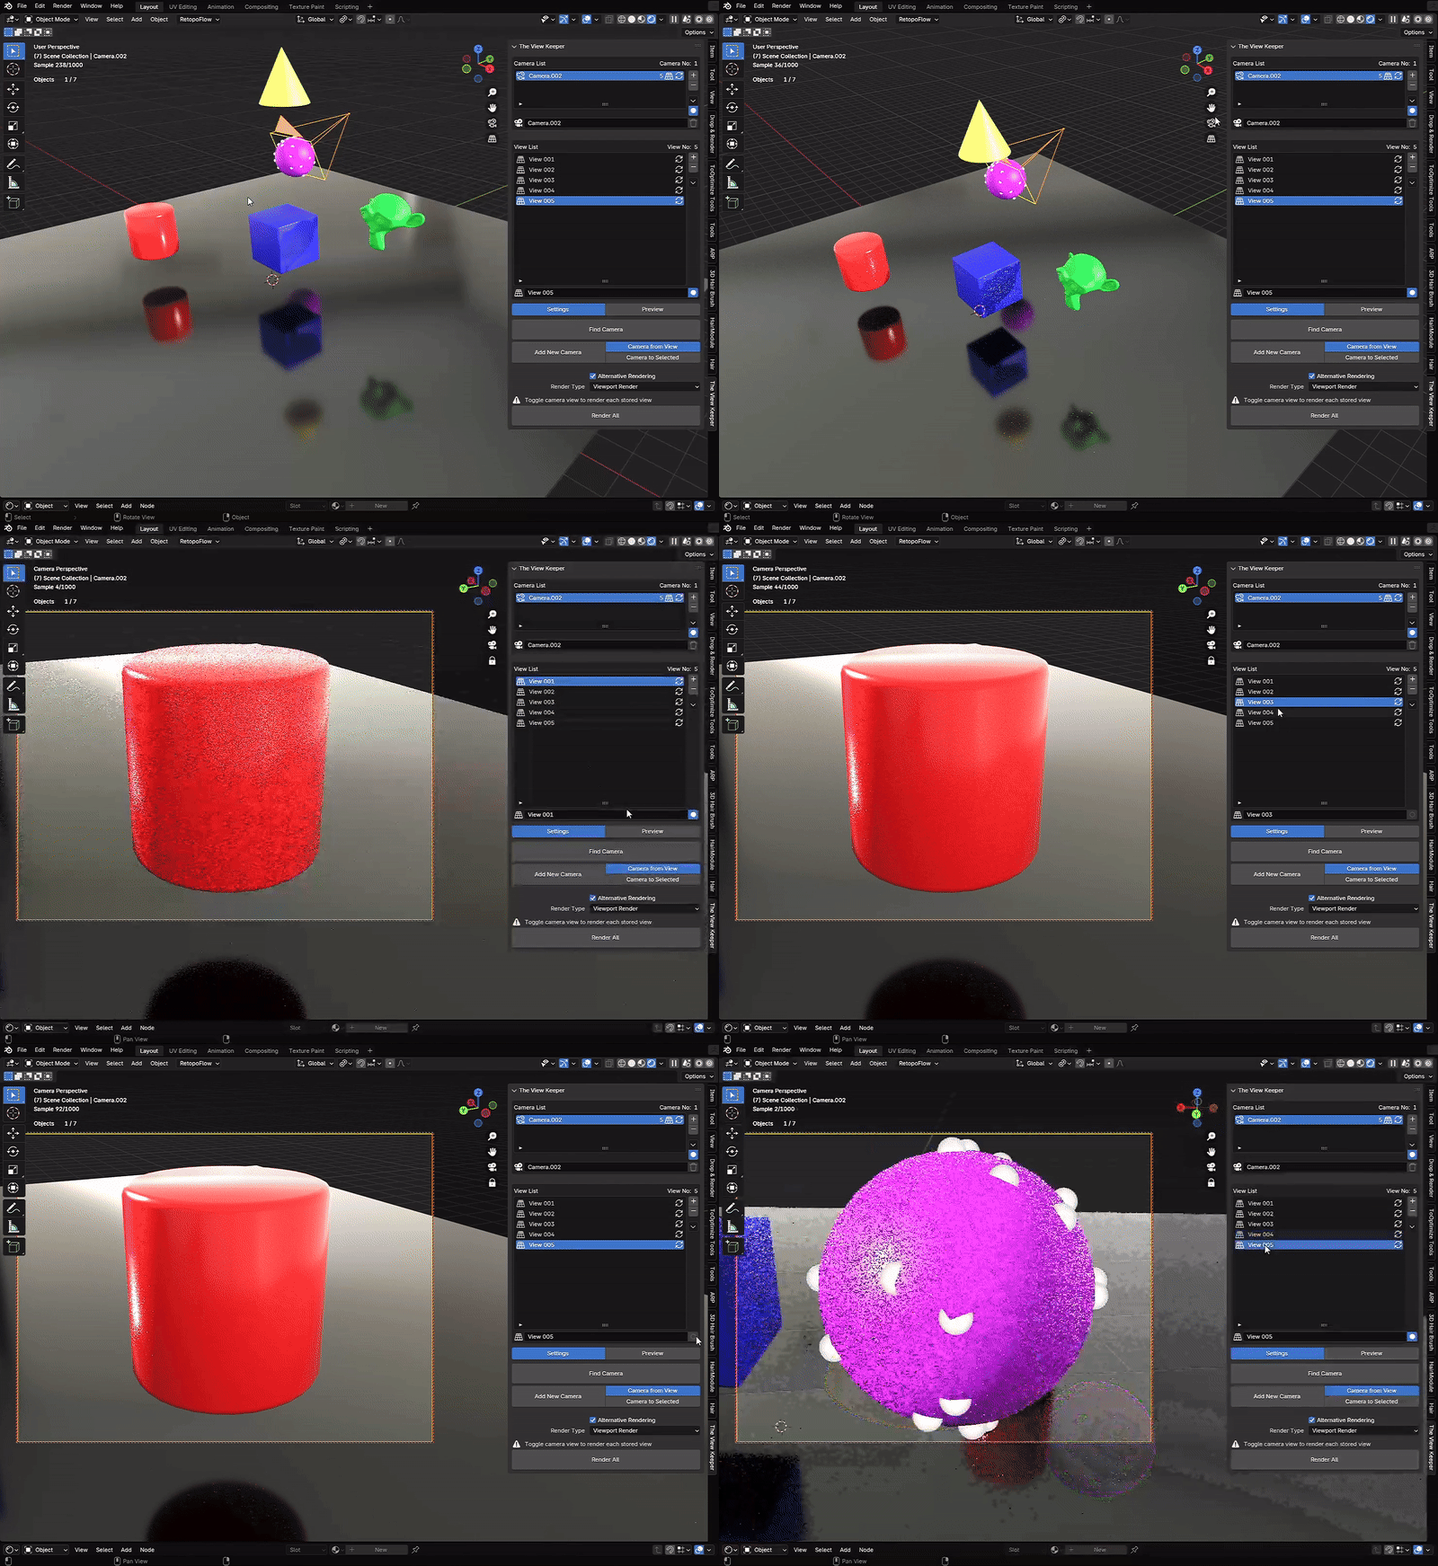
These settings and camera angles are saved as records (Camera and View Records) within the same blend file. This means you can have one camera set to render for social media reels (saved to Folder 1) and another set up to render for YouTube (saved to Folder 2). By default, achieving this would require multiple renders. However, with The View Keeper, you can set things up once and render everything at once. All settings in The View Keeper come with descriptions that help you achieve even more customization.
The View Keeper Workflow
Step 1: Add the Cameras
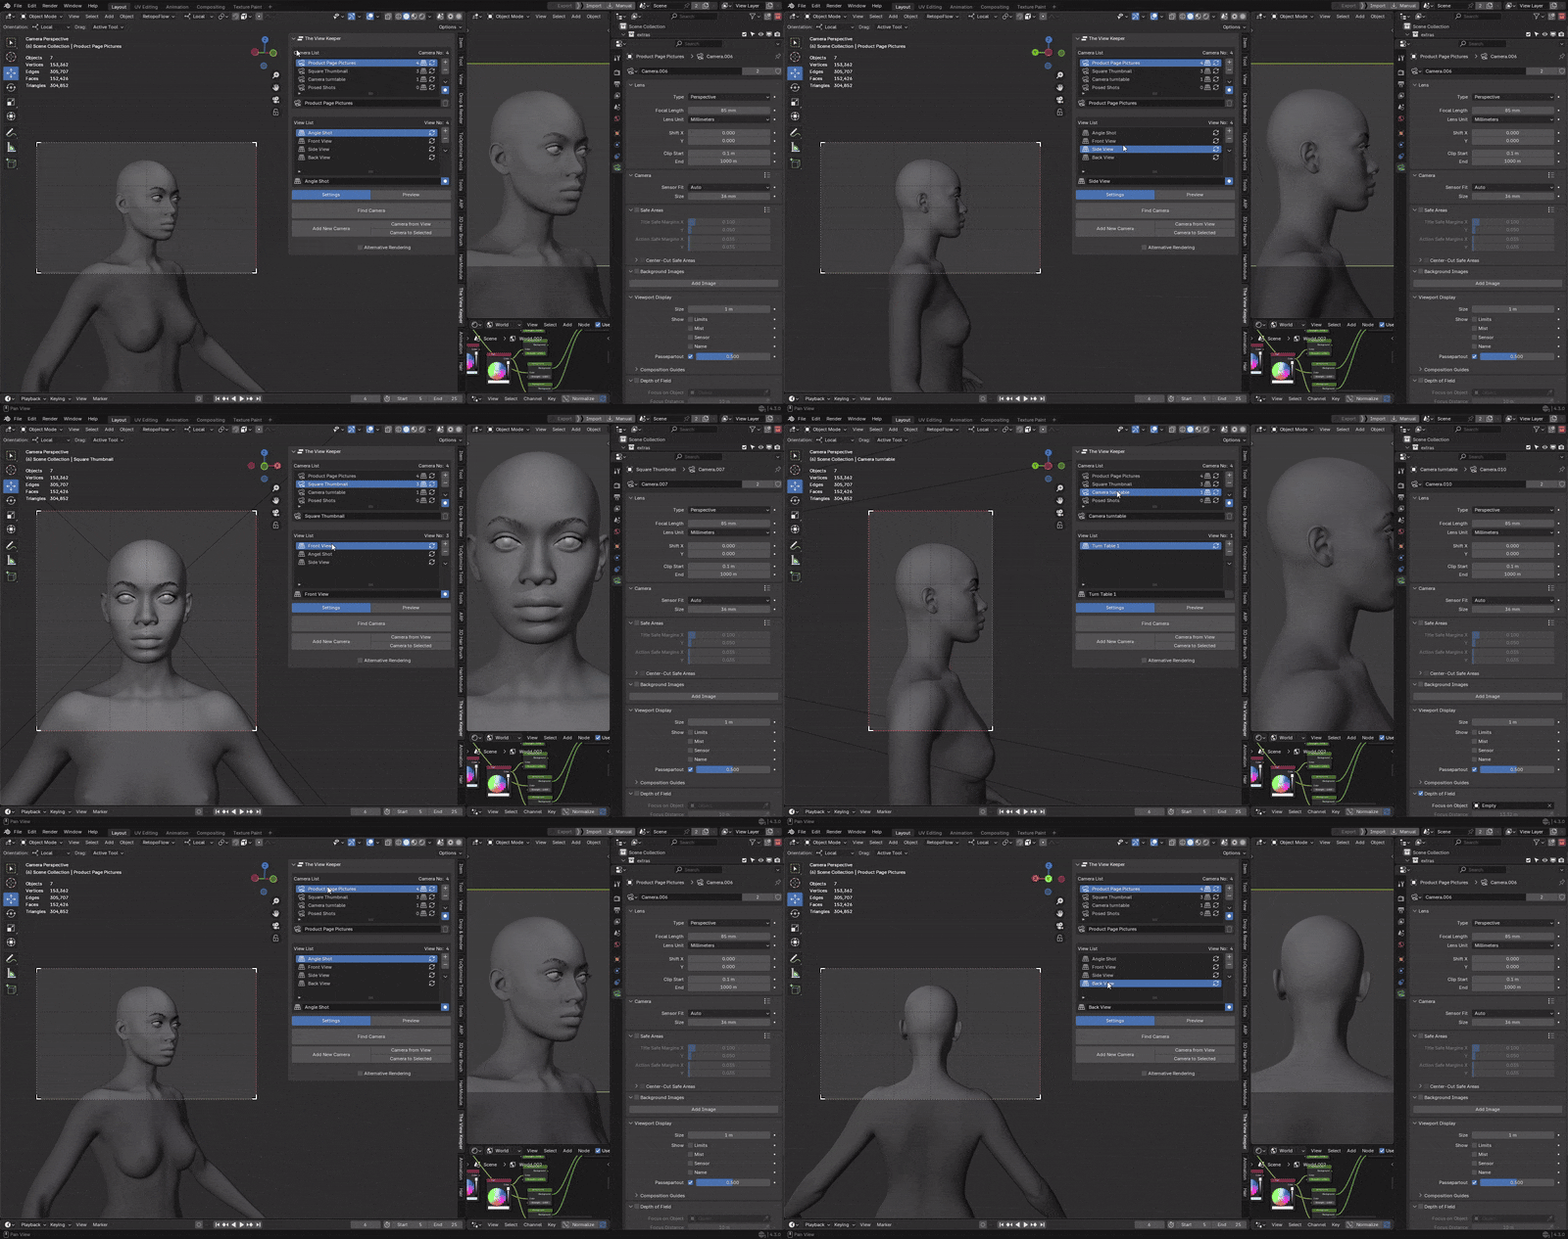
Click the Add New Camera button. The View Keeper automatically adds a new camera and saves it as a record. You can add as many cameras as needed by just clicking a button. The View Keeper also lets you save multiple camera angles for the same camera. To do this, go to the view table and click the Add button to save your current view. Then, make the necessary camera movements to capture the next ideal angle and click the Add button again.
Step 2: Switch to the Desired Record
Once the records are created, simply click on the desired record to have all the settings restored to Blender.
Step 3: Keyframe and Render
Switching camera angles in an animation with The View Keeper is simple. Go to the record that holds the desired camera angle and insert a keyframe. Move to the next frame, select the next record, and insert another keyframe. Now you can seamlessly switch between the camera angles stored in the records.
Why Use The View Keeper?
Ease of Use
The View Keeper is designed with a simple, easy-to-use UI. It’s user-friendly interface gives it a simple learning curve compared to other Blender camera add-ons, making it accessible even for beginners. This ease of use is one of its strongest advantages, positioning it as an efficient solution for managing camera configurations.
Easily Customizable Workflow
With the ability to save render and camera settings for every single camera, The View Keeper enables a highly customizable workflow. You can save different shots for an animation, allowing for rapid iteration and easy comparison between shots to boost creativity and experimentation.
Consistency and Accuracy
By storing detailed camera settings (such as focal length, sensor size, clipping distances, and depth of field), The View Keeper ensures that your renders remain consistent across different shots and scenes. With one camera handling multiple angles, you only need to make a change once for it to be reflected across all saved angles.
Render Flexibility
The View Keeper offers the ability to change or animate render settings during a render, providing added flexibility that default Blender lacks. This feature is especially useful for projects that require outputs in different formats, such as cinematic sequences, VR experiences, marketing content, and social media posts.
Quick Switching
Instantly switching between different camera setups and angles with a single click makes The View Keeper a far better alternative. It allows you to switch camera angles without cluttering your scene with duplicate camera objects.
Compatibility With Other Camera Add-Ons
The View Keeper is compatible with other camera and Blender plugins, such as the Camera Shakify add-on. It has its own panel and doesn’t alter Blender’s overall structure, making it an ideal addition to your workflow.
Limitations of The View Keeper
Records Are Saved per Project
Even though the records feature in The View Keeper is really amazing and efficient, it has a drawback. As of the time of this writing, records created with The View Keeper can only be used per Blend file. The current feature set doesn’t support appending or importing records between multiple Blend files. This might change in the future as The View Keeper is always getting updated.
Workflow Comparison: Manual vs. The View Keeper
Now that we’ve explored both methods individually, let’s compare them on key aspects of workflow: process , configuration, complexity, Flexibility, consistency, and accuracy.
Manual Camera Switching
- Process:
Involves manually adding cameras for every new angle. It requires setting up timeline markers and binding for each camera just to be able to switch between them. You must move the frame or manually change the active camera to see a different view. - Configuration:
Each camera’s settings (focal length, depth of field, etc.) must be adjusted individually. - Complexity:
As the number of cameras increases, so does the complexity and the potential for clutter and repetition. - Flexibility:
While it offers precise control, manual switching limits flexibility when making global changes across multiple cameras. Repetitive manual adjustments can be very time-consuming, especially in projects with numerous camera changes. - Consistency:
Maintaining consistent settings across multiple cameras is challenging and prone to errors. - Accuracy:
Precision depends entirely on the artist’s careful adjustments; even minor errors can lead to noticeable discrepancies in the final render.
The View Keeper
- Process:
Allows you to save entire camera setups as records. You can switch to these records instantly without altering any settings. It even lets you save multiple angles or shots on the same camera, with different settings. Thereby reducing clutter and eliminating the need for duplicate cameras. Switching is just a single click away. - Configuration:
Camera settings are automatically stored and can be recaptured for future shots, ensuring consistency across multiple views. - Complexity:
Its clean, minimalistic interface streamlines the workflow and reduces scene clutter, regardless of the number of cameras. - Flexibility:
You can quickly experiment with different configurations without manually resetting after each test. It also allows you to render multiple outputs simultaneously using unique settings per record. - Consistency:
Detailed camera settings are saved automatically, ensuring uniformity across different shots and renders. - Accuracy:
Centralized management of camera records minimizes human error, providing a reliable and precise workflow even in complex projects.
Real-World Applications and Examples
Real-world applications not only inspire but also illustrate the practical use cases of each workflow.
Cinematic Productions
In film and television, directors rely on multiple cameras to capture dynamic, multi-angle sequences and create stunning scenes. For example, during an action sequence, one camera might capture a close-up of the protagonist while another provides a sweeping wide shot to increase intrigue. Recreating this effect in Blender might look like this:
Manual Workflow Example
A 3D artist may use manual camera switching when the number of shots is limited and deadlines are not a major concern.
The View Keeper Example
In a professional setting, The View Keeper stores multiple camera setups. This allows the art director to quickly switch between different setups, experiment , or review past camera settings all while ensuring consistent settings across numerous shots.
Video Game Cutscenes
Video games often feature cinematic cutscenes that require rapid switching between multiple camera angles. Achieving such cutscenes in Blender might look like this:
Manual Workflow Example
A game developer manually sets up markers and binds each camera to it’s respective marker. This includes the game character’s camera. This increases the number of cameras to manage, making the cutscene cumbersome as scenes grow more complex.
The View Keeper Example
With The View Keeper, the developer might only need two cameras: one for the cutscene (capable of storing unlimited saved shots) and one for the game character’s camera. The developer can quickly test and switch between different configurations, ensuring smooth and consistent transitions throughout the cutscene.
Architectural Visualization
Architectural visualization demands precision in presenting layouts, often requiring multiple views, including a mix of perspective and orthographic views.
Manual Workflow Example
An architect might manually adjust each camera to capture various aspects of a building. However, inconsistent settings could lead to mismatches between renders which is a critical issue in architectural visualization. Additionally, rendering a building in multiple formats becomes a complex process with constant switching.
The View Keeper Example
By storing multiple camera setups in The View Keeper, the architect can ensure that every view from wide exterior shots to detailed interior perspectives maintains the correct settings for accurate, consistent renders. The architect can also produce both perspective and orthographic renders in one go, saving a lot of time. Using view records is especially beneficial for capturing different aspects of the building with a single camera.
People Also Ask
- What is manual camera switching in Blender?
It involves adding and animating multiple cameras, setting timeline markers, and binding them so Blender can automatically switch the active camera during an animation. - How does The View Keeper simplify camera management?
It lets you save, reuse and quickly switching between different cameras during an animation without needing manual reconfiguration. - Which workflow is more efficient for large projects?
The View Keeper is generally more efficient because it cuts down on repetitive adjustments and keeps settings consistent across multiple camera setups. - Can I render multiple cameras simultaneously with The View Keeper?
Yes, each camera record can have its own render and camera settings. You can render several views whether they’re completely different or similar, all at once. - How do timeline markers work for camera switching?
Timeline markers are used to bind specific cameras to designated frames, allowing Blender to automatically switch the active camera during playback. - Is manual camera switching more precise than using The View Keeper?
Not really. While manual switching offers complete control, it’s time-consuming and error-prone. The View Keeper provides more accuracy and speed by centralizing settings and ensuring consistency. - What are the benefits of using The View Keeper?
It streamlines your camera workflow and saves time by storing multiple camera setups. Thereby enabling fast, easy switching of cameras and camera angles in an animation, and ensuring consistent render settings across shots. - How do I ensure smooth transitions between cameras?
Use The View Keeper which allows for easy and smooth camera switching, which helps maintain seamless transitions. - Can I automate camera switching in Blender?
Yes, The View Keeper offers an intuitive, non-programmatic solution to automate camera switching. - What are the real-world applications of these workflows?
They’re used in cinematic productions, video game cutscenes, architectural visualization, VR experiences, and product animations.
Bringing It All Together
When comparing manual camera switching and The View Keeper, it becomes clear that both methods have a place in a Blender artist’s toolkit. Manual camera switching offers precise control over each camera’s settings, making it ideal for small projects or detailed, one-off adjustments. However, as project complexity increases, manual methods can become repetitive, prone to inconsistency, and clutter your scene with numerous camera objects.
In contrast, The View Keeper provides an efficient, organized solution that allows you to switch between cameras seamlessly during an animation. It lets you store, reuse, and switch between multiple camera setups with little effort. Its intuitive interface has an exceptionally easy learning curve. Easier, in fact, than some Blender’s default tools. This efficiency is particularly beneficial for large-scale projects, where consistency and quick iteration are critical.
Final Thoughts
Both manual camera switching and The View Keeper have their strengths as valuable tools for managing multiple camera setups in Blender. Ultimately, the choice depends on your specific needs. For smaller projects or one-off shots, manual methods might suffice. For larger, more advanced projects especially those requiring multiple renders or iterative testing, The View Keeper is the superior choice. Its organized, efficient, and user-friendly approach can transform your workflow, allowing you to focus on creativity rather than repetitive setup tasks.
We hope this guide has provided you with detailed insights, practical tips, and factual comparisons to help you decide which method is best for your project.


