


Blender artists around the world have been captivated by Arcane – the hit Netflix animated series – for its groundbreaking visual style. Arcane’s art style looks like a living painting, seamlessly blending 3D animation with 2D hand-painted flair. Achieving this look in Blender is challenging but possible.
In this full breakdown of the Arcane workflow for Blender, we’ll cover everything you need to know with actionable steps – from modeling and texturing fundamentals to lighting tricks and post-processing effects – to start achieving the Arcane artstyle in Blender. Whether you’re a beginner or advanced user, this guide provides actionable steps and key insights on how to render scenes and 3D characters like Arcane. Let’s dive into the full breakdown of techniques, tips, and things you need to know to emulate Arcane’s visual aesthetics in Blender.

Understanding the Arcane Art Style: Key Characteristics and Visual Elements
Arcane’s visual style is a captivating blend of 3D animation and hand-crafted 2D artistry, often described as a “moving painting” that avoids the overly smooth, “plastic” appearance of typical CG animation. Its tactile, painterly quality infuses every frame with an organic, artisanal feel, achieved through a combination of innovative techniques. The key characteristics and visual elements include:
- Hybrid 2D/3D Aesthetic: Arcane seamlessly integrates 3D models with 2D-like illustrated details, making renders appear hand-drawn. Characters and environments, while built in 3D, feature details that mimic traditional 2D art, creating a unique visual bridge between the two mediums that feels both modern and classic.
- Painterly Textures: Surfaces are adorned with hand-painted textures showcasing visible brushstrokes, lending a rough, organic quality. This contrasts with the sterile perfection of standard CGI, giving characters, props, and environments a crafted, artistic texture that feels like a digital painting.
- Dynamic Lighting & Compositing: Lighting is artistically tailored, with hand-painted shadows and highlights adjusted to enhance the story’s emotional tone. Compositing techniques, including oil painting-inspired backdrops, cel-shaded accents, and neon glows, are layered to create rich, cohesive visuals that elevate the mood of each scene.
- Cinematic Camera Work: Arcane employs film-like techniques such as depth of field, handheld camera shakes, and dramatic angles, infusing scenes with intensity and realism. These dynamic movements make action sequences visceral and dialogue moments intimate, mimicking live-action cinematography.
- Expressive Animation: Character movements are meticulously keyframed, avoiding motion capture to prioritize exaggerated, emotive poses and expressions. Drawing on classical animation principles, animators sculpt every gesture to convey deep personality and emotion, enhancing storytelling.
These elements combine to create a cohesive, hand-crafted aesthetic that feels rich and detailed. Achieving this in Blender requires additional painting and compositing to transform 3D renders into an illustrated finish, with these characteristics serving as guiding principles for the workflow.
Modeling Stylized Characters in Blender Inspired by Arcane
Modeling Arcane-style characters in Blender involves combining precise 3D techniques with a stylized artistic approach, capturing the show’s balance of realistic proportions and subtle exaggerations. The process focuses on creating models that serve as a canvas for painterly textures while supporting expressive animation. Key considerations include:
- Study Concept Art & References: Arcane’s production relied on concept art to define character designs. Collect reference images of characters like Vi or Jinx, noting their silhouettes, facial structures, and proportions (e.g., Vi’s muscular arms, Jinx’s wide eyes and slender build). These references guide shape language and stylization, ensuring models align with Arcane’s aesthetic, as recommended by Blender Artists community discussions.
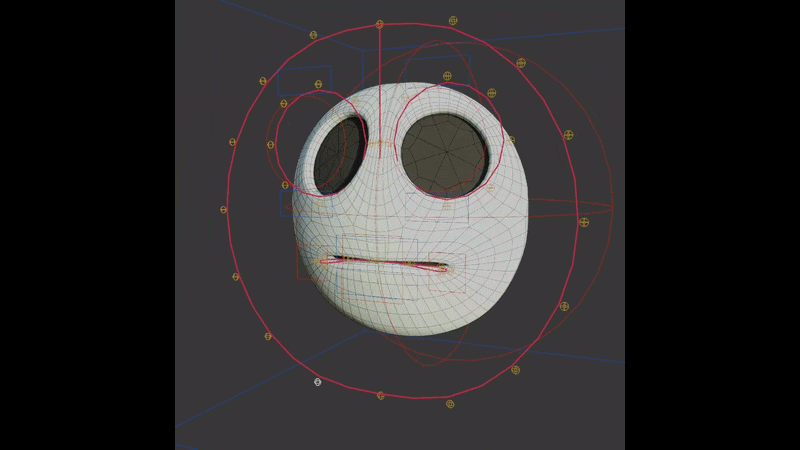
- Sculpt the High-Poly Model: Use Blender’s Sculpt Mode with Dynamic Topology or Multiresolution to create high-resolution models. Focus on smooth, defined forms, avoiding hyper-realistic details like pores, and emphasize features like cheekbones, nose shapes, or hair volume to reflect character personality. Sculpt clothing folds and hair clumps with a painterly touch to support Arcane’s expressive animation style.
- Stylize with Purpose: Introduce subtle exaggerations, such as broader chests for heroic characters or sharper features for sinister ones, while keeping joint anatomy realistic for clean animation deformation. Arcane’s realism allows artistic liberties, like slightly oversized hands or elongated limbs, to enhance character identity without breaking believability.
- Retopology & UVs: Retopologize high-poly sculpts into animation-friendly geometry using tools like Quad Remesh or RetopoFlow, ensuring clean edge loops, especially around the face, for expressive deformations. Arcane models, likely built in Maya, prioritize clean topology, and Blender users should follow suit. Unwrap UVs carefully to minimize distortion, placing seams strategically to hide texture artifacts, preparing for hand-painted texturing.
- Modeling Accessories and Props: Create detailed props like Jinx’s grenade launcher or Ekko’s hoverboard using hard-surface modeling for clean edges and sculpting for wear and tear. Exaggerate or simplify details to ensure they read well with hand-painted textures, incorporating stylized elements like weathered decals or bold rivets to match Arcane’s aesthetic.
The raw model may appear plain in Blender’s viewport, as Arcane’s visual appeal relies on texturing and shading. The goal is to craft a robust, animation-ready model with strong forms that serve as a foundation for the painterly techniques applied in later stages.

Texturing Techniques to Achieve Arcane’s Hand-Painted Look
Arcane’s hand-painted textures are the cornerstone of its illustrated aesthetic, transforming 3D models into digital paintings with visible brushstrokes and organic imperfections. Replicating this in Blender requires manual painting skills, as procedural methods cannot capture the artisanal quality. Detailed techniques include:
- Hand-Paint Everything: Arcane’s textures are manually painted, requiring artists to use Blender’s Texture Paint mode or external tools like Substance 3D Painter, Photoshop, or Krita. A Blender Artists user noted, “The trick to Arcane’s painterly style is that they actually painted it,” emphasizing the need to paint diffuse colors, shadows, highlights, and details like patterns or scratches by hand for authenticity.
- Use the Right Brushes: Replicate Arcane’s brushstroke-heavy look with custom brush alphas mimicking real brushes (e.g., rough bristles, square tips, rake brushes). Community insights compare Arcane’s textures to hand-painted game assets, using varied brush shapes for streaky, textured strokes. Square brushes with low opacity create blocky marks, while rake brushes add scratches or hair-like details, aligning with Arcane’s organic style.
- Layered Painting Technique: Paint in layers like traditional art, starting with broad strokes for base colors and shadows, then refining with finer details. Use low-opacity brushes to build smooth gradients, beginning with darker tones and layering lighter areas to avoid a muddy look. This approach, as described by an artist recreating Arcane assets, ensures vibrant, dynamic textures that mimic the show’s painterly depth.
- Paint in Light and Shadow: Arcane bakes lighting into textures, with artists painting highlights and shadows directly onto surfaces. In Blender, paint darker shadows in creases (e.g., clothing folds) and brighter patches on raised areas (e.g., cheekbones), using cavity masks or ambient occlusion (AO) bakes to guide placement. In Substance Painter, light gradient filters assist, while in Blender, overlaying an AO map enhances hand-painted shading for an illustrated look.
- Color and Material Variation: Introduce subtle hue shifts—reds or purples in skin shadows, weathered discoloration in clothing—using textured brushes for mottled effects. Exaggerate colors for thematic impact (e.g., vibrant blues for Jinx’s chaotic energy), maintaining a cohesive palette with painterly imperfections like brushstroke overlaps to enhance the hand-crafted feel.
- High Resolution & Downscale: Paint at 2K or 4K for crisp brush details, such as canvas-like textures or fine scratches, visible in Arcane’s close-ups. Downscale slightly for performance, using 4K for hero assets and lower resolutions for secondary ones, balancing artistry with rendering efficiency.
- Software and Add-ons: Use Blender’s Texture Paint mode with a drawing tablet for pressure-sensitive control. Add-ons like BPainter or Layer Painter provide Photoshop-like layer management. Substance Painter offers robust brush tools and procedural bases, topped with manual painting, while Photoshop (used by Arcane’s studio Fortiche) and Krita are viable alternatives. Choose tools that maximize artistic control to capture Arcane’s hand-crafted essence.
Texturing demands patience and digital painting practice, as Arcane’s look relies on artisanal effort. Beginners should hone skills on simple models before tackling complex characters, ensuring every stroke contributes to the illustrated, painterly aesthetic.
Creating Arcane-Style Hair in Blender: A Step-by-Step Guide
Arcane’s iconic hairstyles, like Jinx’s blue braids or Mel’s curly updo, are sculptural and painterly, balancing stylized forms with natural movement. Creating such hair in Blender is a complex but rewarding process, requiring modeling, texturing, and rigging tailored to Arcane’s aesthetic. Here’s a comprehensive step-by-step guide:
- Plan the Hair Design: Analyze reference images to break down the hairstyle into components (e.g., bangs, curls, braids). Arcane hair features chunky, sculpted locks with painted highlights, avoiding ultra-realistic strands. Determine whether to use solid geometry for stylized control or Blender’s particle system with a custom shader, based on whether animation is needed.
- Choose a Hair Creation Method:
- Poly-Modeled Strands: Model hair as mesh clumps, sculpting them like clay for styles like Jinx’s braids or Vi’s bangs, offering precise control for Arcane’s chunky, hand-crafted look.
- Curve and Geometry Nodes: Use Blender’s curve-based hair system (Geometry Nodes) for procedural strands or hair cards, ideal for dynamic results with physics, though complex to tweak, as noted by an artist spending 44 hours on Jinx’s hair.
- Particle Hair with Stylized Shader: Comb particle hair guides into shapes, applying a non-photorealistic shader for a painted, outlined look, using community node setups to achieve Arcane’s illustrative style.
- Blocking Out Hair Shapes: For poly-modeled hair, block out volumes with meshes or curves. For Mel’s curls, model a helix-shaped curl using the Screw Modifier, convert to a mesh, and sculpt for tapering. Duplicate and vary pieces, placing them around the scalp with proportional editing or curve modifiers to ensure a natural, Arcane-style silhouette.
- Refining Hair Strands:
- Sculpt tapered ends, twists, or flyaways to avoid uniform “noodle hair,” adding waviness or randomness for realism, as seen in Jinx’s dynamic braids.
- For particle hair, adjust strand thickness, add child particles with randomness, and group into clusters to mimic Arcane’s thick locks.
- Use Curve Brushes or IMM Brushes (in Blender or ZBrush) to draw strands, leveraging Snap to Surface in Blender for precise placement, as demonstrated in recreations of Ekko’s curls.
- Texture and Shade the Hair:
- Paint gradient textures for meshes or cards, transitioning from darker roots to lighter tips with highlights (e.g., Jinx’s purple-pink streaks). Use a drawing tablet for precise strokes.
- Create a custom shader with anisotropic sheen mixed with painted colors, using a Gradient Texture for hand-painted highlights. For particle hair, use Shader to RGB (Eevee) or Fresnel nodes with noise textures for brushstroke effects.
- Paint scalp or under-hair areas dark to blend seamlessly.
- Arcane Hair Special Effects: Rig long hair pieces (e.g., Jinx’s braids) with bones for posing or dynamic animation, using Blender’s Armature system. Apply cloth simulation sparingly for loose strands, as Arcane favors controlled, bone-driven motion. For still renders, pose hair dynamically to capture Arcane’s dramatic flair.
Step-by-Step Example – Stylized Curls (Mel’s Hair):
- Model a single curl with a curve or Screw Modifier, convert to a mesh, and sculpt to taper ends.
- Duplicate and vary curls, scattering them around the scalp with rotation and scaling for natural flow.
- Join curls, sculpt intersections for cohesion, and refine the collective shape.
- UV unwrap representative curls, paint a texture with darker roots, lighter tips, and shine streaks, applying consistently.
- Create a material with the painted texture and slight sheen, applying to all curls.
- Parent curls to the head rig, rigging key curls for subtle bounce.
Arcane-style hair is labor-intensive, often cited as a major challenge due to its sculptural and painterly demands. However, a well-crafted hairstyle elevates characters, embedding them in Arcane’s vibrant, artisanal world.

Lighting and Shading Strategies for Arcane-Inspired Scenes
Arcane employs lighting as a narrative device, using dramatic contrast and colored lights to enhance mood. In Blender, prioritize a painterly approach over physically accurate rendering.
- Artistic over Physical Lighting: Fortiche manually crafted lighting, avoiding automated global illumination and painting light into textures. In Blender, arrange key, fill, and rim lights with a cinematic mindset, adjusting intensities to achieve the desired effect, such as adding a rim light to outline a character even without a logical source, mimicking Arcane’s painted highlights.
- Dramatic, Directed Lighting: Use Spot or Area lights to replicate Arcane’s strong directional sources, like window light or neon signs, with color tints to match Piltover’s warm sunlight or Zaun’s moody greens and purples, reinforcing the show’s distinct color palettes.
- Soft Shadows and Contact Shadows: Opt for Area lights to create soft shadows that align with Arcane’s painterly aesthetic, and enable Contact Shadows in Eevee or use ambient occlusion in Cycles to ensure small objects, like a character’s foot, cast subtle shadows for detailed environments.
- Customized Shaders for Stylization:
- Tone down sharp reflections by blending diffuse and low-gloss glossy shaders, achieving Arcane’s diffuse, painted highlights instead of mirror-like shine.
- Utilize the Shader to RGB node in Eevee or color ramps to create a cel-shaded effect, such as two-tone shadows on character faces during emotional close-ups, similar to Arcane’s anime-inspired shading.
- Incorporate Fresnel or Facing ratios to add rim lighting within materials, using a light tint like pale blue to make characters stand out against backgrounds, as seen in Arcane.
- Light Linking (Workaround): Simulate light linking in Blender using Light Groups in Cycles or duplicated scene layers to isolate effects, such as applying a highlight only to a character, replicating Arcane’s precise control over lighting specific objects.
- Global Illumination vs. Manual Fill: Use global illumination in Cycles cautiously to avoid overly even lighting, supplementing with manual fill lights to brighten areas or negative lights and light blockers to deepen shadows, maintaining Arcane’s art-directed focus.
- Test renders with textures applied, as painted gradients may reduce the need for additional lights. Enhance the painterly look by painting over renders in 2D software to identify needed shader or lighting adjustments, mirroring Arcane’s iterative process.
Camera Mapping and Projection Techniques Used in Arcane
Arcane leverages 2D matte paintings projected onto 3D geometry to create rich, painterly backgrounds with subtle depth.
- How Arcane Uses Projection Mapping: Detailed 2D paintings serve as backdrops for environments like Piltover or Zaun, projected onto simple 3D geometry to achieve expansive vistas with a parallax effect during minor camera movements, preserving the hand-painted aesthetic.
- Steps to Use Camera Mapping in Blender:
- Prepare the Artwork: Create or source a high-resolution digital painting or image that matches the intended perspective, designed for a specific camera view, as done in Arcane’s pipeline.
- Model Proxy Geometry: Construct simplified 3D geometry, such as extruded boxes for buildings, to act as projection surfaces, keeping forms minimal since the painting provides the detail.
- Match the Camera: Align the Blender camera to the painting’s perspective, using a cinematic focal length (e.g., 35mm) and background images in the camera view to ensure proxy geometry matches the artwork.
- Project the Texture: Apply the painting using “Project from View (Bounds)” in Edit Mode for static UVs or the UV Project modifier for dynamic projection, ensuring the render matches the 2D artwork from the camera’s angle.
- Test Parallax: Animate subtle camera movements, primarily horizontal or vertical, to create a depth effect where closer objects shift faster than distant ones, maintaining the illusion of a 3D space.
- Tweak Geometry and Opacity: Refine proxy geometry for accuracy and use layered projections, such as separate foreground and background elements, to enhance depth, splitting paintings into layers if needed.
- Camera mapping preserves the 2D artwork’s detail, ideal for set extensions like city skylines, with matching lighting and atmospheric effects like fog to integrate 3D elements seamlessly.

Animating Characters with Arcane’s Unique Motion Style
Arcane’s animation combines realistic weight with exaggerated, hand-drawn expressiveness, relying entirely on keyframe animation.
- All Keyframe Animation (No Mocap): Arcane’s animators hand-keyed every frame, avoiding motion capture to infuse personality. In Blender, manually keyframe movements using tools like Rigify, grounding motion in real-world references but exaggerating for dramatic effect, such as amplifying fight scene impacts.
- Exaggeration and Animation Fundamentals: Apply the 12 Principles of Animation, emphasizing anticipation, follow-through, and subtle squash & stretch. Include secondary motions, like Jinx’s swinging braids, to enhance liveliness, adjusting Blender’s interpolation curves for dynamic timing.
- Attention to Weight and Lighting: Ensure movements respect physics, with momentum and gravity evident in heavy objects. Prefer keyframe control over simulations for stylistic consistency, referencing live-action footage for nuance and amplifying poses for Arcane’s flair.
- Mixing Frame Rates and Smear Frames: Animate at 24 fps for smooth motion, occasionally holding poses longer or using smear frames (via motion blur or rig stretching) to stylize fast actions, emulating Arcane’s 2D-inspired staccato effects.
- Expressive Acting and Face Animation: Convey narrative through subtle gestures, like a trembling hand or eye twitch, using shape keys or bone controllers in Blender for precise facial expressions, ensuring the character’s thought process is clear.
- Camera and Animation Synergy: Coordinate camera movements with animation, such as quick pans for punches or slow pushes for quiet moments, using techniques like camera shakes or time remapping to enhance impact, as seen in Arcane’s dynamic scenes.
- Polish animations through iterative refinement in Blender’s graph editor and dope sheet, adjusting curves and keyframes to achieve Arcane’s lively, polished motion style.
Rendering Settings in Blender to Mimic Arcane’s Visuals
Arcane’s rendering balances realism and stylization, achievable in Blender using Cycles or Eevee with tailored settings.
- Cycles vs. Eevee: Choose Cycles for realistic lighting, reflections, and bounce effects, ideal for scenes with indirect light, or Eevee for faster rendering and stylized effects like Shader-to-RGB shading, suitable for quick iterations and painterly stills.
- Resolution and Sampling: Render at 1080p or higher to capture painted details, using high samples in Cycles or increased shadow resolution in Eevee to ensure clean, smooth shadows in moody scenes, with careful denoising to preserve texture details.
- Color Management: Opt for Standard view transform for vibrant, saturated output or Filmic with high-contrast presets, adjusting in compositing to achieve Arcane’s punchy, neon-rich color palette.
- Depth of Field and Motion Blur: Enable DOF to guide focus and blur backgrounds, enhancing 2D projection integration, and apply moderate motion blur for cinematic fast actions, ensuring textures remain clear during quick movements.
- Freestyle or Line Art (Optional): Add subtle Freestyle or Line Art lines to emulate Arcane’s occasional painted line details, applying them sparingly on character silhouettes or material edges for graphical emphasis.
- Volumetrics and Fog: Incorporate subtle volumetric fog in Cycles or Eevee to add atmospheric depth, particularly in Zaun’s hazy environments, tinting distant objects to enhance the painterly aesthetic.
- Render Passes for Compositing: Generate passes like Ambient Occlusion, Mist, and Diffuse/Glossy to enable flexible post-processing, allowing fine-tuning of lighting and depth to perfect Arcane’s painterly balance.

Post-Processing Effects to Enhance the Arcane Aesthetic
Post-processing elevates renders to match Arcane’s polished aesthetic through compositing and effects integration.
- Compositing Layers and Elements: Blend render passes, such as characters and matte-painted backgrounds, in Blender’s Compositor with Alpha Over or Mix nodes, using Hue/Saturation or Color Balance to unify color tones for Arcane’s cohesive, layered look.
- Color Grading: Adjust with Color Balance or curves to reflect Arcane’s mood, like Zaun’s green-tinted shadows or Piltover’s warm highlights, increasing contrast and adding vignetting to focus on central elements, as in Arcane’s close-ups.
- Add 2D FX (Smoke, Particles, Flares):
- Draw effects like smoke or sparks with Grease Pencil to mimic Arcane’s hand-drawn VFX.
- Composite hand-drawn image sequences, such as explosions, using Add/Screen modes for authenticity.
- Use procedural effects like smoke with Freestyle outlines for a 2D appearance, though hand-drawing is often more effective.
- Apply Glare (Fog Glow) for soft blooms on bright sources, like Jinx’s neon signs, ensuring subtle intensity to maintain detail.
- Depth Effects: Map the Mist/Depth pass with a ColorRamp to create atmospheric depth, fading distant objects into colors like teal to replicate Arcane’s painterly aerial perspective.
- Sharpening/Blurring: Add subtle Gaussian blur to backgrounds for Arcane’s soft, brush-blended look, or slight sharpening to enhance texture details without introducing noise.
- Film Grain and Texture Overlays: Overlay low-strength noise or canvas textures in the Compositor to reduce digital sterility, enhancing Arcane’s fine grain and painterly feel.
- Compositing Software Workflow: Primarily use Blender’s Compositor, but employ tools like Photoshop or DaVinci Resolve for complex grading or manual paint-overs to add highlights or correct artifacts, as Arcane’s team did.
Post-processing integrates textures, lighting, and effects into a cohesive Arcane-like frame, requiring iterative color grading and effect tweaks to achieve the show’s artistic depth.
Common Challenges and Solutions in Replicating Arcane’s Style
Replicating Arcane’s style in Blender presents multiple obstacles, with targeted solutions to overcome them.
- Challenge 1: “There’s no Arcane button.”: The absence of a one-click solution discourages beginners. Solution: Divide the workflow into stages, practice hand-painting with Arcane references, build a brush library, and progress from simple to complex scenes to build skill.
- Challenge 2: Requires Multi-Disciplinary Skills: Weaknesses in texturing or animation can undermine results. Solution: Pinpoint skill gaps, follow targeted tutorials, seek community feedback on forums like Blender Artists, and improve one discipline at a time.
- Challenge 3: Time-Consuming Workflow: Hand-painting’s slow pace risks burnout. Solution: Focus on visible areas with the 80/20 rule, simplify hidden parts, set project milestones, and spread tasks across days to maintain momentum.
- Challenge 4: Performance and File Size Issues: High-resolution textures and dense meshes strain Blender. Solution: Optimize with Simplify options, use layered scenes or Library Overrides, employ instances or camera projection, and render in passes to manage system resources.
- Challenge 5: Hair and Fur Complexity: Hair and foliage are time-intensive and challenging. Solution: Use hair cards or add-ons like Hair Tool, switch to sculpting if particle hair fails, and study fan art for alternative hair techniques.
- Challenge 6: Maintaining Consistency Across the Project: Inconsistent assets disrupt the unified Arcane style. Solution: Develop a style guide with color and brush settings, reuse shaders, and compare assets to ensure consistent painting and lighting.
- Challenge 7: Getting Noticed or Feedback: Lack of guidance without an art director hinders progress. Solution: Share WIPs on platforms like Blender Artists or Twitter, analyze others’ Arcane fan art, and study case studies to refine techniques.
Anticipating these challenges and applying solutions like smart planning and community engagement helps artists achieve Arcane’s professional quality as solo creators.

Recommended Add-ons and Tools for Arcane-Style Projects in Blender
Add-ons and external tools enhance efficiency in creating Arcane-style art in Blender.
- Substance 3D Painter (or Adobe Painter): Offers robust texture painting with layers and brushes, exporting seamlessly to Blender, with free alternatives like ArmorPaint or Krita for budget users.
- Blender Texture Paint Add-ons (BPainter / Texture Paint Layer Manager): Tools like BPainter or UcuPaint add layers and custom brushes to Blender’s Texture Paint, facilitating Arcane’s multi-layered painting approach.
- Blender Grease Pencil: Enables drawing 2D effects like sparks or outlines in 3D space, ideal for Arcane’s hand-drawn VFX and texture decals.
- Rigify and Animation Add-ons: Rigify streamlines character rigging, while add-ons like Faceit or Graph Editor Extensions support facial rigging and animation workflows.
- Hair Tools:
- Hair Tool: Converts particle hair to deformable cards for easier hair creation.
- Curve to Hair or Simple Hair: Free geometry nodes for generating hair from curves.
- TinyNocky’s Hair Shader/Asset: Custom shader designed for Arcane-style hair highlights.
- UV Packmaster / UV Toolkit: Improve UV unwrapping efficiency, crucial for Arcane’s hand-painted textures, maximizing texture space.
- PureRef: Displays reference images like Arcane screenshots on-screen, ensuring style consistency during modeling and texturing.
- Compositing and Color Grading Tools: Use DaVinci Resolve or Natron for advanced color grading, enhancing Blender’s Compositor for professional post-processing.
- Photopea: A free web-based Photoshop alternative for texture painting or frame paint-overs, accessible for 2D editing.
- ArtStation and Sketchfab Resources: Study Arcane artist portfolios on ArtStation or adapt kitbash sets from Sketchfab, re-textured to match the painterly style, for faster environment creation.
These tools, from Substance Painter to Grease Pencil, streamline technical tasks, allowing artists to focus on Arcane’s artistic demands while leveraging Blender’s evolving features.
Case Studies: Artists Who Successfully Emulated Arcane’s Look
Successful artist projects replicating Arcane’s style provide actionable insights.
- Jorge Martinez Garcia – “Arcane’s Ekko”: Modeled Ekko in Blender, sculpted in ZBrush, and painted textures in Substance Painter, using modular curl shapes for hair and Eevee for rapid iteration. Lesson: Modular hair techniques and tools like Substance Painter accelerate high-quality results without compromising Arcane’s aesthetic.
- Nicolas “Noggi” – “I Recreated Arcane With $0”: Recreated a Jinx scene using Blender, Photopea, and DaVinci Resolve, painting textures with UcuPaint, generating braids with geometry nodes, and using painted-over Arcane frames as backgrounds. Lesson: Free tools and strategic shortcuts, like paint-overs, paired with meticulous compositing, yield impressive Arcane-like visuals.
- Dani Tufeld – “Vi (Arcane) 3D Fan Art”: Modeled Vi in Blender, textured in Substance Painter, and improved through iteration, capturing Arcane’s gritty texture details like armor scratches. Lesson: Revisiting projects and combining Blender with Substance Painter enhances texture quality and overall fidelity.
- Tinynocky – “Arcane Character Sculpts and Hair Shader”: Created Arcane-style character sculpts and a custom hair shader, applied across multiple models like Isha and Ekko. Lesson: Developing specialized assets, like a hair shader, boosts consistency and quality across Arcane-style projects.
- Community Collab – Arcane Environment in Unreal: Students replicated Arcane’s 2D/3D blend in Unreal Engine with hand-painted textures and projection mapping. Lesson: Arcane’s style relies on artistic techniques like hand-painting and compositing, adaptable across platforms beyond Blender.
These case studies highlight the importance of hand-painted textures, innovative problem-solving, and iterative refinement, proving independent artists can achieve Arcane’s visual excellence with dedication and resourcefulness.

Community Feedback and Tips on Achieving Arcane’s Art Style
Blender and digital art communities provide essential guidance for replicating Arcane’s distinctive style, focusing on skill development and practical techniques.
- No Shortcut, Just Skill (and Patience): Achieving Arcane’s aesthetic demands meticulous hand-painting of textures and persistent practice, with no reliance on quick filters or AI solutions, requiring a dedicated commitment to mastering manual artistic techniques over time.
- Use the Right Brushes & Alphas: Select specialized brushes, such as rough dry or chalky types, to create painterly textures, utilizing shared Arcane-style brush packs or Kyle’s Photoshop brushes to produce effects that elevate textures from flat to resembling digital paintings.
- Study the Source Material Deeply: Thoroughly analyze Arcane’s frames to identify details like subtle rim lights or purple undertones in shadows, using high-quality screenshots or the official Arcane art book to ensure accurate replication of texturing and lighting techniques.
- Leverage Animation Fundamentals: Apply traditional animation principles, such as acting out scenes for reference, using timing on 2s and 1s, and fine-tuning with Blender’s graph editor to incorporate polished secondary motions, drawing inspiration from community-analyzed Arcane scene breakdowns.
- Balance Realism and Style in Shading: Prioritize painted textures over complex lighting setups, baking ambient occlusion into textures to avoid flat CG lighting, and using straightforward lighting arrangements to let the artistry of textures and animation drive the scene’s visual appeal.
- Community Resources and Tutorials: Take advantage of tutorials like Lightning Boy Studio’s YouTube series on Arcane-style hair and environments, and participate in Blender Artists or Reddit threads to access shared solutions, such as node setups or brush techniques, for specific challenges.
- Share Your Progress for Feedback: Post work-in-progress on platforms like Blender Artists to receive targeted critiques, such as adjusting texture styles or proportions, helping refine assets to align closely with Arcane’s aesthetic standards.
- Stay Encouraged and Keep Learning: Embrace the learning process as a long-term journey, tracking progress by comparing early and later attempts, and drawing motivation from the community’s enthusiasm and positive feedback for well-executed Arcane fan art.
Community wisdom underscores the importance of hand-painting, thorough reference study, and active engagement with others to steadily achieve Arcane’s coveted look with patience and collective support.
Comparing Blender’s Capabilities with Other 3D Software for Arcane-Style Rendering
Blender is well-equipped to produce Arcane-style art compared to industry-standard tools, offering unique advantages for individual artists.
- Modeling and Sculpting: Blender’s Sculpt Mode provides robust tools for creating Arcane’s stylized forms, comparable to ZBrush, with modeling precision matching Maya’s, though Maya’s pipeline integration is better suited for large studio workflows.
- Texturing: While Blender’s internal painting is less feature-rich than Substance Painter, it supports high-resolution textures and integrates well with external 2D editors like Krita, enabling hand-painted results equivalent to those in Maya or Unreal.
- Hair and Particles: Blender’s evolving Hair Object and Geometry Nodes systems allow for complex hairstyles with manual effort, comparable to Maya’s XGen, with workarounds like hair cards ensuring Arcane-style hair is achievable.
- Rendering: Cycles delivers movie-quality path tracing similar to Arnold, supporting motion blur and volumetrics, while Eevee’s real-time rendering facilitates rapid NPR-style iteration, offering an edge over Maya’s less versatile viewport rendering.
- 2D/3D Integration: Blender’s Grease Pencil enables seamless in-scene 2D effects, unlike Maya, allowing artists to draw effects like dust or sparks directly, reducing reliance on external tools like After Effects for Arcane’s 2D/3D blend.
- Compositing: Blender’s Compositor supports multilayer blending and grading for small projects, sufficient for Arcane-style shots, though less robust than Nuke for large-scale compositing, with After Effects as a viable external option.
- Pipeline and Collaboration: Blender’s collaborative tools, like Library Overrides, are improving but trail Maya’s robust referencing systems, yet its all-in-one nature benefits solo or small-team Arcane projects by minimizing software juggling.
- Cost and Accessibility: Blender’s free, lightweight design contrasts with expensive tools like Maya or Photoshop, enabling extensive experimentation, as demonstrated by Nicolas’s $0 Arcane scene recreation, making it ideal for independent artists.
Blender’s capabilities, bolstered by features like Grease Pencil and community-driven solutions, make it a powerful, accessible choice for Arcane-style rendering, with artistic technique being the primary limitation.
Best Practices for Maintaining Consistency in Arcane-Inspired Projects
Maintaining a cohesive style across an Arcane-inspired project requires disciplined practices to achieve professional unity.
- Develop a Style Guide (Art Bible): Create a detailed document outlining color palettes, detail levels, and techniques, such as consistent warm shadow tones for skin or specific brushstroke styles, to ensure all assets adhere to a unified Arcane aesthetic.
- Reuse and Share Assets Strategically: Utilize consistent base shaders and texture libraries across assets, storing common materials like Arcane-style skin or cloth shaders in a .blend file to ensure uniform light interaction and visual coherence.
- Quality Control and Iterative Review: Periodically compare renders of all assets to check for consistent brightness or texture style, making iterative adjustments like repainting or relighting to align with Arcane’s rigorous quality standards.
- Manage Color and Lighting Consistency: Define distinct palettes for scenes (e.g., Piltover’s gold accents or Zaun’s green grime), use consistent lighting rigs, and grade all frames in a single session or with a LUT to harmonize colors across shots.
- Stay True to the Style References: Resist adding overly realistic effects, keeping an Arcane frame or a successful project shot visible to ensure new assets align with established style choices, like painted highlights over specular ones.
- Collaboration and Communication (for teams): Share brushes, color swatches, and style guides, designate an art director for final texture or lighting tweaks, and maintain regular feedback to align all assets with the unified vision.
- Use of Templates: Employ template files for lighting rigs, shader node groups, and render settings to prevent technical inconsistencies, such as varying exposures or tone mapping, across different scenes or assets.
- Consistent Level of Detail: Maintain uniform texture resolution and detail density, using consistent texel density and line weights in drawn elements to avoid disparities, ensuring all assets match Arcane’s detailed yet simplified aesthetic.
Consistent application of these practices results in a professional, unified project, enhancing efficiency and mirroring Arcane’s seamless production quality.
Incorporating 2D Elements into 3D Scenes for the Arcane Effect
Integrating 2D elements into 3D scenes enhances Arcane’s artful aesthetic, leveraging Blender’s tools for a seamless blend.
- Hand-Drawn VFX (Smoke, Fire, Sparks): Use Grease Pencil to draw frame-by-frame effects like smoke trails or explosion debris with sketchy brushes, or composite stock 2D animations with textured brushes to achieve Arcane’s hand-drawn effect style, ensuring a non-realistic appearance.
- Matte Paintings & Projected Backgrounds: Project detailed 2D paintings onto simple geometry using camera projection, ensuring the painting’s brushstroke style matches 3D assets and applying defocus or mist to blend for Arcane’s rich, painterly backgrounds.
- 2D Overpainting on 3D Renders: Paint over renders in 2D software to add details like rim lights or armor highlights, reintroducing these as overlays in Blender’s Compositor to restore the handcrafted feel where 3D looks too CG.
- Integrating UI/Graphics as 2D Elements: Create graffiti or holograms with Grease Pencil or emissive texture images, placing them in 3D space to mimic Arcane’s illustrative UI, such as Jayce’s blueprints or Jinx’s graffiti hallucinations.
- Compositing 2D Elements in Post: Blend multiple 2D layers, like drawn fire or vignettes, using screen or multiply modes with masks to control placement, ensuring natural integration as seen in Arcane’s layered effects.
- Maintaining Perspective and Depth: Parent Grease Pencil effects to 3D objects or use Motion Tracking for accurate movement, employing depth passes and shadow catchers to ensure 2D elements occlude and interact believably with 3D scenes.
Thoughtful 2D and 3D integration creates Arcane’s signature blurred line between animation styles, adding a hand-crafted flourish to scenes.

Optimizing Performance While Working on Arcane-Style Projects in Blender
Optimizing Blender workflows ensures efficient handling of resource-intensive Arcane-style projects.
- Optimize Geometry: Maintain moderate poly counts, using normal or bump maps to fake small details like bolts, and apply multires or Decimate modifiers to balance detail for rendering while keeping viewport performance manageable.
- Proxy and Placeholder Use: Utilize Simplify to reduce viewport texture resolutions and subdivision levels, disable heavy modifiers like particles during layout, and use instanced objects for repeating elements to conserve memory.
- Texture Management: Opt for 2K textures where possible to save VRAM, use compressed formats like PNG or JPG, atlas textures for small props to reduce draw calls, and keep textures external during work to manage file sizes.
- Lighting and Effects Optimization: Limit shadow-casting lights, reuse lights for multiple roles like key and bounce, and use mist passes or light texture cards instead of costly volumetrics to achieve Arcane’s atmospheric effects efficiently.
- Scene Partitioning: Divide heavy scenes into render layers or separate .blend files for backgrounds and characters, rendering in chunks to lighten system load and simplify compositing tasks.
- Hardware Considerations: Monitor RAM usage via Blender’s status bar, use Library Linking for large assets to manage updates, and save incrementally to protect against crashes in complex scenes.
- Use Performance-Friendly Render Settings: Employ Cycles’ adaptive sampling and denoising to reduce render times, optimize tile sizes, and use Eevee’s Fast GI for quick bounced lighting in test renders, reserving high settings for finals.
- Simplify Shaders: Bake lighting into textures to reduce shader complexity, limit Subsurface Scattering to critical areas like skin, and streamline node trees to ensure efficient rendering without compromising Arcane’s visual quality.
Smart optimization prioritizes resources for key elements, enabling efficient creation of Arcane’s detailed visuals, as shown in Nicolas’s resource-conscious approach.
Resources and Tutorials for Learning Arcane’s Visual Techniques
A comprehensive set of resources supports mastering Arcane’s visual techniques, blending official insights with community guidance.
- Official Behind-the-Scenes Articles and Videos: RedShark News’s article on Arcane’s techniques and SyncSketch’s interview with Lead Animator Alexis Wanneroy provide authentic insights into Fortiche’s pipeline and animation philosophy, informing accurate approaches.
- 80 Level Articles and Case Studies:
- Jorge Martinez’s Ekko recreation details modeling in Blender, texturing in Substance, and modular hair techniques, offering a practical guide for character creation.
- Tinynocky’s Arcane hair shader tutorial, linked on YouTube, demonstrates node setups for achieving painterly hair highlights.
- Nicolas’s $0 Arcane scene breakdown narrates using free tools like Blender and Photopea, emphasizing compositing and clever workflow shortcuts.
- YouTube Tutorial Series (Lightning Boy Studio): Multi-part series covers Arcane-style hair and environment techniques, showcasing node setups and camera projection methods with practical, on-screen examples.
- Stylized Station and Other YouTube Channels: Stylized Station’s Arcane recreation video shares material and lighting tips, while Animator’s Guild’s frame-by-frame analyses provide animation timing insights, with Ross Draws offering 2D color perspectives.
- Community Forum Threads: BlenderArtists and Reddit threads, like “Arcane style” discussions, offer Q&A, step-by-step advice, and shared .blend files for shading or texturing solutions specific to Arcane’s look.
- ArtStation and Portfolio Breakdowns: Arcane artists’ ArtStation portfolios reveal texture and UV techniques, while fan art descriptions and Chimirus’s article on Arcane’s painterly style provide theoretical and practical insights.
- Courses and Workshops:
- Hand-painted texturing courses for game assets teach essential painting skills for Arcane’s high-resolution textures.
- Stylized character sculpting courses from Victory3D or Yiihuu improve modeling for Arcane’s appealing forms.
- Animation fundamentals tutorials, like those on the 12 Principles, enhance keyframing skills for Arcane’s expressive motion.
- Software Documentation and Communities: Blender’s manual details tools like Grease Pencil, Polycount forums discuss stylized art, and notes from Riot’s art book offer direct reference imagery for painting techniques.
These resources form a self-paced curriculum, integrating broad insights, targeted tutorials, and community support to master Arcane’s workflow in Blender, with ongoing updates from emerging content.
Understanding the Role of Color Theory in Arcane’s Art Direction
Color theory is a vital storytelling tool in Arcane, deliberately used to evoke emotions and distinguish settings, guiding artists to create impactful visuals.
- Color Palettes Define Environments: Piltover’s scenes are bathed in golden hues and clean whites, evoking prosperity, hope, and sunlit optimism, while Zaun’s murky greens, teals, and purples convey a sense of toxicity, mystery, and danger. When designing scenes, choose warm golds, rich blues, and crisp highlights for aspirational environments, or sickly greens and deep purples for gritty, undercity vibes to instantly communicate the intended tone and maintain visual cohesion.
- Symbolic Use of Color for Characters:
- Jinx: Pink and Blue: Vibrant pink in Jinx’s hair and attire reflects her youthful chaos and ties to her name, while electric blue connects to her hextech technology, emphasizing her unstable, dual nature through contrasting colors.
- Vi: Red: Reddish and magenta tones in Vi’s hair and clothing signal aggression, passion, and determination, underlining her fiery, combative spirit and reinforcing her character’s intensity.
- Caitlyn: Blue: Blue in her enforcer uniform and calm demeanor suggests loyalty, order, and intuition, aligning perfectly with her principled and composed character.
- Silco: Green and Red: Eerie greens, linked to the shimmer drug, signify literal and moral toxicity, while dark reds convey danger and villainy, fitting Silco’s antagonistic role.
- Complementary Color Schemes for Impact: Arcane uses complementary or split-complementary schemes, such as Piltover’s warm gold against blue accents or Jinx’s pink against Zaun’s green-teal backgrounds, to create vibrant contrast that draws the eye to characters. Artists should identify complementary color pairs, like teal-gray scenes with orange accents, to make focal points stand out and enhance visual interest.
- Lighting and Color Mood: Colored lighting, like Zaun’s neon green glow or Piltover’s golden sunlight, sets mood, with contrasting background colors silhouetting characters, such as Jinx’s pink flares against turquoise eyes. In Blender, use tinted key lights (e.g., amber for Piltover, green for Zaun) and plan compositions to complement or contrast character colors for dramatic effect.
- Emotional Color Beats: Arcane shifts color grading within scenes to match narrative shifts, like a cold blue cast for despair, suggesting artists imbue still images with emotional palettes, such as somber blues for tragedy or gold-crimson for triumph, to convey story in a single frame.
- Reference Arcane’s Color Scripts: Studying Arcane’s concept art or color scripts, like the bridge fight’s chaotic purple-blue-orange palette, reveals planned color combinations for specific moods, using analogous colors for harmonious backgrounds and complementary accents for character emphasis, guiding artists to adopt similar strategies.
In practical terms, evaluate color composition in Blender by blurring images to assess evocative color blocks, adjusting hues and contrasts to achieve Arcane’s narrative depth and intentionality.
Final Thoughts: Bringing It All Together to Create Arcane-Inspired Art in Blender
Replicating Arcane’s art style in Blender requires combining multiple techniques with a focus on artistry to achieve a cohesive, story-driven result.
- Pre-Production Planning: Begin by sketching thumbnails that outline the intended color scheme and lighting, collecting reference images from Arcane, real life, and related stylized art (e.g., Into the Spider-Verse) to establish a clear vision that guides modeling, texturing, and rendering for consistent outcomes.
- Arcane Mindset: Constantly ask how to make elements feel hand-crafted and story-driven, adding details like grime on walls for history, exaggerated poses for drama, or bold color highlights to draw the eye, ensuring the work captures Arcane’s soul beyond generic 3D renders.
- Iteration: Embrace repeated refinement, repainting textures or adjusting lighting multiple times based on peer feedback or fresh perspectives, as Arcane’s team iterated for years to achieve polish and consistency, ensuring every element aligns with the desired aesthetic.
- Technology Serves Art: Use creative workarounds, such as painting directly on renders, manually adjusting frames, or employing Freestyle for line art effects, prioritizing the final painterly image over strict 3D methods, blending sculpting, painting, and compositing for ideal results.
- Community Engagement: Share progress on forums like Blender Artists to gather targeted critiques, such as adjusting eye shadows or texture styles, simulating Arcane’s collaborative process where departments informed each other, enhancing the final work through community input.
- Patience and Growth: Approach the process as a journey to improve painting, lighting, and Blender versatility, recognizing that each attempt builds skills valuable for future projects, making the challenging pursuit of Arcane’s style rewarding and enjoyable.
In conclusion, balancing Blender’s tools—modeling, sculpting, texture paint, Cycles/Eevee, Grease Pencil, compositing—with artistic principles like strong silhouettes, painterly detail, dramatic lighting, rich color, and emotional storytelling creates a resonant Arcane-like image, delivering a “wow” moment when elements fuse into a frame that feels like Arcane.

Frequently Asked Questions (FAQs)
- Can I really achieve Arcane’s art style using only Blender, without expensive software? Yes, you can. Blender provides all the essential tools for modeling, sculpting, texture painting, lighting, and compositing needed to mimic Arcane’s style. Many artists have recreated Arcane-like scenes using Blender and free tools like Krita, relying on techniques such as hand-painting textures, creative lighting, and compositing rather than commercial software.
- What are the most important things to focus on to get the Arcane look? The top three priorities are hand-painted textures, stylized lighting, and integrating 2D effects. Hand-painted textures provide the illustrated, painterly feel, avoiding procedural or photo textures. Stylized lighting involves painting shadows/highlights and using dramatic light rigs to match Arcane’s mood. 2D effects like smoke or fire, drawn or composited, add the authentic hybrid animation touch, with texture work being the starting point for simple models.
- How did Arcane’s artists handle materials like metal or hair – are they using normal PBR shading? Arcane’s artists bypassed standard PBR by painting material properties like highlights and roughness into textures, combining with minimal advanced shaders (e.g., subsurface scattering for skin, anisotropic for hair). In Blender, use Principled BSDF as a base but incorporate painted maps for roughness and sheen, with hair handled as stylized geometry or hair cards with custom shaders tweaked for an illustrated look using color ramps.
- Should I use Cycles or Eevee to render Arcane-style scenes? Both work. Cycles provides final-quality lighting with global illumination and soft shadows, ideal for tweaking into stylized results, requiring painted lighting details. Eevee’s speed supports quick iteration and real-time previews of painterly textures, suitable for look-dev and NPR stills with features like bloom. For animations, Cycles with denoising ensures stability, but both need painted maps for a painterly output.
- How do I create Arcane-style hair in Blender without specialized hair plugins?
- Polygonal Hair Clumps: Model hair as large strands or clumps, optionally sculpting, and apply a solid material with hand-painted textures featuring streaks, darker roots, and lighter tips for a shiny, illustrated look, as used by fan artists for curly hair.
- Particle Hair with Stylized Shader: Use Blender’s particle hair system to shape hairstyles like Jinx’s braids, applying a material with Hair Info/Intercept for root-to-tip gradients and painted textures for variation, reducing roughness for sheen and adding manual rim lights for an illustrated effect.
- Geometry Nodes Hair: For advanced users, employ Geometry Nodes to procedurally generate hair cards or curves, assigning custom shaders for Arcane’s painterly hair, though time-intensive, as demonstrated in fan recreations of Jinx’s hair. In all cases, hand-paint textures or colors to avoid a flat CG look, and add loose strands or Grease Pencil flyaways for authenticity.
- My textures look too clean or game-like. How can I make them more Arcane-painterly?
- Use textured brushes: Switch from basic round brushes to bristle or chalk brushes to simulate paint strokes, breaking up the smooth digital look for a painterly appearance.
- Layer your painting: Build textures in multiple passes, starting with broad strokes, adding opacity, then layering darker and lighter strokes, leaving visible brush edges to mimic Arcane’s layered textures like walls with base colors, darker washes, and grime streaks.
- Add variation and detail by hand: Avoid uniform areas by introducing subtle color shifts and details, such as blushing cheeks, freckles, or warmth in skin, or sponging patina on metal, to create organic, hand-painted textures.
- Reference Arcane frames while painting: Study high-res Arcane shots to replicate brushstroke variations, zooming in to add tiny accents for realism and style, despite the time-intensive process.
- How can I improve my character animation to match Arcane’s quality and style?
- Animate in passes: Block out major poses first, exaggerating for readability, then refine motion arcs and easing for smooth, weighty movement, reflecting Arcane’s meticulous animation process.
- Incorporate subtle 2D elements: Add Grease Pencil smear frames or blur streaks for fast motions, mimicking Arcane’s 2D smears, or use controlled motion blur in Blender to enhance quick actions.
- Use video reference: Act out scenes or study clips, importing them into Blender to match key poses, then exaggerate for stylized believability, as Arcane’s team did.
- Apply secondary motion: Add hair bobbing, clothing sway, or camera shakes using the graph editor for overlapping action, ensuring no element remains static for rich, dynamic motion.
- Polish facial expressions: Use shape keys or bones for strong, emotive expressions at key moments, adding micro-expressions like blinks or quivering mouths to bring faces to life after larger body movements.
- How do I use camera and composition to enhance the Arcane style?
- Compose for storytelling: Use rule of thirds and leading lines to focus on subjects, framing with environment elements like doorways for silhouettes, and add slightly blurred foreground objects for cinematic depth.
- Camera movement on still frame: Choose dynamic angles like low for imposing scenes, Dutch tilts for chaos, or close-ups for intimacy, imagining the camera’s approach to add drama, even in stills.
- Use camera projection for backgrounds: Apply detailed painted backgrounds with subtle parallax moves, keeping camera motion gentle unless using full 3D environments, as Arcane does.
- Depth of Field (DOF): Set camera focus on subjects with an appropriate f-stop for pleasant background blur, balancing bokeh to maintain visible painted backdrops, matching Arcane’s focus style.
- Cinematic camera effects: Add slight camera shake or sway in animations for a handheld feel, and apply subtle film grain or vignettes in compositing to emulate Arcane’s non-crystal-clean look.
- My scene is getting very slow to work with. Any tips for managing heavy Arcane-like scenes?
- Work in layers: Hide high-poly characters or environments when not needed, using the outliner or Local View to focus on one element, reducing viewport load.
- Lower viewport settings: Use Bounding Box display or Simplify to reduce subdivisions and texture sizes, switching to Solid shading for weight painting or broad edits, reserving Material Preview for look checks.
- Split the .blend: Model and texture assets in separate files, linking them into a master scene for lighting and posing to keep files light and reduce corruption risks.
- Use proxies or decimated versions: Animate with low-detail models (e.g., no Subsurf, simplified hair), swapping for full-detail versions at render time using Blender’s proxy system or manual linking.
- Manage textures smartly: Unload large image files from memory during viewport work, avoiding 8K maps, and render at 50% resolution with lower samples for faster test iterations.
- What’s the biggest piece of advice for an artist attempting Arcane’s style for the first time? Start small and practice the workflow in pieces. Begin with a single asset, like a prop or character bust, taking it through modeling, hand-painting, lighting, and compositing with a painted background to tackle challenges on a manageable scale. Be patient, as Arcane’s expert team collaborated extensively, and as a solo artist, you’re handling multiple roles. Early attempts may fall short, but each teaches something (e.g., adding more texture detail). Keep Arcane’s art book or screenshots nearby for inspiration, and with persistence, your work will increasingly resemble the style, making the journey rewarding.

Conclusion
Mastering the Arcane art style in Blender is a formidable but rewarding pursuit. By now, you’ve learned that the essence of Arcane’s look comes from artistic dedication: meticulous hand-painting, thoughtful lighting, and a seamless blend of 2D and 3D techniques. It requires stepping beyond Blender’s default behaviors and infusing a touch of traditional artistry into your 3D workflow.
As you apply the comprehensive workflow guide outlined above, work iteratively and don’t be afraid to refine repeatedly – consistency and polish are what elevate good work to Arcane-level greatness. Utilize the recommended resources and community wisdom at your disposal; they will accelerate your learning and keep you inspired. Whether you’re painting an atmospheric Zaun alley or animating a powerful Vi punch, always tie your technical decisions back to story and emotion, just as Arcane’s team did.
In the end, creating Arcane-inspired art in Blender isn’t just about mimicking a style – it’s about growing as an artist. You’ll find that skills gained here (like confident texture brushwork or dynamic lighting design) will benefit all your future projects. Take pride in each step forward, and remember to enjoy the creative process. With careful practice and the full breakdown of techniques we’ve covered – from actionable modeling steps to advanced rendering tricks – you have a solid roadmap to achieve that coveted “moving painting” aesthetic.
Now it’s time to implement these actionable steps on your own Blender canvas. Keep the Arcane spirit in your workflow: bold, innovative, and story-driven. Gradually, you’ll see your scenes transform into the kind of art that wouldn’t look out of place in Arcane itself. Good luck, and happy blending in your journey to achieve the Arcane workflow for Blender – we can’t wait to see the magic you create!
sources and citation
- Fortiche pipeline + Arcane hybrid style
- Yelzkizi. (2025, March 16). Arcane’s Animation Debate: Is It 2D Or 3D? | Full Breakdown. Yelzkizi.
- Yelzkizi. (2025, March 17). What 3D Software Did Arcane Use? Full Breakdown. Yelzkizi.
- Winter, D. (2024, December 26). Why Netflix’s Arcane looks so good: How Fortiche ramped up the animation pipeline. RedShark News.
- Haux, B. (2021, December 8). Arcane: Fortiche x RIOT blow critics away with masterpiece animation. SyncSketch Blog.
- 80 Level (Ekko recreation interview)
- Martinez, J. (2024, April 3). Learn How to Recreate Arcane’s Ekko with Substance 3D & Blender. 80 Level.
- Blender Artists forum (Arcane style technique discussions)
- Ninjacatgeorge (isaac). (2025, January 11). Does anyone have any ideas on how this pesron did this. Blender Artists Community.
- bluberry (T). (2024, July 8). Handpainted stylized gold ball that reacts to light?. Blender Artists Community.
- The VFX Media ($0 Arcane recreation breakdown)
- The VFX Media. (2024, December 24). How Nicolas Recreated Arcane scene for $0: A detailed breakdown. The VFX Media.
- Lightning Boy Studio (YouTube tutorials) + 80 Level write-up
- Lightning Boy Studio. (n.d.). Lightning Boy Studio (YouTube channel). YouTube.
- Lightning Boy Studio. (n.d.). Arcane Style Tutorial Part 1: Hair (Blender 3.0 / EEVEE). YouTube.
- Lightning Boy Studio. (n.d.). Arcane Tutorial Part 2: Deep Dive Into the Arcane Look and Camera Projections (Blender 3.0 / EEVEE). YouTube.
- McKenzie, T. (2022, March 29). Tutorial: Creating Arcane-Style Hair in Blender. 80 Level.
- Medium (design lessons)
- Bartia, S. (2024, November 25). Design lessons from Arcane. Bootcamp (Medium).
- Reddit r/arcane (color symbolism analysis)
- wafflesandsyrupyum. (n.d.). [S1 Spoilers] Arcane, colors and meanings.. Reddit (r/arcane).
- Brosif563. (n.d.). [no spoilers] Color Theory in Arcane. Reddit (r/arcane).
- Arcane behind-the-scenes (YouTube features)
- League of Legends. (n.d.). ARCANE: BRIDGING THE RIFT (YouTube playlist). YouTube.
- League of Legends. (n.d.). Arcane: Bridging the Rift | Part 1 – I Only Dream in Risky. YouTube.
Recommended
- How to Create Realistic Hair Using the New Hair Tools, Geometry Nodes, and Hair Curves in Blender
- How to Animate a Camera in Blender
- The Most Efficient Way to Create 3D Ponytails in Blender
- Best Blender Add-ons for Camera Management: Why The View Keeper Stands Out
- How to Use Mesh to Metahuman for AAA Digital Doubles in Unreal Engine 5
- The Best Beards in Video Games: Iconic Characters and Their Legendary Facial Hair
- inZOI: The Ultimate Life Simulation Game – Features, Gameplay, and Comparisons
- How to Export Metahuman to Maya: A Step-by-Step Guide for Seamless Integration and Customization
- How do I set up a scene with multiple cameras in Blender?
- What Is Gaussian Splatting? A Complete Guide to This Revolutionary Rendering Technique


