


Camera switching in Blender can be a complex and time‐consuming process. This is especially when working on animations or projects that demand multiple camera angles. When creating animations, video game cutscenes, or architectural visualizations, managing multiple camera angles can quickly become a repetitive process. This slows down your workflow. Fortunately, The View Keeper add-on offers impressive ways to simplify and enhance camera switching in Blender. Thereby making it an essential asset for any Blender artist seeking to elevate their work.
In this comprehensive guide, we’ll explore advanced camera switching techniques using The View Keeper. We’ll start by discussing the challenges of manual camera management, then dive deep into the features and benefits of The View Keeper. We’ll cover everything from storing multiple camera angles without duplication to achieving seamless transitions, while also batch rendering these outputs. We’ll also provide real-world examples, troubleshooting tips, and best practices. By the end of this article, you’ll have detailed insights into why The View Keeper stands out and how it can transform your Blender rendering workflows.
Introduction
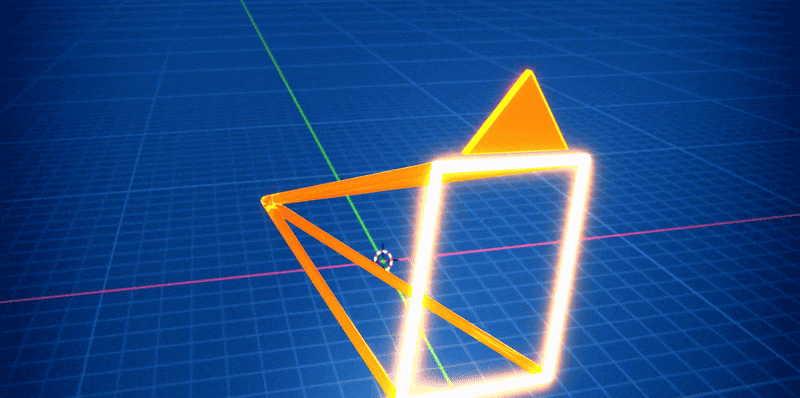
You know how in Blender, the camera is basically your window into the scene? It’s what captures everything you want to show in your animation or render. Switching between different camera angles can really make your animation feel and look cinematic with smooth transitions offering your audience different perspectives.
But let’s be honest, doing this manually is a pain. It’s so easy to mess up, and it takes forever. You have to create a bunch of different cameras, set keyframes for each one, and keep track of all those markers in the timeline. It’s a lot to handle. Not only does your scene get cluttered with all these cameras, but it’s also super easy to make mistakes or end up with inconsistencies in your shots.
That’s where The View Keeper comes in. It’s a game-changer for managing your camera views and angles. It gives you a simple, centralized way to store and switch between different camera setups. You can save everything about a camera’s setup like multiple focal length, depth of field, even the render settings all on one camera. So instead of having a bunch of duplicated cameras, you can just click to switch between your saved camera views and angles. It keeps everything consistent, and you can even render out multiple shots at the same time. How cool is that?
No matter what you’re working on, be it a short film, a game cutscene, or an architectural viz. The View Keeper makes camera switching a breeze, so you can spend more time on the creative stuff. In this article, we’re going to dive deep into how The View Keeper can level up your camera work in Blender.

The Challenges of Manual Camera Switching in Blender
Before we dive into what The View Keeper can do, let’s take a look at how things are usually done manually in Blender and why it can be tricky.
Manual Workflow Overview
In a typical manual camera switching workflow, you would:
- Add Multiple Camera Objects:
For each shot or angle, you manually add a new camera with Shift + A and then position and orient it just right to capture the view you’re after. - Set Up Keyframes:
You animate each camera’s position, rotation, and settings like focal length or depth of field by inserting keyframes manually. Even though It’s detailed and gives you precision, it gets super repetitive. - Use Timeline Markers for Active Camera Switching:
You add markers, bind cameras to them using , so the right camera kicks in at the right time during your animation. Each time you want to check out a different camera, you have to adjust the frame position or manually change the active camera. - Adjust Camera Settings Individually:
For each camera view, when you have to tweak render settings like sensor or depth of fields, you have to select each camera and change the settings manually. Then afterwards, make it the active camera and test. only to move back to the previous camera later which is a real pain
Limitations of Manual Methods
Sure, manual camera management can give you pinpoint control, but it has drawbacks that can make your Blender experience feel frustrating and who wants that. Here’s a breakdown of the limitations:
- It’s a huge time-suck:
Having to tweak and keyframe every single camera by hand is exhausting. The bigger your project gets, the more this repetitive work eats into your creative time. - It’s easy to mess up:
When you’re doing everything manually, small slip-ups are practically guaranteed. Tiny differences in camera settings can throw off your Camera settings and renders. This can really mess with how your final render turns out. - Your workspace gets cluttered:
Duplicating cameras for every view fills up your 3D view and Outliner, turning it into a total mess that’s a nightmare to navigate or keep organized. This results in constantly clicking the wrong camera during production. - It’s slow for experimenting:
Want to try out new camera angles or settings? You’re stuck starting over each time, which drags down your pace and makes it tough to play around with creative ideas.
So yeah, while manual control has its perks, these downsides can really put a damper on your workflow!

Introducing The View Keeper Add-on
What is The View Keeper?
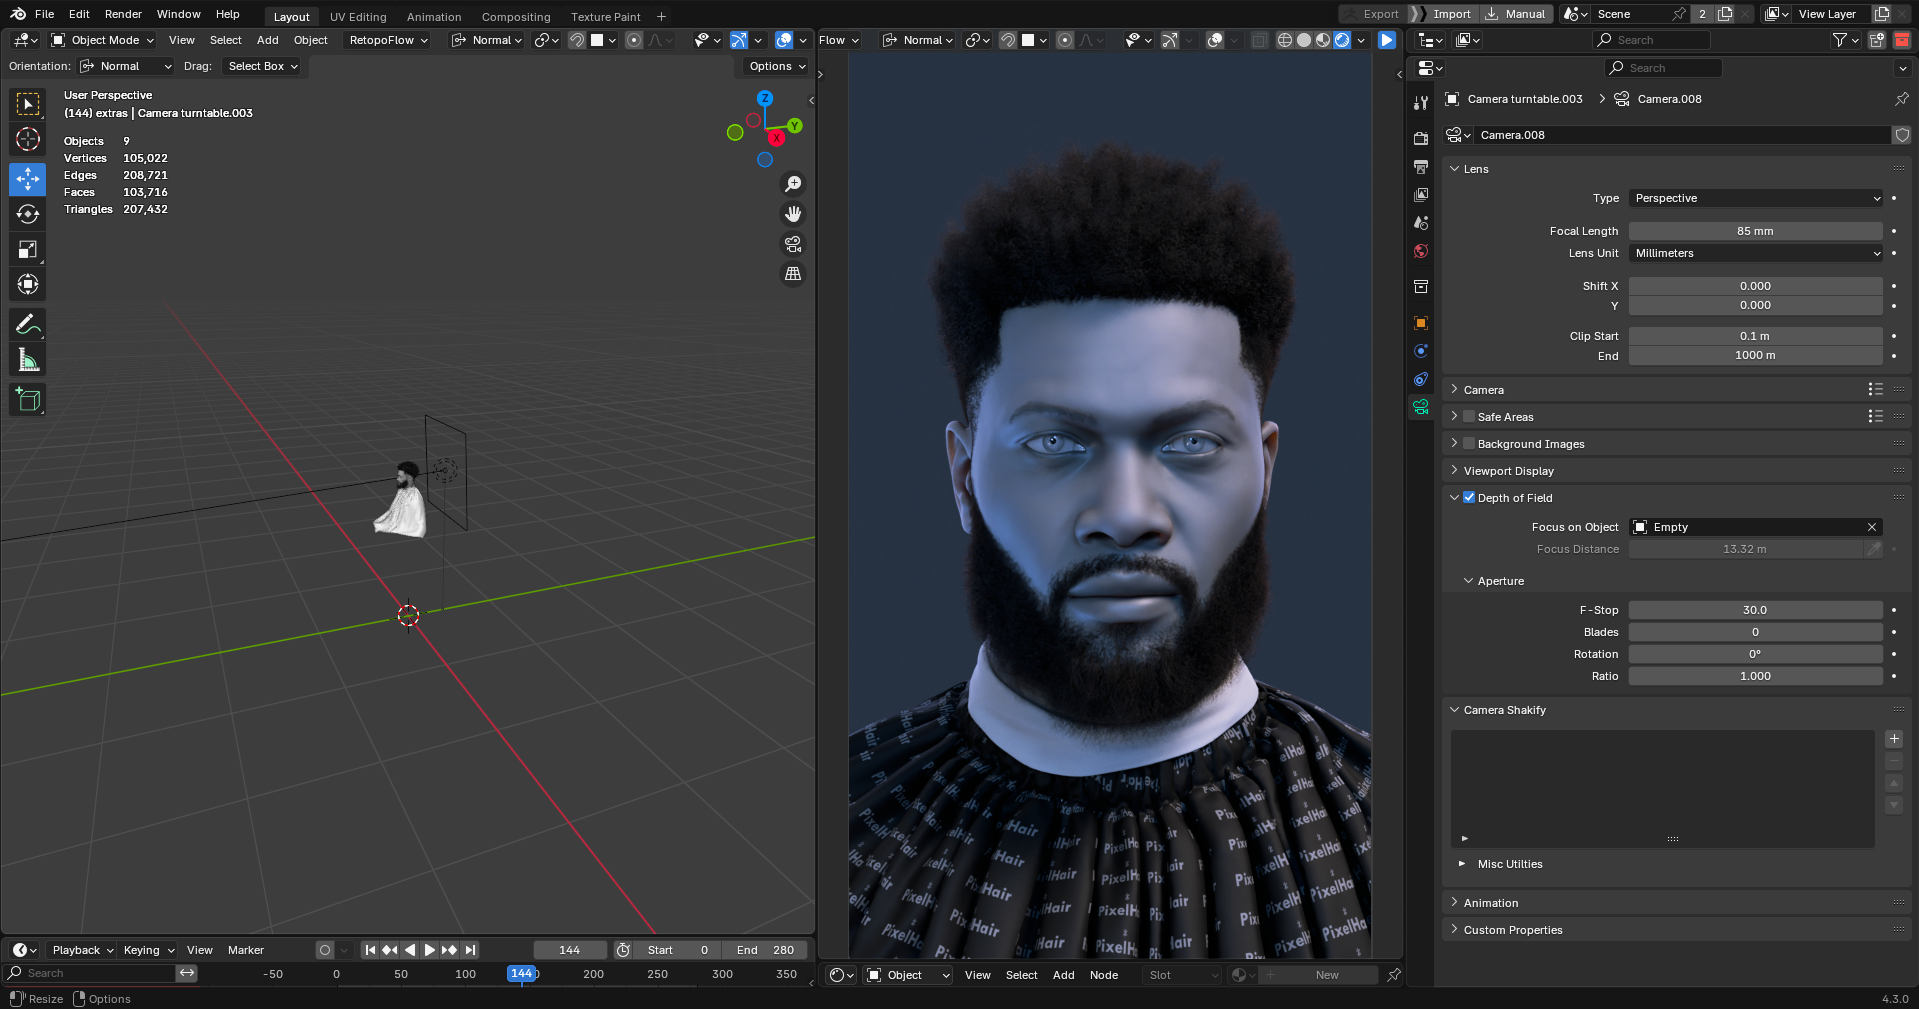
The View Keeper is an add-on for Blender that fixes the challenges of managing cameras in blender. You know how you usually have to create a bunch of camera objects for different angles? Well, with this tool, you can save all those different angles all on one camera. It keeps track of everything, the position, the rotation, the focal length, depth of field, clipping distances, and even the render settings. So, when you want to switch to a different shot, just click on the saved view and everything’s set up exactly how you saved it.
Key Features and Benefits
- Intuitive Interface:
One thing to love about The View Keeper is how easy it is to use. The interface is really clean and straightforward. it only shows you what you need at any given time, so you’re not drowning in a lot of buttons. Whether you’re just starting out with Blender or you’ve been using it for years, you’ll find it super simple to get the hang of. - Complete Configuration Storage:
Whenever you save a camera or camera angle, it saves everything about it. I mean everything, I mean like the position, rotation, the lens settings, and even render settings. So, when you go back to that view, it’s all set up just the way you left it. No more tweaking settings every time you switch shots. - Effortless Switching:
Switching between different camera views is a piece of cake. You just click on the one you want, and it’s ready to go. No more fiddling with settings or messing with keyframes. It saves you so much time, especially when you’re working on a tight deadline. - Simultaneous Multi-Output Rendering:
Oh, and get this, you can set up different render settings for each view then render them all at the same time. That’s a huge time-saver if you need different outputs for a project, like different resolutions or formats. Perfect for social media. - Reduction in Scene Clutter:
Another great thing is that it keeps your scene tidy. Instead of having a million camera objects cluttering up your project, everything’s organized in one spot. Makes managing big, complicated scenes way less of a headache. - Integration with Blender’s Native Tools:
It fits right into Blender, too. You can access all your saved views from the N-panel in the 3D Viewport, so you don’t have to jump around different menus. You can preview and tweak your shots without breaking your flow. - Ease of Use and Learning Curve
Honestly, the best part is how easy it is to use. You can start saving and switching views right away without needing to watch a lot of tutorials. It’s so intuitive that even if you’re new to Blender, you’ll pick it up in no time. It just blends into your workflow, letting you focus on being creative instead of getting bogged down by technical stuff.
Making Rendering Easier with The View Keeper
One of the best things about The View Keeper is how it makes rendering a lot smoother, especially when you have a bunch of different shots to render. Let me tell you how it helps keep everything efficient and consistent.
Storing Multiple Camera Views Without Duplication
Normally, if you want different camera angles, you’d have to create a new camera for each one, which can make your scene really messy and means you have to tweak settings for each camera individually. But with The View Keeper, you can save all those different camera angles like a wide shot, a close-up, or an over-the-shoulder angle right inside one camera. It’s like having a neat little filing system for your camera angles, so your workspace stays tidy, and you can try out different shots without creating a bunch of extra cameras.
Saving Complete Camera Settings
When you save a camera view with The View Keeper, it remembers everything about how you set up the camera. Here’s what it keeps track of:
- Camera Position and Rotation, so you can get back to the exact same spot later.
- The focal length and sensor size, which control how much of the scene you see and the perspective. It keeps these saved just the way you initially set them.
- Depth of field and clipping distances, which are important for making your shots look cinematic and controlling what’s in focus. These are also saved
- Plus, all the render settings like resolution, aspect ratio, what file format to save in, and where to put the files when saving. So, you can handle all the rendering details for different shots from one place.
Effortless Switching Between Views
Switching between different camera views is super easy with The View Keeper. Instead of having to adjust all the settings by hand every time, you just click on the view you want, and it sets everything up for you right away. This is really handy for complicated animations or when you need to change shots a lot. It saves you a ton of time and lets you try out different setups without any hassle, which makes tweaking your project a lot smoother.
Simultaneous Multi-Output Rendering
Rendering a bunch of views one after another can take forever. But with The View Keeper, you can render all your saved views at the same time, each with their own settings. Here’s what that means:
- You can set different render options for each view. Like, maybe one is for a high-quality final image, and another is for a quick preview.
- You can batch render everything in one go, which is great when you’re in a hurry or need different versions of your project.
- And since each view keeps its own render settings, all your final images or animations will look consistent and just the way you planned.
Workflow Comparison: Manual vs. The View Keeper
To really see why The View Keeper is such a game-changer, it helps to compare it to the old-school way of managing cameras in Blender. Let’s break it down across three key areas:
- Manual Camera Management:
So, when you’re managing cameras the default way, you have to create a bunch of different camera objects, right? And then you’ve got to position each one, set up keyframes, and tweak all the settings separately. It gets really repititive and inefficient, and you end up spending a lot of time just managing all that. Handling cameras manually is such a drag. You have to adjust each camera one by one, which takes forever, and if you want to switch between different views quickly, it’s a pain. It really slows you down when you’re trying to experiment with different shots. You know how it is when you’re trying to keep all your cameras set up the same way, it’s really easy to mess up. Even a tiny mistake in the settings can make your renders look off, and you have to be super careful to get everything just right in order to avaoid re-rendering.
- The View Keeper:
But with The View Keeper, it’s way simpler. You can save all your different camera views in one place like in a single interface. It remembers everything about each view. Multiple camera angles can be saved on a single camera so you don’t need to make extra cameras. Plus, it’s really easy to use, which saves you a ton of time. With The View Keeper, You can save your views and switch between them with just a click. It’s super fast and lets you try out different setups without all the hassle. Plus, you can even render multiple views at the same time, which is awesome for getting things done quicker. The View Keeper, makes shots consistent for you. It saves everything exactly how you set it, so when you go back to a view, it’s always consistent. It keeps everything organized in one place, which means fewer mistakes and a much nicer-looking final project.

Real-World Applications and Use Cases
Efficient camera management is a big deal in a lot of professional fields. Let’s look at how The View Keeper can make life easier across different industries.
Cinematic Productions
When working on an animated show, directors often have to switch between a bunch of camera angles to capture the perfect scene. Here is what it would look like in Blender
- Manual Approach:
For a small indie short film, switching cameras manually might work for a few key shots. It’s precise but as you know how it is a lot to deal with as the production increases. - The View Keeper in Action:
For different, more planned out short film, an animator can save all their shots like wide establishing shots, medium close-ups, and those tight detail shots right, all in one camera. The View Keeper is like having a camera crew at your finger tips that sets everything up perfectly every time. This makes transitions seamless and keeps every shot consistent, which is super important for keeping the story flowing.
Video Game Cutscenes
Video game cutscenes need quick camera switches to keep players hooked in the action. This is what it would look like
- Manual Approach:
Game devs have to painstakingly set up each camera angle by hand, having to always reset and override settings which can be a real pain especially when there are tons of transitions. It’s slow and easy to mess up. - The View Keeper in Action:
With The View Keeper, devs can save all their camera setups and switch between them super fast. Experiment with as many shots as they like. This makes sure every frame looks just right, creating a smoother, more immersive cutscene that players will love.
Architectural Visualizations
Architectural projects need precision and consistency especially when presenting their designs to clients. Here is the outcome of each method
- Manual Approach:
Architects manually sets up several cameras to capture different views of a building, but it’s easy to miss something small or end up with slight differences between shots. Because of the multiple camera and presentation requirements, Architects have to render, in sections. This is a huge waste of time spent waiting for renders only to go back to blender, change settings and render again. - The View Keeper in Action:
With The View Keeper, an architect can save exterior and interior views with the exact settings they need. Once all shots have been set, with a single click the Architect can render all in one go.This makes virtual tours and client presentations more reliable and impressive, with no stress about inconsistencies.

Product Animations
Product animations often need to showcase a product from multiple angles to highlight different features and better market the product to prospective customers. This is what this would look like
- Manual Approach:
A marketing team might have to set up multiple cameras to capture every detail of a product, tweak each one, render in parts and constantly override settings while seeking approval from superiors. All of which can lead to little mistakes and inefficiencies. For every new platform the marketers have to market on, they also have to render and reset everything all over again, which is highly unnecessary. - The View Keeper in Action:
With The View Keeper, they can save each view and even render them all at once. The marketers can set up shots for multiple platforms without issues and also get feedback without needing to override any settings. This is awesome for commercials or online demos, where you want everything to look polished and cohesive.
Troubleshooting and Best Practices
Even with an incredible tool like The View Keeper in Blender, you might encounter a few issues. Here are some suggestions to prevent issues and keep your workflow smooth with your renders looking spot-on.
Ensuring Consistency
Make sure each of your saved views has all the right settings like focal length, depth of field, and clipping distances. A quick test render can save you a headache later by confirming everything’s set up correctly. You can also check the preview section to make sure things are correctly saved. And if you tweak something after saving, don’t forget to hit that Refresh Record button to keep your setup up to date.
Managing Scene Clutter
Keep your scene neat by giving each record clear, descriptive names so you can find what you need when you need it. Instead of creating a bunch of extra cameras for different views, just use The View Keeper to store them as records on a single camera, it’s way cleaner and simpler.
Experiment with Different Camera Angles
Don’t be afraid to experiment! The View Keeper makes it easy to try out different views and tweak things until you get that perfect shot. With a single click, you can switch back and forth between two different camera settings.
People Also Ask
- What is manual camera switching in Blender?
It involves adding multiple camera objects, manually keyframing their positions and settings, and using Timeline markers to designate the active camera during an animation. - How does The View Keeper simplify camera management?
The View Keeper allows you to save complete camera configurations as records, enabling quick recall and seamless switching between views without manual reconfiguration. - Which workflow is more efficient for complex projects?
The View Keeper is generally more efficient because it centralizes camera management, reduces repetitive tasks, and supports simultaneous multi-output rendering. - Can I render multiple camera views simultaneously with The View Keeper?
Yes, each saved camera record can include its own render settings, allowing you to render several views at once, ideal for projects with tight deadlines. - How do Timeline markers work for camera switching?
Timeline markers designate specific frames for camera transitions. By binding a marker to a camera, Blender automatically switches the active camera at that frame. - Is manual camera switching more precise than using The View Keeper?
The View Keeper provides an efficient balanced approach with consistent camera management and additional features like batch rendering. - What are the benefits of using The View Keeper?
It streamlines your workflow by saving and recalling camera setups, maintains consistent settings across shots, reduces scene clutter, and supports simultaneous rendering of multiple views. - How do I ensure smooth transitions between camera views?
Use The View Keeper and make sure records are correctly configured and saved. You can use Preview to confirm saved records. - Can I automate camera switching in Blender?
The View Keeper offers an intuitive, non-programmatic way to switch cameras in Blender. - What real-world projects benefit from efficient camera management?
Cinematic productions, video game cutscenes, architectural visualizations, VR experiences, and product animations all benefit from streamlined camera management workflows.

Bringing It All Together
In Blender, when you need to capture different camera angles, you usually have to create a bunch of separate camera objects. It’s such a pain because it takes repetitive and inefficient. It is also super easy to mess up the settings or end up with a cluttered workspace. Well, this is where the add-on called The View Keeper makes it way easier. Instead of having all these separate cameras, you can save different camera angles on the same camera.
When you save a view, it stores everything the camer position, rotation, focal length, depth of field, clipping distances, even the render settings. And the best part is, you can switch between them with just one click. No more fiddling with settings every time you want a different shot.
Oh, and get this, you can even set up different render settings for each view and render them all at once. That’s a huge time-saver, especially if you’re on a deadline or need different versions of your project, like different resolutions or formats for different platforms.
So yeah, if you’re tired of the manual camera switching hassle in Blender, The View Keeper is definitely worth checking out. It saves time, keeps things organized, and makes your renders look more professional.
Final Thoughts
if you’re using Blender, you know how tricky it can be to keep track of all those camera settings, right? Why not try out The View Keeper. it’s a total lifesaver.
Basically, it saves all your camera settings in one simple, easy-to-use spot. No more messy scenes or stress about changing camera settingst, every time. You can save all your camera setups, flip between them with a click, and even render a bunch of views at once. It’s awesome for anything from small to big projects.
Whether you’re new to Blender or a total pro, it’s a breeze to figure out. No steep learning curve here. Everything is made simple. it is just powerful a tools that cut out all the fiddly, repetitive tweaks. That means more time for the fun part: getting creative and telling your story, not wrestling with technical headaches. It’s perfect no matter what you’re working on, animations, 3D models, 3D characters, building designs, product demos, you name it. It’ll help you nail those camera switches and keep your renders looking sharp and professional, every step of the way.
Hopefully, this guide gives you a clear picture of how The View Keeper can make your Blender life so much easier, with some handy tips and real examples thrown in. Give it a try, it’s all about saving time, staying consistent, and letting your creativity run wild.
Have fun animating! Hope your camera transitions are smooth, your renders look amazing, and your ideas come to life just how you imagined. Oh, and share this guide with someone it has everything you need to get the most out of The View Keeper.