


Sometimes, you need the camera to line up exactly along a specific axis. This helps you get clear and professional-looking shots. For example, in architectural visualization, a perfectly aligned camera can show clean, straight lines of a building. In animation and film, a well-aligned camera creates smooth, controlled movements. In this article, we will learn what it means to align the camera to a specific axis, why it is important, and how to do it step by step. We will also share useful tips, examples, and answer common questions.
What Does Aligning the Camera Mean?
Aligning the camera means adjusting its position and rotation so that it faces a certain axis or direction. In Blender, you often work with three axes: X, Y, and Z. Each axis represents a different direction in your scene. For example, you may want your camera to face straight down the X-axis or look directly up along the Z-axis.
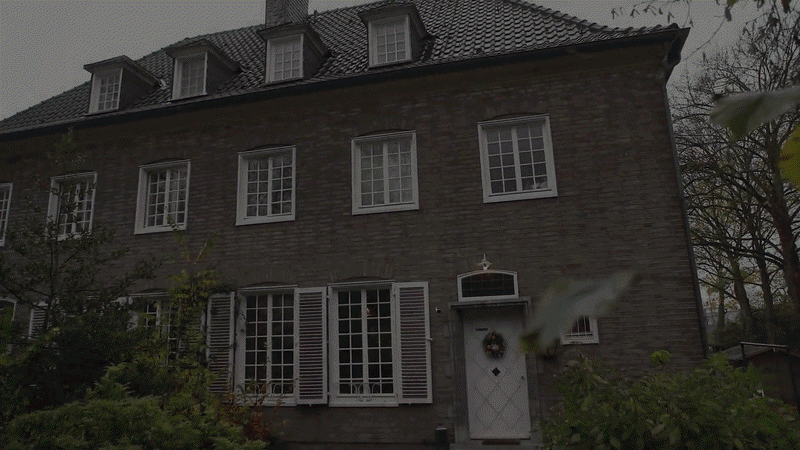
When your camera is aligned to a specific axis, it means that it is positioned and rotated exactly as you want. This makes it easier to create images that are precise and free of unwanted tilt or skew. Many technical illustrations and architectural renders need a camera that is perfectly aligned to look straight at an object. This alignment is similar to how a photographer might use a tripod to keep a camera steady and level.
Why Is Camera Alignment Important?
There are several reasons why aligning the camera to a specific axis is useful:
- Technical Accuracy: When you need to measure or analyze a 3D object, a perfectly aligned camera shows the true shape and size without distortion.
- Professional Presentation: In fields like architectural visualization and product design, a clean, straight-on view makes the final image look polished and professional.
- Cinematic Effects: Filmmakers often use aligned cameras to create symmetrical shots that are pleasing to the eye. This technique is seen in movies like The Grand Budapest Hotel, where every shot is carefully composed.
- Consistency: In animation and game cinematics, consistent camera alignment helps maintain a steady look between different shots. This ensures that the story flows smoothly.
- Ease of Use: Once the camera is aligned, it is easier to set up keyframes and animate the camera without having to adjust for unwanted rotations.
These benefits show why many artists and designers spend time getting the camera just right. Whether you are working on a short animation, a VR project, or a technical diagram, a properly aligned camera is key to a great final result.
How to Align the Camera to a Specific Axis
Now, let us explore how to align the camera in Blender step by step.
Step 1: Open Your Blender Project
First, open Blender and load the project you are working on. Make sure your scene is ready and that you have at least one camera in your scene. If you do not have a camera, press Shift + A and select Camera from the menu.
Step 2: Select Your Camera
Find your camera in the Outliner or click it directly in the 3D Viewport. Once selected, press Numpad 0 to view the scene through the camera. This is called Camera View. This helps you see what the camera is capturing.
Step 3: Adjust the Camera’s Rotation
To align the camera to a specific axis, you must adjust its rotation. You can do this in a few ways:
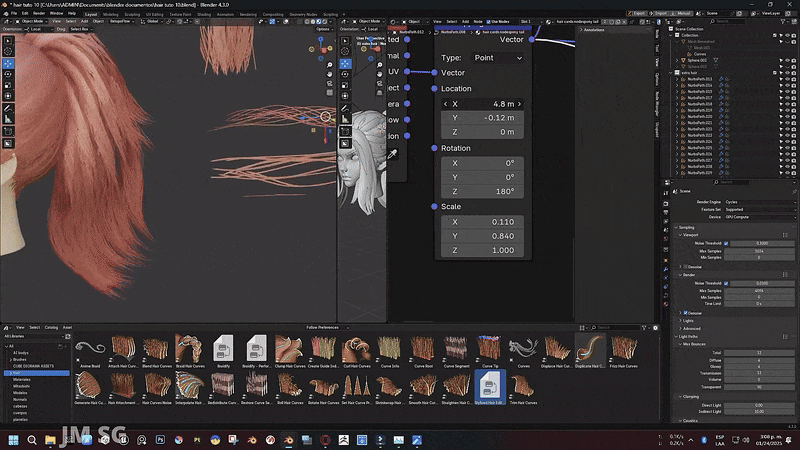
Method 1: Using the Transform Panel
- Press N to open the Sidebar in the 3D Viewport.
- Go to the Item tab, which shows the camera’s Location, Rotation, and Scale.
- In the Rotation section, you will see values for X, Y, and Z.
- To align the camera along a specific axis, change the rotation values.
- For example, if you want the camera to face straight along the X-axis, you might set the rotation values to 0 for X and Z, and adjust Y as needed.
- Experiment with these values until the camera is aligned correctly.
Method 2: Using the Shortcut to Align the Camera
Blender offers a handy shortcut to align the view to the active camera or vice versa. Follow these steps:
- Make sure the camera is the active camera and press Ctrl + Alt + Numpad 0.
This shortcut aligns the camera to your current 3D View. Make sure your view is looking exactly as you want the camera to be oriented. - Once you press the shortcut, the camera moves to match the 3D View.
This is useful if you have manually adjusted your view and want the camera to follow it precisely. - Check the alignment by pressing Numpad 0 again to see the updated camera view.
This method is very efficient when you want to capture a specific viewpoint quickly.
Step 4: Aligning the Camera to a Specific Object or Axis
Sometimes, you want your camera to face a particular object or align with a specific axis in relation to an object.
Using the Track To Constraint
- Select the Camera:
Click on the camera to ensure it is active. - Add a Constraint:
Go to the Constraints tab in the Properties Editor (the chain icon) and click Add Object Constraint. Choose Track To. - Set the Target:
In the Track To settings, click on the Target field and select the object you want the camera to focus on. For example, if you want the camera to look at a statue, select that statue. - Adjust the Axes:
In the Track To settings, set the To axis to -Z and the Up axis to Y. This typically keeps the camera facing the target. - Test the Alignment:
Move the target object slightly and see if the camera follows. The camera should stay focused on the object, maintaining a steady, aligned view.
This constraint is especially useful for animations where the camera must always point at a moving object, ensuring the focus stays consistent.
Using the Locked Track Constraint
Another option is the Locked Track constraint, which gives you similar control with a different method.
- Select Your Camera:
Ensure the camera is selected. - Open the Constraints Tab:
Click the chain link icon in the Properties Editor. - Add the Locked Track Constraint:
Click Add Object Constraint and choose Locked Track. - Set the Target:
In the Locked Track settings, assign your target object. - Configure the Axes:
Set the Track Axis to -Z and the Lock Axis to Y (or adjust as needed). This makes the camera follow the target while preventing unwanted rotations. - Review the View:
Check that the camera remains correctly aligned with your target as it moves.
Using constraints like Track To or Locked Track helps to maintain alignment automatically, which is useful for dynamic scenes and animations.
Step 5: Save Your Setup
Once your camera is aligned to the specific axis or target, save your camera setup with tools like The View Keeper. This ensures that your camera settings are stored and ready for use in future renders or animations.
Tips and Tricks for Perfect Camera Alignment
Here are some tips to help you master camera alignment in Blender:
Use Reference Images
If you are aiming for a specific look, such as the balanced composition seen in classic films or modern architectural designs, use reference images. These images can guide you in setting the correct angles and positions for your camera.
Lock the Camera’s Location and Rotation
After aligning your camera, consider locking its transformation values. This prevents accidental changes. In the Sidebar (press N), you can lock the Location and Rotation values by clicking on the padlock icons next to each value.
Experiment with Different Constraints
Both Track To and Locked Track constraints have their uses. Try both methods to see which one works best for your scene. Sometimes, one may offer a smoother or more precise result than the other.
Use the Viewport as a Guide
The 3D Viewport in Blender can be used as a live guide. Before applying any constraints, adjust your view manually until it looks perfect. Then, use Ctrl + Alt + Numpad 0 to align the camera to your current view.
Combine with The View Keeper
Using The View Keeper, save your aligned camera settings as a record. This tool makes it easy to return to your perfect camera alignment without redoing all the work. It is especially useful if you need to switch between different camera setups for various parts of your project.
Real-World Inspirations and Applications
Aligning the camera to a specific axis is a technique used in many professional fields. Here are some real-world examples to show you its impact:
Film and Television
Many directors use precise camera alignment to create iconic shots. For example, in the movie The Grand Budapest Hotel, every shot is meticulously aligned to create a symmetrical, balanced look. In Blender, aligning your camera can help you achieve a similar style. Whether you are working on a short film or an animated scene, proper alignment enhances the visual storytelling.
Architectural Visualization
Architects rely on perfectly aligned camera views to present accurate floor plans and building layouts. A camera aligned to a specific axis can capture the true proportions of a room or structure. This level of detail is essential when you need to communicate a design clearly to clients.
Video Game Cinematics
In video game cutscenes, camera alignment is key to creating smooth transitions and dynamic views. Games like Assassin’s Creed use well-aligned camera shots to follow characters and showcase expansive environments. By aligning your camera in Blender, you can produce cinematic sequences that capture every important detail.
Graphic Design and Technical Illustrations
Graphic designers and technical illustrators often use orthographic or precisely aligned camera views to create clean, accurate images. For technical manuals or infographics, a perfectly aligned camera ensures that every element is shown without distortion. This technique makes your designs look professional and clear.
Virtual Reality and Interactive Tours
For virtual reality projects and interactive tours, a well-aligned camera offers a stable and immersive experience. Viewers can explore a 3D environment without experiencing unwanted tilts or shifts. Aligning the camera to a specific axis helps maintain consistency and comfort in the VR experience.
Troubleshooting Common Issues
Even with careful alignment, you might encounter some challenges. Here are common problems and solutions:
- Unwanted Rotation or Tilt:
If your camera still appears tilted, double-check the constraint settings and ensure that the correct axes are set (usually -Z for the “To” axis and Y for the “Up” axis). Adjust the values until the camera is perfectly level. - Camera Not Staying Focused on Target:
When using a tracking constraint, the camera might not always point exactly at your target. Make sure the target object is correctly assigned and that no other constraints are interfering. Sometimes, resetting the constraint or reapplying it can help. - Misalignment After Animating:
If you animate the camera and it shifts out of alignment, review the keyframes in the Graph Editor. Smooth out any abrupt changes and ensure that the alignment remains consistent throughout the animation. - Difficulty Achieving the Desired Angle:
Sometimes, aligning the camera to a specific axis requires multiple adjustments. Use the 3D Viewport to manually set the view, then use Ctrl + Alt + Numpad 0 to align the camera to that view. This method can help you achieve the exact angle you want. - Accidental Changes:
Once you have the perfect alignment, save the camera setup using The View Keeper to prevent accidental changes. This ensures that your settings remain intact during further editing.
Common Questions
- How do I align the camera to a specific axis in Blender?
You can align the camera by adjusting its rotation values in the Transform panel or by using the shortcut Ctrl + Alt + Numpad 0 to match the 3D View. - What is the Track To constraint?
The Track To constraint makes the camera point at a target object, helping maintain alignment as the object moves. - What is the Locked Track constraint?
The Locked Track constraint is similar to Track To but locks one axis to prevent unwanted rotations, ensuring the camera stays level. - How do I use the 3D Viewport to align the camera?
Adjust your 3D View manually until you have the desired view, then press Ctrl + Alt + Numpad 0 to align the camera to that view. - Can I lock the camera’s alignment to avoid accidental changes?
Yes, Using The View Keeper, you can save various camera alignment on a single camera without any accidental changes and return to it when needed. - How do I check my camera’s alignment?
Press Numpad 0 to switch to Camera View and see how your scene is captured. Make further adjustments if needed. - Why is camera alignment important in Blender?
Proper alignment ensures a clear, professional view of your scene and helps maintain technical accuracy in renders. - Can I animate camera alignment in Blender?
Yes, you can keyframe the camera’s rotation and use constraints to maintain alignment throughout an animation. - What are common problems with camera alignment?
Common issues include unwanted rotation, misalignment after animation, and difficulty achieving the exact angle. These can be fixed by adjusting constraints and keyframes. - How can I save my camera setup for later use?
Use The View Keeper to save your camera records, allowing you to recall your perfect alignment with one click.
Bringing It All Together
Aligning the camera to a specific axis in Blender is a vital skill for any 3D artist. It ensures that your scene is captured accurately and professionally, whether you are working on a film, architectural visualization, or technical illustration. By using simple tools like the Transform panel, manual shortcuts, and constraints such as Track To or Locked Track, you can achieve precise camera alignment with ease.
This technique is especially useful when you need a steady, clear view of your work. It helps to maintain consistency across renders and animations, much like how a photographer uses a tripod to keep a camera steady. In film, video games, and VR experiences, aligned cameras contribute to a smooth, immersive viewing experience.
Take inspiration from various media. Look at the symmetrical compositions in films, the technical precision in architectural renders, or the dynamic tracking in video game cutscenes. Each example shows how important camera alignment is in presenting a scene that is both engaging and accurate.
Experiment with different methods. Use manual alignment with Ctrl + Alt + Numpad 0, adjust the rotation values in the Sidebar, and try different tracking constraints until you find the perfect setup for your project. Once you are happy with the alignment, remember to lock your transformation values to avoid accidental changes.
Combine these techniques with tools like The View Keeper. Saving your camera settings as a record allows you to quickly switch between different setups and maintain consistency across multiple shots. This is especially useful in large projects where you might need to alternate between several camera views.
By mastering camera alignment, you open up a new level of control over your 3D environment. Your renders will look more professional, and your animations will flow more smoothly. The process is simple but powerful, and with practice, it will become an essential part of your Blender workflow.
Thank you for reading this article on how to align the camera to a specific axis in Blender. We hope the step-by-step instructions, practical tips, and real-world examples have given you the knowledge and confidence to achieve perfect camera alignment in your projects. Enjoy your creative journey in Blender, and may your camera always capture your scene exactly as you envision it.


