


A panoramic camera is a special camera that captures a wide view of the scene. It can show the whole area around it, just like a 360-degree picture. Many artists use panoramic views for virtual reality, game design, architectural visualization, and even for artistic effects. In this article, we will learn how to set up a panoramic camera in Blender.
What Is a Panoramic Camera?
A panoramic camera captures a very wide view of the scene. Instead of showing just one small angle like a normal camera, it shows everything around the camera. Think of it as if you are standing in the middle of a room and you can see all the walls at the same time. This type of camera is great for making virtual tours, interactive scenes, and unique artistic renders.
For example, virtual reality experiences use panoramic views to make the viewer feel like they are inside the scene. Video games like No Man’s Sky and Mirror’s Edge use panoramic views to create an immersive world. In architectural design, a panoramic render can show a building and its surroundings in one clear image. It could give clients and potential business partners a 360 degree view of a project.
Why Use a Panoramic Camera in Blender?
There are many reasons to use a panoramic camera. Here are some common ones:
- Immersive Experience: Panoramic images give viewers a sense of being inside the scene. This is useful in virtual reality and interactive displays.
- Complete Environment: You can show the entire room or landscape. This is helpful for architectural visualizations.
- Artistic Effects: Panoramic views can create a dramatic and modern look. Many artists use them to create unique visual styles.
- Game Design: In some games, a panoramic camera is used for background scenery or for cutscenes. It shows the whole world around the character.
- Technical Drawings: Engineers and architects use panoramic views to capture a complete layout with accurate proportions.
A panoramic camera is not just a technical tool. It can inspire creativity by offering a fresh way to look at a scene.
How to Set Up a Panoramic Camera in Blender
Setting up a panoramic camera in Blender is simple. Follow these steps carefully.
Step 1: Open Your Blender Project
Open Blender and load your project. Make sure your scene is ready with the objects and environment you want to capture. You should have a scene with lighting and materials applied.
Step 2: Select Your Camera
If you do not have a camera in your scene, add one by pressing Shift + A, then choose Camera. You can see your camera in the Outliner or the 3D Viewport. Click on it to select it.
Step 3: Go to the Camera Properties Panel
On the right side of Blender, find the Properties Editor. Click on the camera icon to open the Camera Properties panel. This panel shows all the settings for your selected camera.
Step 4: Change the Camera Type to Panoramic
In the Camera Properties panel, look for the section labeled “Lens.” By default, the camera is set to Perspective. Click on the dropdown menu and change the type to Panoramic.
When you select Panoramic, new options will appear. You will see an option called “Panorama Type.” Choose the type you want. The most common type is “Equirectangular.” Equirectangular is used to create a full 360-degree view. It is also popular for virtual reality projects.

Step 5: Adjust the Panorama Settings
Once you set the camera to Equirectangular, you will see settings that let you control how the panoramic view appears. The two main settings are:
- Field of View (FOV): This setting controls the angle that the camera captures. In Equirectangular mode, the FOV is usually fixed to 360 degrees horizontally and 180 degrees vertically.
- Resolution: To get a good panoramic render, set the resolution in the Output Properties panel. A common resolution for panoramas is a 2:1 ratio, such as 4096 x 2048 or 8192 x 4096. A higher resolution gives more detail but may take longer to render.
Adjust these settings until you have a view that shows the full environment as you like it.
Note: You can save and use multiple render resolution and camera settings in the same blend file using The View Keeper. This means this settings don’t haveto be restictive if you don’t want it to be.
Step 6: Position Your Camera
Place your panoramic camera in the scene where you want to capture the view. In a 360-degree render, the camera should be placed at the center of the scene for the best results. You can move the camera by selecting it and pressing G, then moving it to the desired location. Use R to rotate it if needed. Remember, in panoramic mode, the camera captures everything around it, so the position is very important.
Step 7: Test the Panoramic View
Press Numpad 0 to switch to the camera view. Look at your scene by making a test render using the camera view in the 3D Viewport. You should see a full panoramic view of your scene. Check that the entire environment is visible and that there are no unwanted gaps. If the view does not look right, adjust the camera position, FOV, or resolution settings and test again.
Step 8: Render Your Panoramic Image
Once you are satisfied with the view, it is time to render. Go to the Render Properties panel and set your render options such as samples and denoising if you are using Cycles. Then, press F12 to render your panoramic image. The output will be an equirectangular image that you can use for virtual tours, VR projects, or artistic effects.
Note: If you want to make multiple variations of Panoramic renders, you can use The View Keeper‘s Alternative rendering feature. This helps you set up different variations of the Panoramic camera and render all at once. The View keeper helps you save each render to it’s own unique folder which helps speed things up and prevents rendering multiple times.
The View Keeper and Panoramic Renders
The View Keeper is a powerful tool that can enhance your panoramic rendering workflow in Blender. This add-on lets you save and manage multiple camera settings within a single blend file. Here’s why The View Keeper is important when working with panoramic renders:
- Multiple Camera Setups:
You can save and use multiple render resolutions and camera settings in the same blend file using The View Keeper. This means you are not restricted to a single camera setup. For example, you can have one camera setup for a standard panoramic view, another for a perspective view, and yet another for a fish-eye effect. All in the same scene. With The View Keeper, you can switch between these setups with a single click, offering immense flexibility. - Different Resolutions and Formats:
The View Keeper allows you to save various render resolutions. You might want a high-resolution panoramic render for VR projects, while a lower resolution might be ideal for quick previews. You can save each setup to different folders and in different formats. This means you can have your 360-degree view in one format and your perspective views in another, making it easier to manage your assets and deliver them to clients. - Consistent Workflow:
By saving multiple camera settings, you can maintain consistency in your scenes and projects. This is especially useful in large projects where you might need to create multiple panoramic renders. The View Keeper helps you quickly recall your favorite settings, saving time and reducing errors. - Enhanced Creativity:
With The View Keeper, you’re free to experiment. You can easily switch between different panoramic views or even completely different camera setups. Want to see how your scene looks with a fish-eye lens? Save that configuration and compare it with your standard equirectangular view. This ability to switch back and forth without losing your settings encourages creative exploration and ensures that your final render perfectly fits your vision. - Efficiency and Organization:
The View Keeper organizes your camera records and settings in one place. This makes it easier to manage multiple views, especially when working on projects that require numerous renders. Whether you’re working on architectural visualizations, animated films, or interactive VR content, The View Keeper streamlines your workflow and allows you to focus on the creative aspects of your project.

With The View Keeper, you are empowered to create a variety of panoramic renders. From immersive VR images to cinematic artistic effectswithout the hassle of reconfiguring your camera every time.
Tips and Tricks for Panoramic Renders
Panoramic cameras can be very powerful. Here are some extra tips to help you get the best results:
Use High Resolution
Panoramic images cover a large area. Use a high resolution to capture more detail. For example, 8192 x 4096 pixels will give you a very detailed image. This is similar to high-definition images in modern video games or VR applications. A clear, high-resolution render makes your work stand out.
Experiment with Lighting
Good lighting can make your panoramic render look amazing. Try different lighting setups to see how they change the mood of your scene. Use soft lighting for a calm and inviting look or dramatic lighting for a more intense atmosphere. Lighting can make a flat panoramic image come to life, just like in movies that use clever light and shadow to create a mood.
Consider the Environment
When setting up a panoramic camera, think about what you want to show. Place your camera in an interesting spot in your scene. For architectural visualization, this might be the center of a room. For a landscape scene, consider placing the camera on a hill or in the middle of an open area. The position of the camera affects the overall impact of the render.
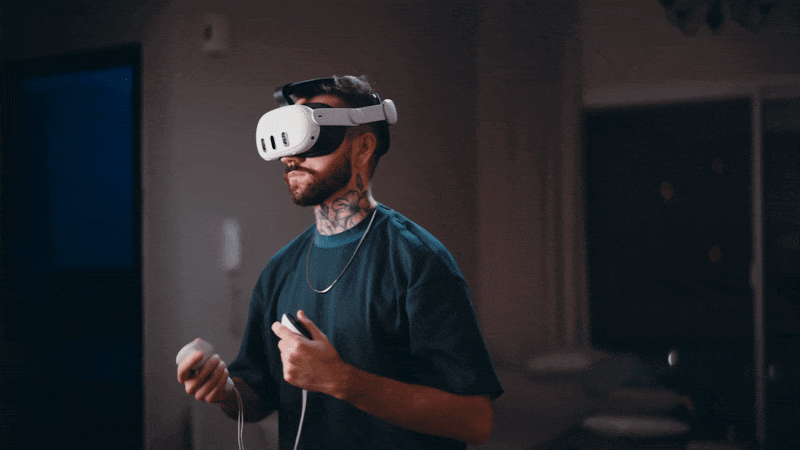
Use Panoramic Renders for Virtual Reality
Panoramic images are the backbone of virtual reality experiences. When you create a VR project, your render will wrap around the viewer to create an immersive environment. If you are interested in VR, setting up a panoramic camera is an essential skill. Many VR platforms, such as Google VR and Oculus, support equirectangular images.
Combine with Other Techniques
You can combine panoramic renders with other techniques to create interesting effects. For example, you can use split screens in post processing to show a panoramic view alongside a close-up detail. With The View Keeper this is possible. You can render both camera types at once and merge it into a split screen in post processing. This method is common in documentaries and art films where multiple perspectives are shown at once. Combining views gives your work a dynamic and modern look.
Use Different Panoramic Types
While Equirectangular is the most common type, Blender offers other panorama types for specific needs. Explore these options to see if they fit your project better. For instance, some types might offer a different mapping that suits certain artistic styles. Using The View Keeper, you experiment with these options to find your favorite.

Real-World Examples and Inspirations
Let us look at some examples from different media to see how panoramic cameras are used.
Virtual Reality Experiences
Many virtual reality experiences rely on panoramic renders. A VR tour of a museum, for instance, uses 360-degree images so that viewers feel as if they are walking through the space. Artists and designers use panoramic cameras in Blender to create these immersive worlds. The level of detail and clarity in a panoramic render can transform a simple scene into an interactive experience.
Video Games
Video games sometimes use panoramic cameras to capture wide environments. Strategy games, such as Civilization or Age of Empires, use a fixed, top-down view that is similar to an orthographic projection. However, some modern games use panoramic or 360-degree views for cutscenes or interactive maps. This approach gives players a full view of the game world and enhances the sense of immersion.
Architectural Visualizations
Architectural visualization often requires a complete view of a building and its surroundings. Panoramic renders can show an entire interior or exterior layout in one image. This method is used by architects to present their designs to clients. A clear panoramic view can reveal details that a standard render might miss. In many architectural presentations, panoramic images are key to communicating the full scope of the design.
Film and Photography
While traditional film cameras capture a limited field of view, panoramic photography is a well-loved technique in art. Photographers like Jeff Wall have used wide-angle images to create dramatic and expansive compositions. In film, wide panoramic shots are used to set the scene and show the vastness of a location. These examples show that a panoramic view can be both functional and artistic.
Graphic Design and Illustration
In graphic design, panoramic images are used to create engaging backdrops and unique layouts. Designers often use wide, flat images to give a sense of space and depth without the distortion of perspective. This technique is popular in modern website design and digital art. By setting up a panoramic camera in Blender, you can create assets that have a clean, modern look.
Troubleshooting Common Issues
Sometimes you might run into problems when setting up a panoramic camera. Here are some common issues and how to fix them:
- The Render Looks Distorted:
This may happen if the resolution is too low or the camera is not positioned well. Increase the resolution and adjust the camera position to fix the problem. - Not All of the Scene Is Visible:
Check your camera position. For the best panoramic render, place the camera in the center of the scene. Also, verify your output resolution to ensure it has the correct 2:1 ratio. - The Image Is Too Dark or Too Bright:
Adjust your lighting in the scene. Panoramic renders are sensitive to the environment’s lighting. Experiment with different lighting setups until you achieve a balanced look. - The Edges Look Unnatural:
Sometimes, the stitching of a panoramic render can create issues at the edges. Try to smooth out the lighting and avoid strong contrasts at the boundaries of your scene. - Slow Render Times:
Panoramic images are high resolution and can take longer to render. Use optimized settings or reduce the resolution if you need a faster preview. Using The View Keeper, you can save both the preview and final render settings thereby speeding up the entire process.
Common Questions
- What is a panoramic camera in Blender?
A panoramic camera in Blender captures a wide, 360-degree view of the scene, often using an equirectangular projection. - How do I set a camera to panoramic mode?
Select the camera, go to the Camera Properties panel, change the Lens Type to Panoramic, and choose Equirectangular as the Panorama Type. - What resolution should I use for panoramic renders?
A common resolution is a 2:1 ratio, such as 4096 x 2048 or 8192 x 4096, to ensure clarity and detail. - Why do I need a panoramic camera?
Panoramic cameras are used to create immersive views, virtual reality experiences, and detailed environmental renders. - How do I adjust the field of view for a panoramic camera?
In panoramic mode, the field of view is often fixed to 360 degrees horizontally and 180 degrees vertically, but you can adjust the Orthographic Scale or output settings for different effects. - Can I use panoramic cameras for virtual reality?
Yes, panoramic renders are widely used in virtual reality projects to create immersive 360-degree views. - How do I change the panoramic settings in Blender?
Go to the Camera Properties panel, switch to Panoramic mode, and choose your preferred Panorama Type. Then, adjust the resolution and output settings as needed. - What are common uses for panoramic renders?
They are used in architectural visualization, virtual tours, game design, and artistic projects that require a wide field of view. - Can I animate a panoramic camera?
Yes, you can animate any camera in Blender. A panoramic camera can be animated to create dynamic VR experiences or change views over time. - How do I fix distortion in a panoramic render?
Increase the resolution and adjust the camera’s position and lighting to reduce distortion and achieve a balanced render.
Bringing It All Together
Setting up a panoramic camera in Blender is a simple yet powerful way to capture your 3D world. By following these steps
- selecting your camera
- switching to Panoramic mode
- choosing Equirectangular as the Panorama Type
- adjusting the output settings
you can create stunning 360-degree renders that are both immersive and clear.
Panoramic renders are used in many fields. In virtual reality, they bring the viewer into a fully immersive environment. In architectural visualization, they show complete interiors and exteriors in one image. In video games, they create dynamic and engaging backgrounds. And in graphic design, they offer a modern, clean look that can make any project stand out.
When you set up your panoramic camera, think about the story you want to tell. Imagine standing in the middle of a busy city or a quiet room where every detail is visible. This view can transform your work and provide a fresh perspective that is both artistic and informative. Look at famous examples from movies, games, and design for inspiration. Consider how panoramic views in films like The Revenant capture vast landscapes, or how VR tours allow users to explore virtual spaces. These examples show that a panoramic camera is not just a tool, it is a way to engage and inspire your audience.
Experiment with different lighting setups and camera positions. Panoramic renders can change the mood of your scene. A bright, sunny environment will look very different from a dim, moody one. Adjust your scene until you get the perfect balance of light and detail. This experimentation is part of the creative process, and each change brings you closer to a professional finish.
Remember, practice makes perfect. The more you work with panoramic cameras in Blender, the easier it will become. Save your camera settings and experiment with The View Keeper. This tool can help you store different panoramic views and switch between them quickly. It is like having a library of your favorite shots ready to use whenever you need them.
Using a panoramic camera opens up many creative possibilities. You can create virtual tours that make viewers feel like they are stepping into your world. You can design game backgrounds that capture every angle of your environment. You can even produce artistic renders that show off your skills in a fresh and exciting way.
In conclusion, a panoramic camera in Blender is a versatile tool that can enhance many types of projects. Whether you are working on a VR experience, an architectural visualization, or an artistic project, setting up a panoramic camera is a valuable skill. By following the steps outlined in this article and experimenting with different settings, you can achieve high-quality, immersive renders that capture the full beauty of your scene.
Thank you for reading this article on how to set up a panoramic camera in Blender. We hope that these step-by-step instructions, tips, and examples have given you the confidence to try panoramic renders in your own projects. Enjoy your creative journey, and let your panoramic views open up a whole new world of possibilities.


