


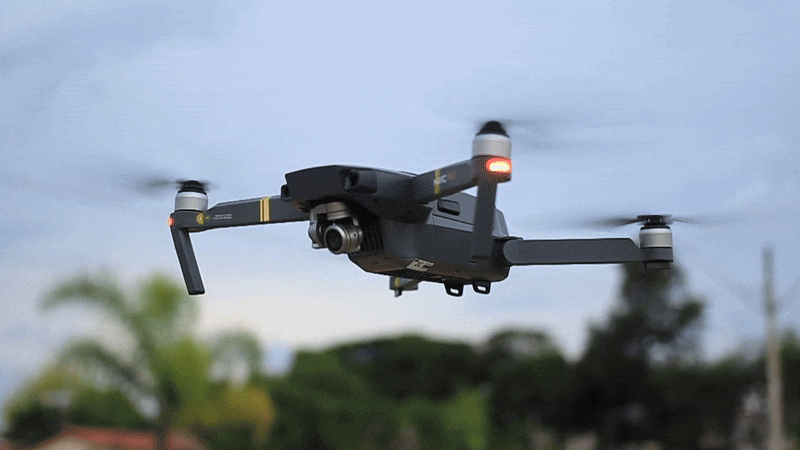
A drone camera gives a unique view of the world. It glides smoothly above landscapes and moves like a bird in the sky. In Blender, you can simulate a drone camera to capture your 3D scene in dynamic, cinematic ways. In this article, we will explain how to set up a drone camera in Blender. We will look at step-by-step instructions, useful tips, and real-world examples from films, video games, and virtual tours. This guide will help you create smooth, airborne shots that feel like you have a drone really flying above your scene.
What Is a Drone Camera Simulation?
A drone camera simulation mimics the movement and look of a drone flying over a scene. Real drones move with a gentle float, sometimes with slight shakes or subtle tilts. When you simulate a drone camera in Blender, you want your camera to follow a smooth path, look at interesting subjects, and sometimes add a touch of natural motion blur or slight vibration. This technique is great for:
- Aerial Views: Show an entire landscape or cityscape.
- Tracking Shots: Follow a moving subject from above.
- Virtual Tours: Create interactive walkthroughs of buildings or outdoor areas.
- Cinematic Sequences: Add dramatic flair to film-like animations.
Why Simulate a Drone Camera?
Drone shots are very popular in modern films, video games, and even documentaries. Consider the sweeping aerial views in movies like The Revenant or the dynamic tracking shots in Mission: Impossible – Fallout. Video games like Assassin’s Creed also use drone-like views in cutscenes to show vast environments. Simulating a drone camera in Blender gives your project:
- A Unique Perspective: The high-angle view can reveal details that ground-level shots miss.
- Smooth Motion: A drone camera offers fluid movement that can make scenes look more cinematic.
- Creative Flexibility: You can design any flight path and control every aspect of the camera’s movement.
- Interactivity: For VR or interactive tours, a drone camera gives viewers a complete view of the scene.
Setting Up Your Drone Camera in Blender
To simulate a drone camera, you need to control its movement and orientation. You can do this by using camera paths, keyframe animation, and constraints. Below are the steps to create a basic drone camera simulation.
Step 1: Open Your Blender Project
Begin by opening Blender and loading your scene. Ensure your 3D environment is ready to be viewed from above. Whether you have an outdoor landscape, a cityscape, or an interior scene, make sure the lighting and materials are set up to look good from a high view.
Step 2: Add a Camera
If you do not already have a camera:
- Press Shift + A and choose Camera.
- Position the camera at a starting point. For a drone simulation, the camera is usually placed high above the scene.
- Press Numpad 0 to see through the camera view. This helps you see what the drone will capture.
Step 3: Create a Flight Path Using Curves
A smooth flight path is key for a drone camera.
- Press Shift + A and choose Curve > Path or Bezier Curve.
- In the 3D Viewport, go to Edit mode and shape the curve to form the flight path.
– Use the handles on a Bezier curve to adjust its flow and create gentle curves.
– Think of a drone flight as a smooth, flowing journey, similar to the gentle arcs of a roller coaster ride. - Place the curve so that it covers the area you want your drone to fly over.
– For an aerial view, position the curve above your scene.
Step 4: Parenting the Camera to the Curve with Follow Path
You can parent the camera to your curve using the Follow Path option. This method automatically links the camera’s movement to the curve, and you can still adjust the camera’s progress along the path.
- Select Your Camera and Curve:
First, select your camera in the 3D Viewport. Then hold Shift and click to select the curve you created for the flight path. - Parent with Follow Path:
Press Ctrl + P and choose Follow Path from the parenting menu. This action parents the camera to the curve and automatically sets it to follow the curve’s path. - Adjust the Evaluation Time:
With the camera now parented to the curve, select the curve and go to its properties. Here, you can adjust the Evaluation Time setting to control how the camera moves along the path.
Step 5: Ensure Smooth Orientation with Tracking
A drone camera often needs to face the subject or follow the curve naturally.
- With the camera still selected, add a Track To constraint from the Constraints tab.
- Set the Target of the Track To constraint to a specific object or an empty placed near your subject.
– For example, if your drone is filming a moving car, place an empty object on the car and set it as the target. - Adjust the To axis to -Z and the Up axis to Y. These settings ensure that the camera stays level and properly oriented.
Step 6: Fine-Tune the Camera Animation
Adjust the flight path and camera movement to make your simulation look natural.
- Smooth the Path:
Edit the curve in Edit Mode (Tab key) to remove any sharp corners. - Adjust Keyframes:
Open the Timeline or Graph Editor to fine-tune the Evaluation Time keyframes for a steady pace. - Add Motion Blur:
In the Render Properties, enable motion blur for added realism when the camera moves quickly. - Simulate Drone Vibration:
For extra realism, consider adding a slight camera shake using keyframe animation or by adding a noise modifier in the Graph Editor. This can mimic the natural vibrations of a drone in flight.

Step 7: Test and Render Your Animation
Once you are happy with the flight path and camera movement:
- Press Spacebar to play the animation in the Timeline.
- Observe the camera’s movement and check that it follows the desired path smoothly.
- If necessary, make further adjustments to the curve, keyframes, or constraints.
- Once you’re ready, save your camera setup using The View Keeper if you plan to set up and capture additional shots. Alternatively, if you only need to render one drone animation or just a single frame, simply navigate to Render Properties and press F12.
Real-World Inspirations and Applications
Simulating a drone camera in Blender is not just a technical exercise—it opens creative possibilities. Here are some examples and inspirations:
Aerial Cinematography in Film
Modern films like Skyfall and La La Land feature breathtaking aerial shots captured by drones. These films use smooth, dynamic camera moves to show vast landscapes and urban environments. In Blender, you can simulate similar shots by setting up a drone camera that flies over your scene. The smooth curves and subtle shakes add a cinematic quality that draws viewers into the story.
Video Game Cutscenes
Video games often use drone-like camera moves in cutscenes. For example, a game might show a sweeping view of a historical city before zooming in on key action. By simulating a drone camera in Blender, you can create engaging cutscenes that capture the attention of players. The fluid movement along a carefully planned path helps set the mood and pace of the narrative.
Virtual Reality and Interactive Tours
Virtual reality experiences rely on immersive camera views. When you simulate a drone camera, you can create 360-degree views that let users explore a scene as if they were flying over it. This technique is used in VR tours of museums, historical sites, and natural landscapes. With a drone camera simulation, your viewers can get a complete, interactive experience of your 3D environment.
Architectural Visualization
Architects and designers often need to showcase a building from multiple angles. A drone camera simulation can create a virtual tour of an architectural project. Imagine a drone flying over a modern skyscraper, then swooping down to show the interior layout. This dynamic view gives clients a better understanding of the design. By simulating a drone camera, you can produce impressive presentations that blend technical accuracy with creative flair.
Experimental Art and Music Videos
Artists and directors often use unconventional camera moves to create unique visuals. An animated music video might feature a drone camera that glides smoothly through abstract environments. This approach is also popular in experimental films where the focus is on mood and atmosphere. With Blender, you can simulate these creative camera moves and bring your artistic vision to life.
Advanced Techniques for Drone Camera Simulation
Once you have mastered the basics, you can explore advanced techniques to enhance your simulation further.
Combining Multiple Constraints
For more control, combine the Follow Path parenting with the Track To constraint. This ensures that while the camera follows the flight path, it also stays focused on a moving subject. For example, if your drone is filming a runner in a park, use the Follow Path parenting to move along the curve and the Track To constraint to keep the runner in focus. Adjust the weight of the constraint to achieve a natural look.
Using The View Keeper for Drone Setups
Using The View Keeper, you can save your drone camera setup as a camera record, allowing you to quickly switch between various flight paths and camera behaviors without having to reconfigure settings each time. For example, you could have one drone setup for a wide aerial shot and another for a detailed tracking shot of a subject, with toggling between these setups just one click away.
The View Keeper also lets you seamlessly switch between a drone camera setup and another camera setup. Imagine starting your scene with a drone shot, then transitioning to a trailing camera, and finally moving to a close-up reveal of the character’s face. All three camera switches can be executed with as few as three clicks and repeated in any order, making the process highly efficient.

Adding Realistic Drone Movements
Real drones have slight vibrations and minor positional changes due to wind and mechanical motion. To simulate this:
- Use a Noise Modifier:
In the Graph Editor, add a noise modifier to the camera’s location and rotation keyframes. This adds subtle jitter and makes the motion feel more realistic. - Motion Blur:
Enable motion blur in the Render Properties to smooth out fast movements. This can help hide any abrupt transitions and give the appearance of continuous flight. - Camera Shake:
Consider using keyframe animation to add occasional camera shake. This can be especially effective during high-speed maneuvers or when simulating a drone adjusting its position.
Customizing the Flight Path
For a truly unique drone shot, customize your flight path:
- Edit the Curve:
In Edit Mode, adjust the curve’s control points to create smooth, natural movements. Add extra points to create gentle turns or dramatic swoops. - Animate the Curve Itself:
You can animate the curve’s shape over time, allowing the flight path to change dynamically during the animation. This technique is useful in creative projects where the environment itself is changing.
Troubleshooting Common Issues
When simulating a drone camera, you might face a few challenges. Here are some common issues and how to solve them:
- Camera Not Following the Path:
Check that camera is parented correctly to the curve. You can unparent (Alt + P) and parent again - Unwanted Rotations:
If the camera rotates oddly along the path, adjust the Track To constraint settings. Make sure the correct axes are set (usually -Z for “To” and Y for “Up”). - Jittery Movement:
If the camera movement feels choppy, smooth out the curve or adjust the keyframe interpolation in the Graph Editor. - Speed Issues:
If the camera moves too fast or too slow, tweak the Evaluation Time on the curve or adjust the keyframes in the Timeline. - Unexpected Camera Shake:
If added noise causes too much shake, reduce the strength of the noise modifier. A little bit of vibration is natural, but too much can be distracting. - Render Quality:
Optimize your render settings and consider using a lower resolution for previews until you are ready for the final render.
People Also Ask
- How do I simulate a drone camera in Blender?
You can simulate a drone camera by parenting the camera to a curve path using the follow path option and keyframe animation. - What is the Follow Path option?
The Follow Path option makes the camera move along a curve when parented to a curve1, creating smooth, predictable movement. - Can I add realistic vibrations to a drone camera?
Yes, use noise modifiers in the Graph Editor to add slight vibrations and camera shake for realism. - How do I adjust the speed of my drone camera?
Adjust the Evaluation Time on the curve and refine the keyframe timing in the Timeline to control the camera’s speed. - What is the best way to keep the camera focused on a subject?
Use a Track To or Locked Track constraint along with the Follow Path constraint to ensure the camera stays focused on your target. - How do I create a smooth flight path for my drone camera?
Create a curve using Bezier or NURBS, then adjust its control points in Edit Mode for a smooth, natural path. - Can I simulate drone movement in virtual reality?
Yes, a drone camera simulation is excellent for VR projects, giving viewers an immersive, 360-degree experience. - What software can help me save my camera setups?
Tools like The View Keeper can store your camera setups as records, making it easy to switch between different drone setups. - Is it possible to animate the flight path itself?
Yes, you can animate the curve to change its shape over time, adding dynamic elements to your drone simulation. - What are common challenges when simulating a drone camera?
Common challenges include ensuring smooth movement, managing unwanted rotations, and fine-tuning the speed and vibration effects.
Bringing It All Together
Simulating a drone camera in Blender opens up a world of creative possibilities. By setting up a flight path with a smooth curve, applying the Follow Path constraint, and combining it with tracking constraints, you can create dynamic aerial shots that capture your scene from breathtaking angles. Whether you are showcasing an expansive landscape, following a moving subject, or creating immersive VR content, the drone camera simulation gives you the freedom to explore every detail of your 3D world.
Think of it like piloting a real drone. In films and video games, aerial shots give viewers a bird’s-eye view that is both dramatic and immersive. With Blender, you can achieve the same effect by carefully planning your camera’s path, adjusting the movement with keyframes, and adding realistic touches like motion blur and subtle vibrations. These techniques can transform a simple scene into an engaging visual journey.
Advanced users can further enhance their simulation by customizing the flight path and even animating the curve itself. For instance, you might design a flight path that changes dynamically to mimic wind or other forces. This can add an extra layer of realism that sets your project apart. Using tools like The View Keeper can also streamline your workflow by letting you save and recall complex camera setups with ease.
As you work on your drone camera simulation, don’t be afraid to experiment. Adjust the curve, refine the constraints, and test different camera speeds until you find the perfect balance for your scene. Look at examples from films, video games, and architectural visualizations to see how smooth aerial shots can elevate your work. Every project is an opportunity to learn something new and push the boundaries of your creativity.
In conclusion, simulating a drone camera in Blender is a powerful way to bring a cinematic quality to your 3D projects. Whether you are creating a virtual tour, an animated film, or an immersive VR experience, mastering drone camera simulation will add a dynamic perspective that captivates your audience. With the steps outlined above and a bit of practice, you can control your camera like a pro and create stunning aerial shots that truly stand out.
Thank you for reading this article on how to simulate a drone camera in Blender. We hope these clear instructions, practical tips, and inspiring examples help you take your projects to new heights. Enjoy your creative journey and let your virtual drone soar through your 3D world!


