


Switching between multiple cameras in a single animation can bring your Blender projects to life. Whether it’s for a short film, product showcase, or character reel, camera cuts keep viewers engaged and help tell a more dynamic story. Below, we’ll walk you through setting up markers, binding cameras, and avoiding common pitfalls so you can master seamless camera transitions in your next Blender project.
Why Switch Between Cameras in an Animation?
Camera switching is one of the most effective ways to guide your audience’s attention and create a more engaging experience. It’s not just about showing different angles, it’s about using perspective to tell a story, add depth, and keep your viewers immersed. Here’s why it matters:
Storytelling: Guiding the Viewer’s Focus
Cameras are the eyes of the audience. By switching between cameras, you can:
- Highlight key elements of your scene.
- Create emotional weight by focusing on a character’s expression or an object of importance.
- Set the mood switching from a wide-angle establishing shot to a tight close-up instantly changes the atmosphere.
Example: In a short film, an opening wide shot establishes the setting. Then, a smooth transition to a close-up on a character’s face conveys tension or intimacy. The audience subconsciously follows the camera’s lead, absorbing the narrative as intended.
Dynamic Scenes: Keeping It Engaging
Static camera work can make even the most beautifully animated scenes feel flat. Switching cameras introduces variety, making animations more visually dynamic. You can:
- Show motion or action from multiple perspectives, such as tracking a racing car from above and then cutting to a ground-level view.
- Alternate between perspectives to prevent monotony in longer animations, ensuring the viewer stays engaged.
Example: In a product showcase animation, start with a slow pan around the product using a wide shot, then switch to a macro view to reveal intricate details. This approach keeps the viewer intrigued and fully immersed.
Creative Flow: Enhancing Artistic Expression
Every angle tells a different story. By experimenting with multiple cameras, you can:
- Explore unconventional perspectives, such as an over-the-shoulder shot or a low-angle hero shot.
- Enhance storytelling by playing with spatial relationships between objects or characters.
Example: In an architectural visualization, a bird’s-eye view highlights the layout of the building, while an eye-level shot from within showcases how it feels to walk through the space. Combining these perspectives makes the final presentation more compelling.
Elevating the Visual Narrative
Switching between cameras isn’t just a technical feature, it’s a creative tool. Imagine you’re animating a scene where a character runs through a forest. You could start with:
- Wide Shot: Establish the environment, showing the forest’s scale and the character’s path.
- Tracking Shot: Follow the character closely to emphasize their movement and urgency.
- Close-Up: Capture their expression, adding emotional context to the scene.
These changes in perspective transform a simple sequence into a rich visual narrative. Without switching cameras, the scene might feel static and less impactful.
The Impact of Camera Switching
Think of iconic films or animations. Often, their most memorable moments are a result of deliberate and effective camera work. Switching between cameras helps you:
- Add a cinematic quality to your work.
- Mimic techniques used in professional filmmaking.
- Make your animation resonate emotionally with the audience.
By weaving different angles and perspectives together, you control the audience’s journey through your scene, ensuring they stay engaged and connected to the story.
Switching Cameras in Blender
Blender provides a way to switch between cameras using Timeline Markers. Here’s how to do it:
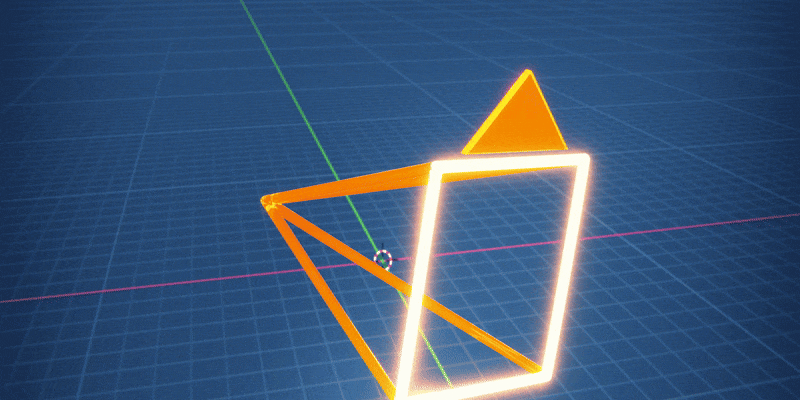
Step 1: Add and Position Multiple Cameras
Add Cameras:
- Press Shift + A → Camera to create a new camera.
- Position and Frame: Use G (grab) to move the camera into place and R (rotate) to orient it.
- Preview Each Camera: you’ll need to ensure the framing is perfect for the shot you’re aiming to capture.
- Select the camera and press Ctrl + Numpad 0 to make it the active camera and to preview the view through the camera.
- Press Numpad 0 to exit camera view, Adjust as necessary.
Imagine you’re setting up five or more cameras for an animated short. You would need to repeate these steps for each one, particularly when fine-tuning their positions.
Step 2: Add Timeline Markers
Markers are used to tell Blender when to switch to a specific camera during playback. While simple in theory, the process can become tedious as the number of cameras increases. Here are the steps:
- Move the Timeline Cursor:
- For each camera switch, move the timeline cursor to the exact frame where the switch should occur.
- Add a Marker:
- Press M to place a marker on the timeline.
- Label the Marker:
- To stay organized, you might want to rename markers to reflect the associated camera.
With a large animation project, adding and labeling markers for every camera switch can quickly clutter your timeline. Each additional camera or change requires revisiting this process.
Step 3: Bind Cameras to Markers
This step links each camera to its corresponding timeline marker. It’s a necessary step for each camera switch.
- Select the Camera:
- Click on the camera in the 3D Viewport or Outliner.
- Bind the Camera:
- Go to the timeline and select the marker you want to bind the camera to.
- Use Marker → Bind Camera to Marker to make the link.
- Repeat for Every Camera:
- For every switch in the animation, repeat this process.
For scenes requiring frequent camera changes, this step can become monotonous. If you decide to tweak a camera’s position or timing later, you may need to revisit and rebind multiple markers.
The View Keeper – A much easier way to switch Cameras
While Blender’s native tools work, managing multiple cameras in animations can get messy. This is where The View Keeper shines. It not only simplifies camera switching but also enhances control over your scene.
Features That Make The View Keeper Perfect for Camera Switching
- Save Camera Views: Easily save and recall camera angles for your scene. This allows you to render multiple angles using a single camera, eliminating clutter from too many cameras or excessive markers on your timeline. Each saved angle includes its own unique settings, meaning you can store multiple camera setups on one camera. If you prefer to work with multiple cameras, The View Keeper supports that too, giving you maximum flexibility for your workflow.
- Organized Camera Management: Keep your cameras neatly organized with an intuitive interface. Instead of relying on timeline markers, The View Keeper uses tables, making camera switching as easy as a single click and camera animation as simple as adding one keyframe.
- Quick Adjustments: Easily tweak camera settings or positions without losing your saved views. With The View Keeper’s non-destructive workflow, you can make as many changes as needed without touching the timeline unless you choose to.
- Alternative Rendering: The View Keeper offers the ability to render different camera resolutions, different camera aspect ratios to different folders using different camers settings all in one go.

When to Use The View Keeper for Camera Switching
If your animation involves multiple camera switches, The View Keeper can save you hours of work. Here’s why:
- Simplified Workflow: No need to bind and rebind cameras manually.
- Multi-Camera Control: Easily navigate, modify, and switch between cameras in a user-friendly interface.
- Alternative Rendering: Render scenes from multiple angles seamlessly without waiting for one render to finish before starting the next. The View Keeper streamlines the process, saving you time and effort.
Advanced Tips for Smooth Camera Switching
Smooth Transitions
If you want smoother transitions between cameras (instead of instant cuts):
- Add Keyframes:
- Animate the focal length, position, or rotation of one camera to simulate a transition.
- Use Depth of Field:
- Enable Depth of Field in the Camera Properties to enhance cinematic effects.
Combine Tracking and Switching
- Add a Track To Constraint to one or more cameras to follow a moving object.
- Switch between these tracking cameras to add dynamic motion to your animation.
Common Pitfalls & FAQs
“Why isn’t my camera switching during playback?”
- Ensure the timeline marker is bound to the correct camera.
- Check if the camera is properly positioned and visible in the scene at the time of the switch.
- Verify that no conflicting markers are causing unexpected behavior.
- when using The View Keeper ensure updates is turned on
“Why do my camera switches look abrupt?”
- Abrupt transitions occur when there’s no smooth lead-up to the switch. Consider animating the focal length or camera rotation just before the switch to soften the transition.
“Can I animate the camera switch without using markers?”
- Yes, you can do this with The View Keeper using a single keyframe.
“Can I use different camera settings for each shot?”
By default, when rendering animations, some settings can be changed for each shot, while others cannot. For settings that can be adjusted like focal length, depth of field, or aspect ratio you’d typically need to manually configure each camera, keyframe the changes at the right moments, and carefully track them to ensure everything plays out correctly.
If adjustments are needed later, modifying each camera becomes repetitive, time-consuming, and prone to errors.
With The View Keeper, it’s much easier. There are little to no restrictions on the settings you can change. Simply save the desired camera settings and, with as little as a single keyframe, render shots with completely different camera setups effortlessly.
“How does The View Keeper improve this process?”
- The View Keeper streamlines camera management by:
- Allowing you to save, organize, and recall camera views with their unique settings.
- Enabling quick adjustments without rebinding markers.
- Supporting batch rendering from multiple cameras without manual toggling.
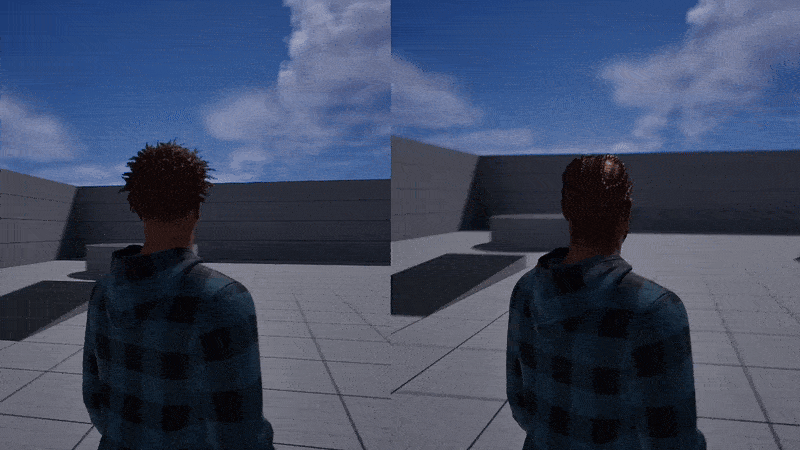
“Can I preview all my cameras at once?”
Blender doesn’t natively support multiple simultaneous camera previews in a single viewport. However you can easily use The View Keeper to easily switch between camera views without losing track of configurations.
“Why is my timeline cluttered with too many markers?”
- Large projects with frequent camera switches can overcrowd the timeline.
- Organize markers with consistent naming conventions or color coding for better clarity.
- Alternatively, tools like The View Keeper consolidate camera views, reducing the reliance on markers altogether.
Conclusion
Switching between cameras during an animation in Blender is a powerful way to enhance storytelling and scene dynamics. Blender’s built-in tools provide a solid foundation, while The View Keeper takes this process to the next level, offering a more organized and efficient approach.


