In the world of 3D production, it’s the little things that add up to a big impact. Whether you’re piecing together an animated film, designing an architectural visualization, or perfecting a product render, how you handle your camera views can shape the quality of what you deliver. Preserving those views in Blender isn’t just a technical step it’s how you keep your renders consistent, your workflow smooth, and your results professional. Blender’s built-in tools give you a start, but they can leave you wanting when it comes to quickly saving and pulling back exact camera setups. That’s where The View Keeper add-on comes in, changing the way you manage cameras with a solution that’s both powerful and practical.
This guide is here to walk you through it all: why preserving camera views matters, what it really means, and how The View Keeper takes it to the next level. You’ll get a rundown of its standout features, see how it helps with different kinds of projects, learn how to set it up step-by-step, and pick up best practices to get the most out of it. By the time you’re done, you’ll see why The View Keeper is a must-have for any Blender user looking to keep scenes tidy, renders reliable, and time on your side.
Introduction: The Importance of Preserving Camera Views
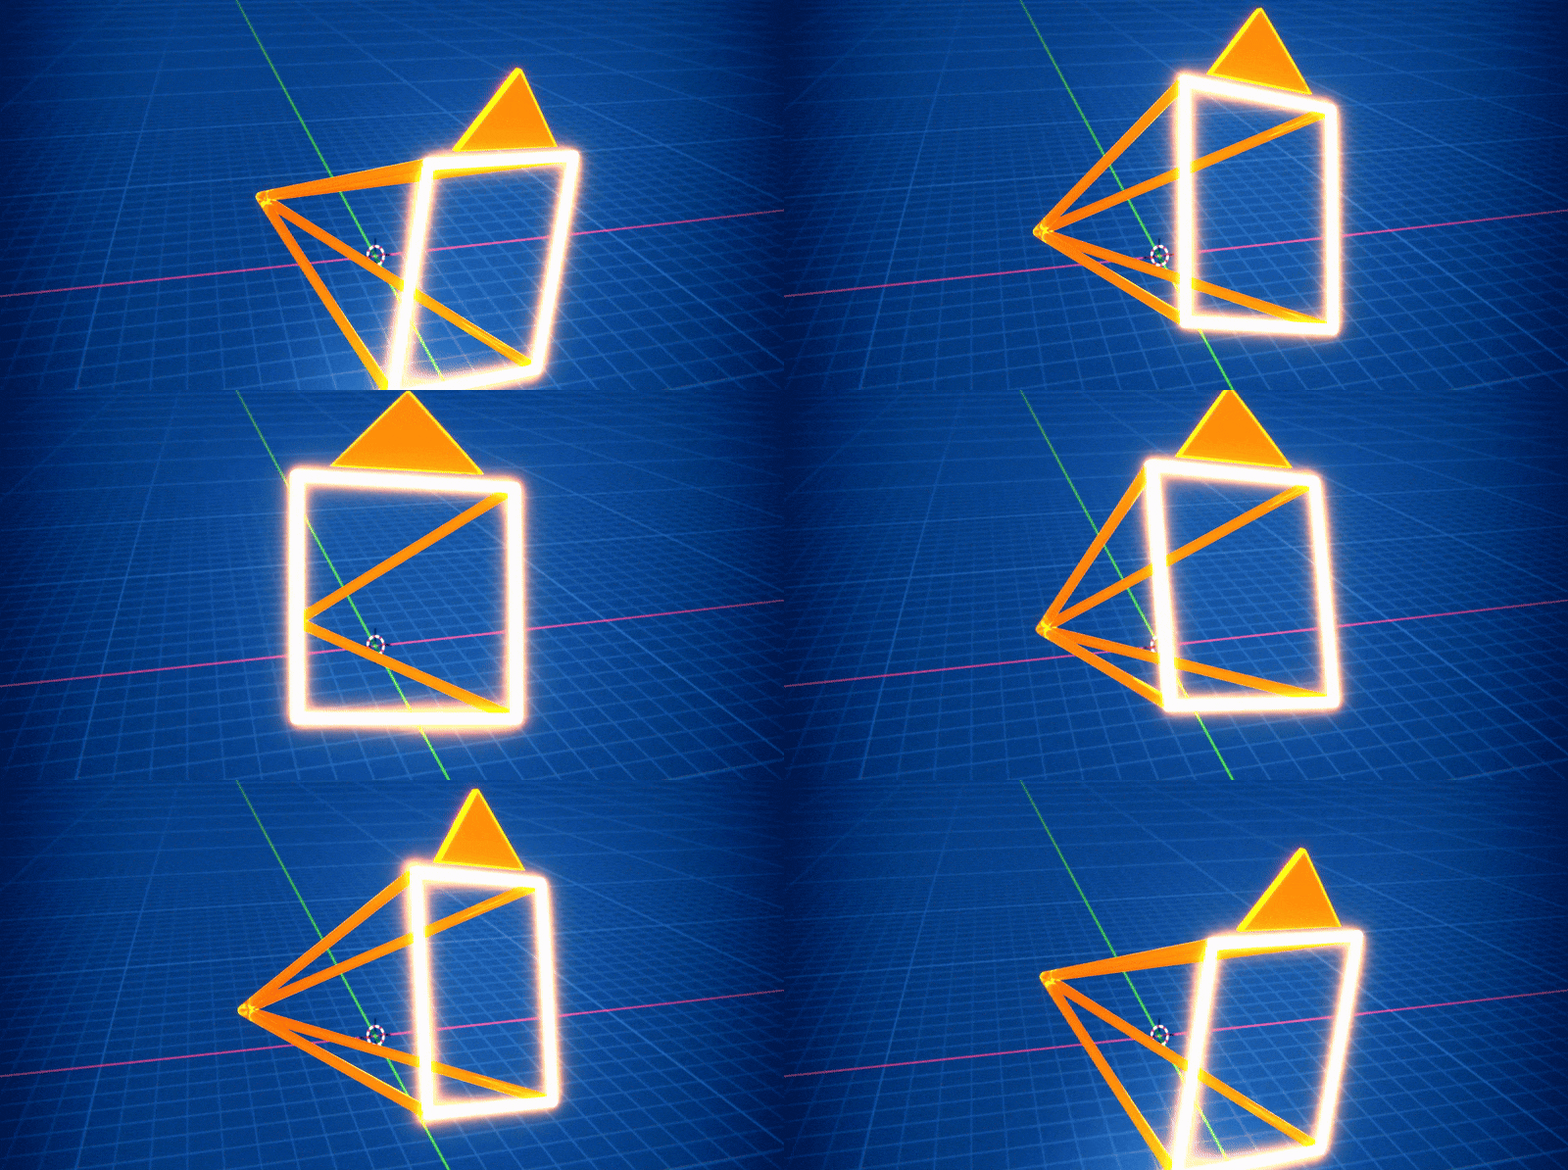
When you’re deep into a 3D project, your camera isn’t just equipment it’s how you tell your story. Its position, angle, and settings decide what people see, setting the mood and quality of every render. For projects with lots of shots, nailing those camera views and keeping them steady is crucial. That’s what preserving camera views is all about saving exactly where your camera sits, how it’s angled, and what settings it’s using, so you can bring it back anytime without starting over.
Think about an animation where each frame needs the perfect angle to hit the right note maybe a wide shot for drama or a close-up for feeling. Or picture an architectural visualization where you need exterior views, interior sweeps, and tiny details to show off a design just right. For a product, you might want multiple angles to highlight every feature. Without a solid way to save these views, you’re stuck tweaking things by hand, risking slip-ups and a workflow that feels more cluttered than it should.
Blender’s basic tools offer some help, but they often mean fiddling with adjustments that take time and can lead to mistakes. The View Keeper steps up by letting you store all your camera views in one camera. It’s a centralized setup that cuts down on mess and lets you pull up any view instantly, settings and all. It’s about making your work easier and your renders sharper, so you can focus on creating instead of fixing.

What is Camera View Preservation?
Camera view preservation is all about saving your camera’s exact setup position, angle, and settings so you can pull it back whenever you need it in your Blender project. It’s a lifesaver for complex scenes where you’ve got multiple shots that need to stay just right. With this approach, you don’t have to keep repositioning your camera or resetting settings by hand every time you want that perfect view again.
Key Components of Camera View Preservation
Here’s what goes into preserving your camera views and why it matters for your work.
- Camera Position and Orientation: This locks in where your camera sits and how it’s angled in your 3D scene. You’ll know your composition stays spot-on, even if you step away and come back later.
- Camera Settings: Things like focal length and depth of field get saved too. It’s how you keep every render looking the way you want, without tweaking the same details over and over.
- Post-Processing Effects: Any extra touches like color grading or bloom that shape your final image can be stored with the view. That means your renders stay consistent, no guesswork needed.
- View-Specific Configurations: Each view you save is its own thing. You can flip between different setups without starting from scratch, cutting down on time and slip-ups.
By preserving your camera views, you’re setting yourself up to work smarter. It’s about keeping your shots steady and your process smooth, so you can focus on creating instead of fiddling with the basics.
Why Choose The View Keeper for Camera View Preservation?
When it comes to saving and managing your camera views in Blender, The View Keeper goes beyond what the built-in tools can do. It’s designed to make the process smooth, reliable, and tailored to what you need. Here’s why it’s the smart choice for keeping your camera setups in check.
Reduced Scene Clutter
With The View Keeper, you can store all your camera views in just one camera no need to duplicate a bunch of them. That means your scene stays cleaner and less crowded, so you can find what you need without wading through a mess. It’s a simple way to keep your workspace organized and easy to handle.
Instant Recall of Saved Views
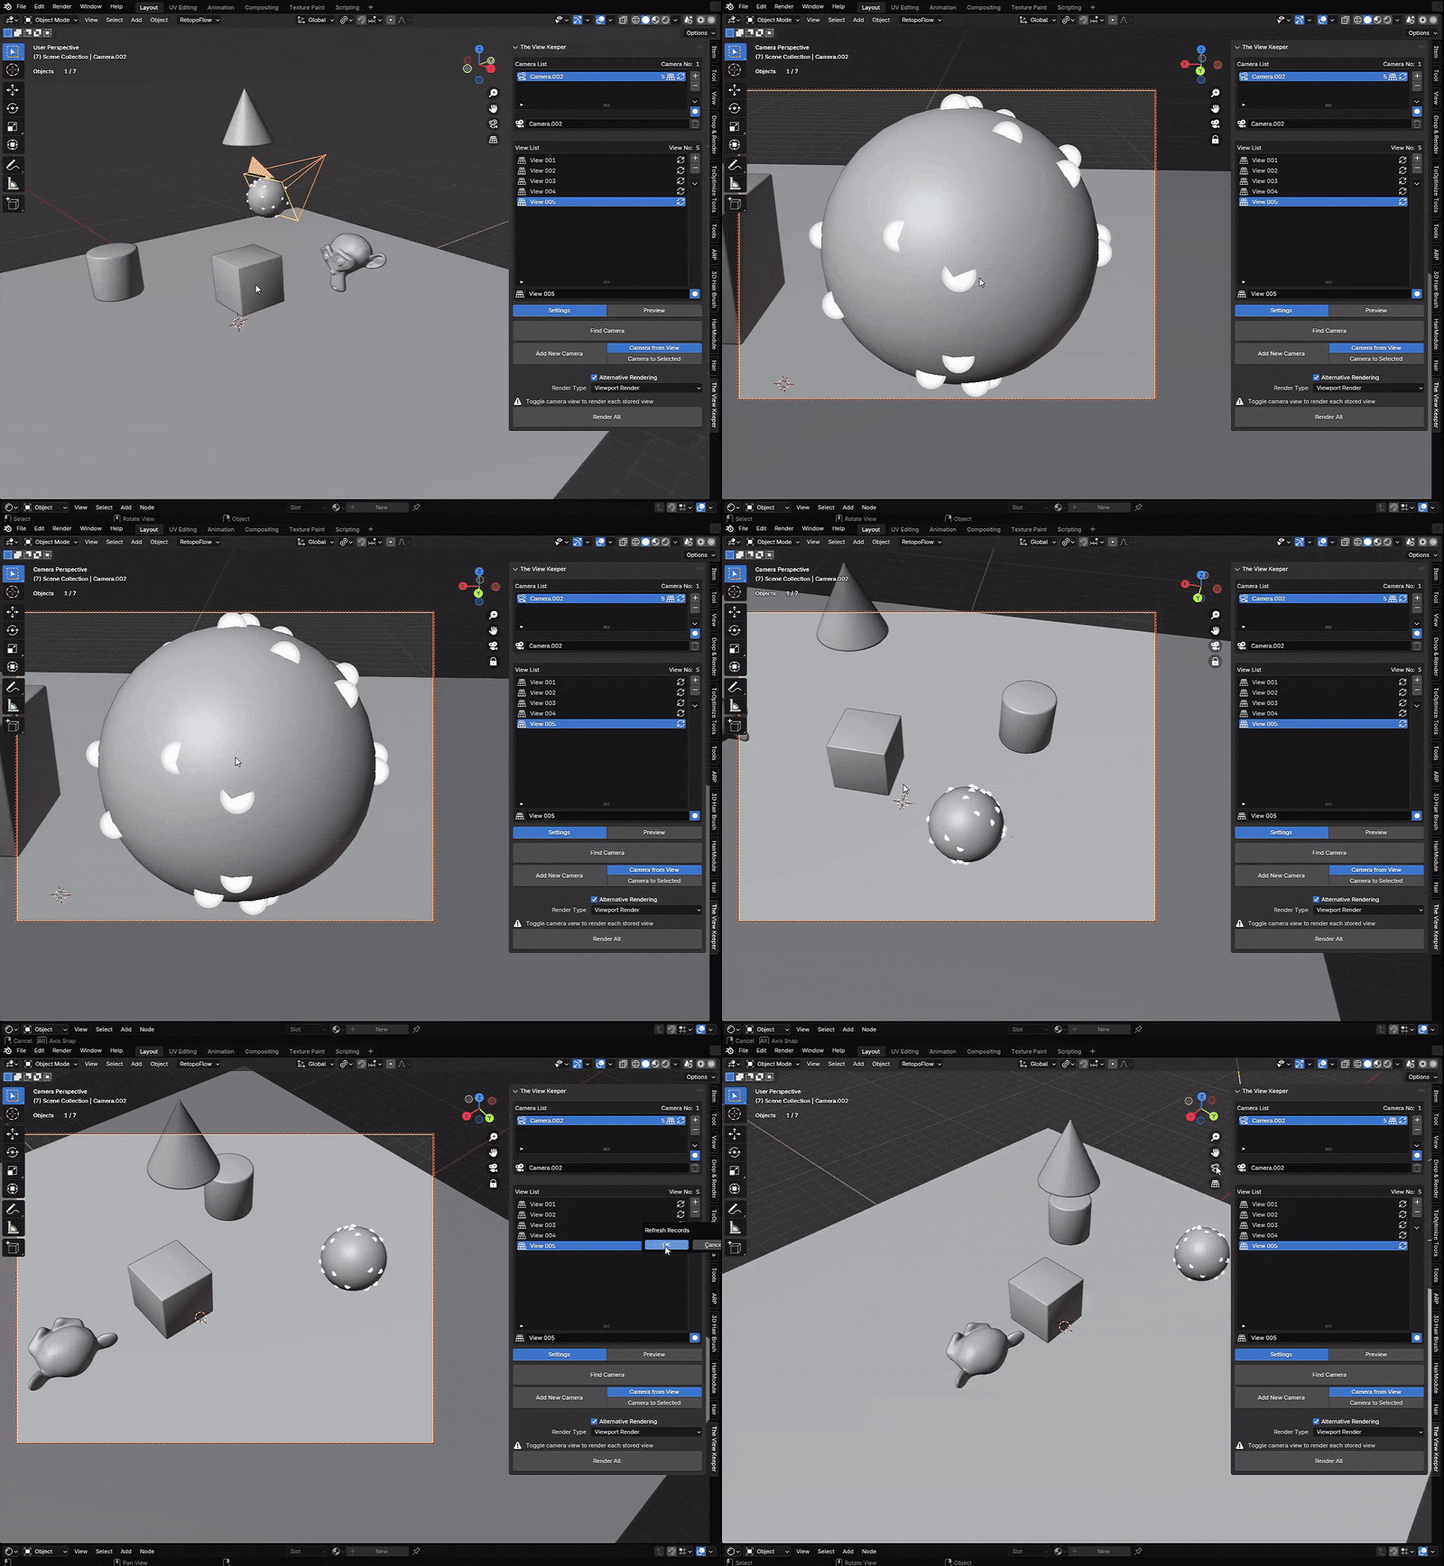
Once you save a view in The View Keeper, bringing it back is as quick as a click. You won’t have to waste time repositioning your camera or resetting settings by hand. Being able to switch between views that fast keeps your workflow moving, especially when you’re tweaking and testing ideas.
Consistency Across Renders
Every view you save keeps its own settings locked in, so your renders come out exactly how you planned them. Whether you’re going for a high-res animation or a quick preview, you’ll get the same quality every time. That kind of consistency is a big deal when you’re aiming for a polished, professional finish.
Time Savings
The View Keeper takes the tedious setup out of your hands by automating how you save and recall views. Instead of juggling multiple cameras and fiddling with settings for each shot, you manage it all in one spot. That frees up more time for you to dive into the creative parts of your project.
Enhanced Flexibility
No matter what you’re working on animations, architectural visuals, product designs The View Keeper adapts to your needs. You can save different camera setups and render settings that fit your project perfectly, giving you the flexibility to switch gears without missing a beat.
Choosing The View Keeper means choosing a tool that simplifies your process and boosts your results. It’s about working smarter, keeping things steady, and giving you room to focus on what you love to create.

Key Features for Camera View Preservation
The View Keeper is loaded with tools that tackle the trickiest parts of saving and managing camera views in Blender. It’s built to make your life easier, and here’s a closer look at what it brings to the table and how it helps you get the job done.
Multiple Views in One Camera
The heart of The View Keeper is how it lets you save tons of camera views inside a single camera. Instead of adding a new camera for every angle, you store each perspective called a view record in one neat interface. It’s a smart way to keep your scene tidy and your work flowing.
Benefits:
- Clutter Reduction: Fewer cameras mean less chaos in your scene.
- Centralized Management: Everything’s right there in one spot for you to find.
- Simplified Switching: Flip between views with just a click.
View-Specific Render Settings
Each view you save can have its own render settings, locked in and ready to go. Whether you want a high-res cinematic shot or a close-up with a specific depth of field, The View Keeper keeps those details tied to the view no manual resets needed.
Benefits:
- Customization: Adjust resolution, aspect ratio, or focal length to fit each shot.
- Consistency: Pull up the same settings every time for steady quality.
- Flexibility: Switch between different looks without extra work.
Quick and Seamless Camera Switching
Switching between your saved views is a breeze with The View Keeper just click, and you’re there, settings and all. It’s especially great for animations where you need smooth, precise camera changes without slowing down.
Benefits:
- Rapid Iteration: Try out angles fast to find what works best.
- Smooth Workflow: Skip the hassle of keyframing every switch.
- Enhanced Creative Control: Keep your focus on the story, not the tech.

Batch Rendering Capabilities
Forget rendering one view at a time The View Keeper’s batch rendering lets you process all your saved views in one session. It’s a faster, cleaner way to get your shots done, all under the same conditions.
Benefits:
- Time Efficiency: Knock out multiple renders at once.
- Uniformity: Every view comes out consistent and polished.
- Streamlined Post-Production: Outputs are ready and easy to handle.
Automation Tools for Updating Camera Records
The View Keeper takes care of the busywork with tools like “Find Camera” and “Refresh Camera Records.” They spot your camera and update your saved views automatically whenever you tweak something, so you’re always working with the latest setup.
Benefits:
- Error Reduction: Less chance of slip-ups creeping in.
- Efficiency: Keeps things current without extra effort from you.
- Reliability: Your views stay accurate and trustworthy.
Customization Options and Seamless Integration
The View Keeper fits right into Blender’s N-panel, feeling like it’s always belonged there. You can tweak it to your liking think hotkeys, labels, or presets so it works just how you want it to, without getting in your way.
Benefits:
- User-Friendly: Easy to pick up and use right away.
- Adaptability: Shape it to match your workflow.
- Seamless Workflow: Blends into Blender, keeping your rhythm steady.
With these features, The View Keeper gives you a practical, powerful way to preserve your camera views. It’s all about saving you time, keeping things organized, and letting you focus on what you’re creating.
Benefits for Different Types of Blender Projects
The View Keeper’s knack for preserving camera views can make a real difference, no matter what kind of Blender project you’re tackling. It’s a tool that adapts to your needs, and here’s how it pays off across different fields complete with examples to show you how it works in action.
Animations
If you’re an animator, you know how much consistent camera angles matter for keeping your story flowing and your visuals on point. The View Keeper lets you save all your camera views and switch between them easily as you build your animation. You’ll keep every frame looking just how you want it, even as your scene shifts and grows.
Example: Picture yourself working on a short film. You save views for wide establishing shots, medium tracking shots, and close-ups in The View Keeper. Switching between them is a snap, so you can tweak your storytelling without getting bogged down in setup details.
Architectural Visualizations
When you’re showing off a building or space, you need shots from all angles to bring the design to life. Normally, that might mean piling up cameras for exteriors and interiors, but The View Keeper keeps it simple by storing everything in one spot, each view with its own perfect settings.
Example: Imagine a studio designing a sleek office. They save views for the façade, interior rooms, and material close-ups. Batch rendering through The View Keeper churns out a crisp, consistent set of images ready to impress clients with a polished look.
Product Designs
For product designers like you, showing every side of your creation is key to spotlighting its features. Whether it’s a tight shot of details or a broader view for context, The View Keeper manages all those angles in one camera, with settings tailored to each.
Example: Say you’re a freelancer modeling a new smartphone. You save different views in The View Keeper each set up to highlight the device’s best bits. It keeps your scene clean and lets you batch render a slick set of images fast, perfect for marketing.
Virtual Reality (VR) Projects
Building a VR experience means covering every angle for that full 360-degree immersion. The View Keeper pulls all your camera views into one easy interface and handles switching automatically, so every render comes out steady and smooth just what VR needs.
Example: A VR team uses The View Keeper to save views for a virtual space. With batch rendering, they get uniform outputs for every perspective, creating a seamless environment that pulls users right in.

Social Media Content Creation
If you’re making content for social media, you’re juggling formats like square for Instagram, widescreen for YouTube, or vertical for TikTok. The View Keeper lets you save views with settings tweaked for each platform, so your content’s ready to go without extra hassle.
Example: Think of an influencer crafting an animated post. They save views for each format in The View Keeper, and batch rendering pumps out high-quality clips tailored to every channel keeping their online game strong and consistent.
Step-by-Step Guide: Installing and Setting Up The View Keeper
Adding The View Keeper to your Blender setup is easier than you might think, and it’ll quickly become a key part of your workflow. Here’s a clear, step-by-step guide to get you started, from downloading it to rendering your shots.
Step 1: Downloading and Installing The View Keeper
First things first, you’ll need to grab The View Keeper and get it into Blender.
- Download the Add-On: Head to the official developer website or Blender Market and snag the latest version. Make sure it matches your Blender release so everything works smoothly.
- Open Blender: Fire up Blender on your computer.
- Access Preferences: Click Edit > Preferences from the top menu.
- Go to the Add-ons Tab: In the Preferences window, find the Add-ons tab and click it.
- Install the Add-On: Hit the Install button, find the ZIP file you downloaded, select it, and click Install Add-on.
- Enable The View Keeper: Look for The View Keeper in the add-on list, then check the box next to it to turn it on. You’re good to go!
Step 2: Accessing and Setting Up The View Keeper Interface
Now that it’s installed, let’s get you familiar with where it lives and how to tweak it.
- Open the N-Panel: Press the N key in the 3D Viewport to pop open the side panel.
- Locate The View Keeper Tab: Scroll until you spot The View Keeper tab click it to see the interface.
- Familiarize Yourself: Take a quick look around. You’ll notice the Camera List Table where your saved views will show up.
- Configure Initial Settings: Set some defaults like render resolution or how you’ll name your views to fit your project right from the start.
Step 3: Saving and Managing Camera Views
Time to start saving those perfect camera angles you’ve been setting up.
- Position Your Camera: Move your camera in the scene until the shot’s just right adjust focal length, depth of field, or angle as needed.
- Save the View: In The View Keeper interface, click Add View to lock in that camera setup as a view record.
- Name Your View: Give it a name that makes sense to you, like “Cam_CloseUp” or “Exterior_Wide,” so you can find it fast later.
- Repeat as Needed: Keep saving more views for your project, each with its own settings dialed in.
Step 4: Customizing Render Settings
Here’s where you make sure each view renders exactly how you want it.
- Open Render Settings Panel: Jump to Blender’s Render Settings panel to tweak things like resolution or sampling.
- Assign Settings to Each View: Customize the settings for each saved view to match what that shot needs maybe high-res for a key frame or lighter for a preview.
- Save the Configuration: Link those settings to each view record in The View Keeper, so they kick in automatically when you switch views.

Step 5: Automating Camera Switching on the Timeline
If you’re animating, this step will save you tons of time with smooth camera switches.
- Plan Your Timeline: Figure out where in your animation you want the camera to change mark those key frames.
- Assign Views to Frames: In The View Keeper, tie each saved view to the right frames on your timeline. It’ll switch views for you as the animation runs.
- Test Transitions: Play it back to check the flow tweak the timing if a switch feels off until it’s seamless.
Step 6: Batch Rendering All Saved Views
When you’re ready to render, The View Keeper makes it quick and painless.
- Prepare for Batch Rendering: Double-check that all your views are saved with the right settings.
- Initiate Batch Rendering: Hit the batch rendering option in The View Keeper to process every view at once no waiting around.
- Organize Outputs: Set up specific folders or file formats so your renders land where you want them, neat and ready to use.
Best Practices for Camera View Preservation
To get the most out of The View Keeper and keep your camera views on point, a few smart habits can go a long way. These tips will help you work smoother, stay organized, and make your Blender projects shine. Here’s what you need to know.
Maintain Clear Naming Conventions
- Consistency is Key: Give your view records names that tell you exactly what they are like “Cam_Intro_Wide” or “Cam_Dialogue_CloseUp.” It’s a quick way to find what you need without second-guessing.
- Standardize Labels: Stick to a naming style across all your projects. You’ll save time and keep everything clear, no matter how many scenes you’re juggling.
Customize Render Settings Diligently
- Tailor Each View: Take a moment to tweak render settings like resolution or aspect ratio for each saved view. You’ll ensure every shot looks just right for what you’re aiming to show.
- Test Thoroughly: Run a quick render now and then to check your settings. It’s worth it to catch anything off before you’re deep into production.
Embrace Batch Rendering
- Time Savings: Use batch rendering to process all your views at once it’s a huge time-saver, especially when deadlines are tight.
- Uniform Output: Rendering everything together keeps your shots consistent, so your project feels polished from start to finish.
Leverage Automation Tools
- Reduce Manual Work: Let tools like “Find Camera” and “Refresh Camera Records” handle the updates for you. It’s less fiddling and more creating.
- Stay Current: Keep your saved views in sync with any camera changes. You’ll avoid surprises and keep your renders true to your setup.
Keep Your Workspace Organized
- Minimize Clutter: Every so often, clear out view records you don’t need anymore. A clean scene makes your work feel less cluttered and more manageable.
- Enhance Productivity: When your workspace is tidy, you can zero in on the creative stuff instead of digging through a mess.
Plan Your Camera Transitions
- Smooth Flow: Think ahead about how your camera should move, then use keyframes to link your saved views. You’ll get transitions that pull your story together naturally.
- Storyboard: Sketch out a quick plan of where switches happen. With The View Keeper, setting them up becomes fast and spot-on.
Experiment and Iterate
- Test Variations: Save a few takes of the same shot to see what works best. Comparing them helps you land on something even better than you first thought.
- Innovate: Play around with new angles or settings The View Keeper makes it easy to try things out and spark fresh ideas.
Collaborate Effectively
- Share Settings: Working with a team? Show off your camera setups through The View Keeper’s interface so everyone’s on the same page.
- Streamline Revisions: Clear, shared settings cut down on back-and-forth, keeping your project moving forward with less hassle.
With these practices, The View Keeper becomes more than a tool it’s your partner in keeping your camera views sharp and your workflow steady. You’ll save time, boost quality, and have more room to let your creativity run.
FAQ
- What does “preserving camera views” mean in Blender?
It means saving your camera’s exact setup its position, angle, and settings so you can recall the perfect shot anytime without redoing the work. - How does The View Keeper add-on improve camera view preservation?
The View Keeper stores multiple camera views as records within a single camera, letting you instantly recall setups and lock in unique render settings. - Why is preserving camera views important for 3D projects?
It keeps your compositions consistent, reduces errors, and speeds up your workflow by eliminating the need to manually reposition cameras for every shot. - What are the benefits of using The View Keeper to manage camera views?
It minimizes scene clutter, ensures render consistency, saves time, and streamlines switching between different camera setups. - How do I save a camera view using The View Keeper?
Simply position your camera, open The View Keeper panel in Blender’s N-panel, click “Add View,” and give the view a descriptive name. - Can I customize render settings for each saved view?
Yes you can assign specific settings like resolution, aspect ratio, and post-processing effects to each view record so every shot is optimized. - How does The View Keeper help reduce scene clutter?
By consolidating all your camera setups into one camera instead of duplicating multiple cameras, your scene remains neat and easy to navigate. - What is batch rendering and how is it used in The View Keeper?
Batch rendering lets you process all saved camera views in one go, ensuring consistent quality across your project while saving you valuable time. - How does The View Keeper enhance workflow for various projects?
It works for animations, architectural visualizations, product designs, VR projects, and social media content by enabling quick, precise camera switches and uniform renders. - What best practices should I follow when using The View Keeper?
Maintain clear naming conventions, customize render settings for each view, use batch rendering, leverage automation tools for updates, and keep your workspace organized.

Conclusion: Why Embracing The View Keeper is Essential
Optimizing camera settings and preserving camera views in Blender is not just a technical necessity it’s a vital component of creating high-quality, consistent 3D projects. Traditional methods of duplicating cameras and manually adjusting settings often lead to cluttered scenes, wasted time, and increased errors. The View Keeper transforms this process by providing an efficient, centralized solution for managing multiple camera views within a single camera object.
With features like view-specific render settings, seamless camera switching, and batch rendering, The View Keeper ensures that every shot is rendered with precision and consistency. It streamlines workflows, reduces scene clutter, and frees up valuable time so you can focus on the creative aspects of your project.
Whether you are working on animations, architectural visualizations, product designs, VR experiences, or social media content, The View Keeper is an indispensable tool that enhances productivity and maintains high standards across your renders. Its seamless integration with Blender’s native tools and its powerful automation features make it a must-have for any serious 3D artist.
Looking ahead, the future of camera management in Blender is bright. With anticipated advancements in keyframe animation, dynamic render settings, enhanced automation, and collaborative features, The View Keeper is poised to remain at the forefront of 3D production technology. Embracing this tool now not only optimizes your current workflow but also prepares you for future innovations that will further streamline your creative process.
In conclusion, if you are dedicated to achieving professional-quality renders and maximizing your efficiency in Blender, integrating The View Keeper into your workflow is essential. It revolutionizes camera view preservation by allowing you to save, manage, and recall multiple camera configurations with ease. By reducing scene clutter and automating key processes, The View Keeper empowers you to focus on what truly matters bringing your creative vision to life.
Recommended
The Ultimate Guide to the Most Popular Black Hairstyle Options
Redefining Representation: Authentic Black Hairstyles in Video Games
The Ultimate Guide to Hair for Games: Techniques, Tools, and Trends
