


Getting hair right for your 3D characters in Blender is a big deal it’s what can take your work from decent to jaw-dropping. Whether you’re animating a character with personality or rendering a still that pops, hair’s the detail that pulls it all together. Doing it the old-school way with Blender’s particle system can feel like a slog tons of tweaking, tech know-how, and time you might not have. But with PixelHair, a slick asset pack made just for Blender, you’ve got a faster, easier way to nail that pro-level look. This guide’s your step-by-step roadmap to customizing PixelHair assets for any character, saving you effort while keeping the quality high.
Introduction: The Art and Science of Hair Creation
Hair’s not just a topping for your characters it’s what gives them life, depth, and that real-deal vibe. But let’s be honest: making hair in Blender is no walk in the park. It’s a mix of art and tech, with strands that need to flow, catch light, and look naturally messy in just the right way. Going manual with Blender’s particle system is powerful, sure, but it’s a grind steep learning curve, endless adjustments, and a time sink that can test your patience.
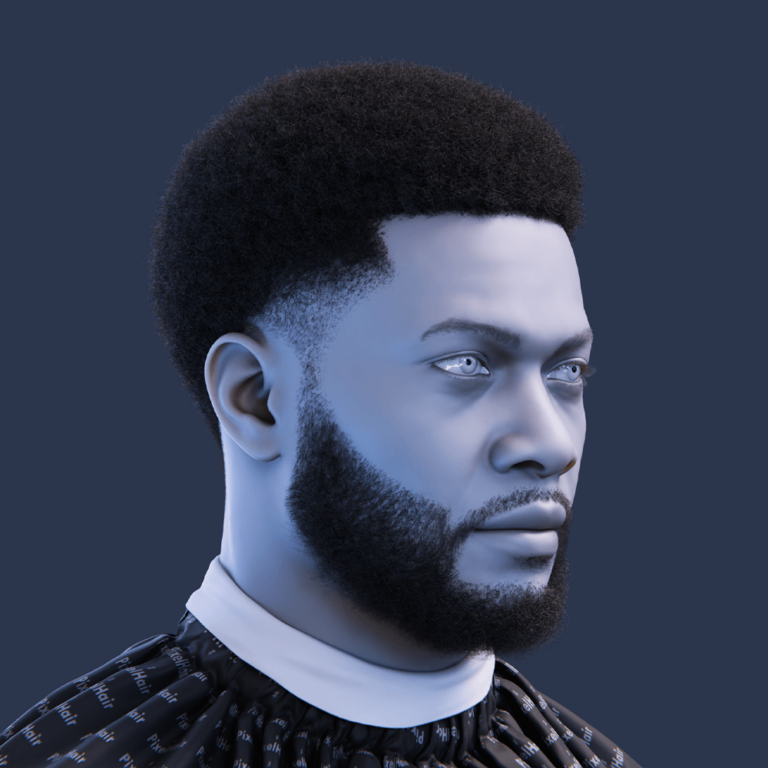
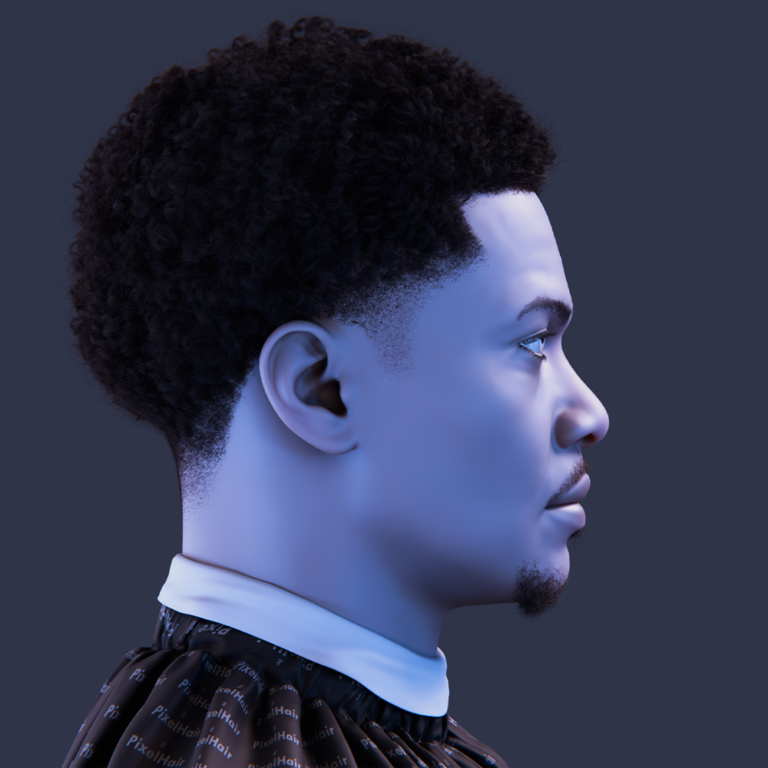
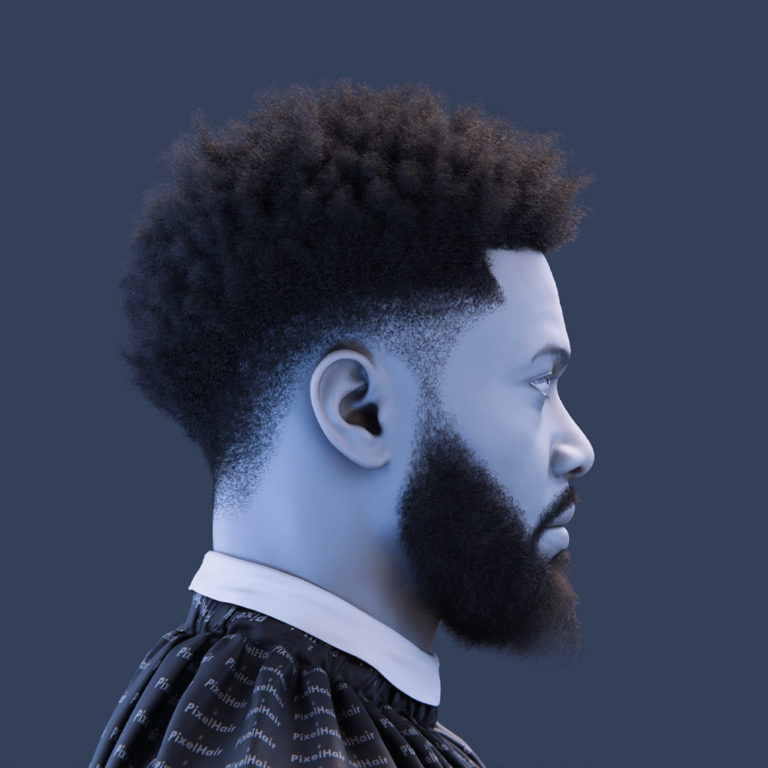
That’s where PixelHair steps in to shake things up. Designed specifically for Blender, this asset pack hands you a stash of pre-made, strand-based hair that’s ready to roll. It’s versatile enough for humans, animals, or even your wildest fantasy creatures, and it’s built to get you realistic results without the headache. In this guide, we’ll walk you through importing PixelHair into your project, tweaking everything from length and style to color and movement, and polishing it to fit your vision. Plus, we’ll stack it up against manual grooming and toss in some tips to keep your workflow smooth. You’re about to make hair a strength, not a struggle.

Step 1: Importing PixelHair Assets
Ready to get started with PixelHair? The first step is importing those slick hair assets into your Blender project it’s quick, simple, and sets you up for all the customizing ahead. Here’s how to pull it off smoothly and get your character’s hair rolling.
Getting Started
- Open Your Blender Project
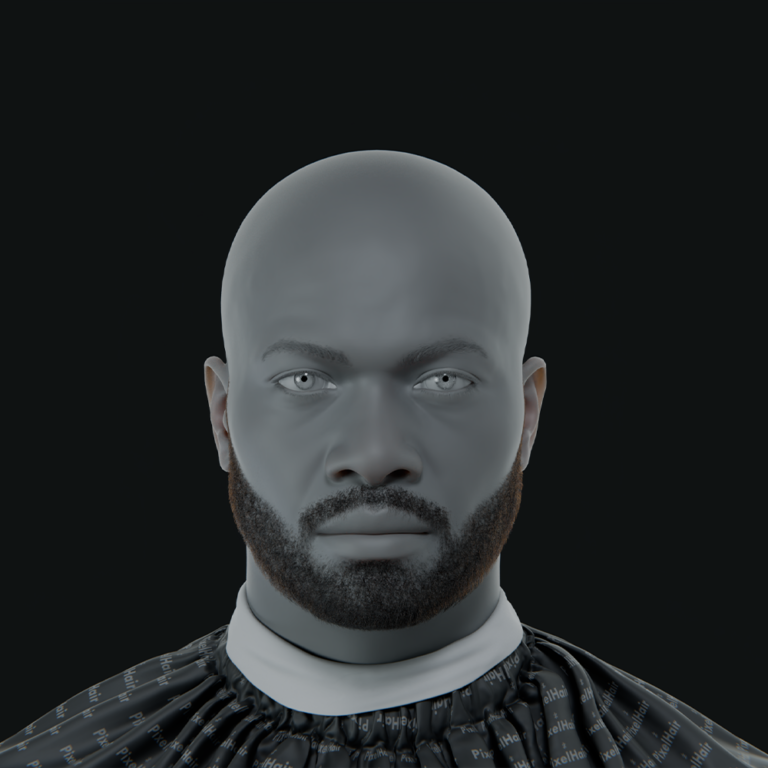
Fire up Blender and load the project with your 3D character. Make sure your model’s all set rigged, posed, whatever it needs so the hair’s got a solid base to land on. - Navigate to the Append Menu
Head to the top menu and click File > Append. This is your way of pulling in stuff from other Blender files in this case, the PixelHair assets you’re after. - Locate the PixelHair Library
A file browser pops up, go to where your PixelHair asset pack lives on your computer. The assets are sorted into neat categories, so you can zero in on the hairstyle for your character without digging too deep. - Select and Append an Asset
Found the one? Double-click the file, pick the object or collection you want usually the hair itself and hit Append. Boom, that hair asset’s now in your scene, ready to work with.
Tips for a Smooth Import
- File Organization
Keep your PixelHair pack tidy on your drive maybe a dedicated folder or clear labels. It’ll save you time when you’re looking for the hair asset. - Backup Your Project
Before you bring in anything, save a backup of your project. It’s a quick safety net if something glitches, you can jump back without a sweat.
With PixelHair imported, you’ve got the foundation laid now it’s yours to shape. It’s a straightforward start that gets you into the fun part fast, so your character’s hair can start taking form.
Step 2: Adjusting Hair Length and Density
After importing your PixelHair asset, the next step is to adjust the basic parameters of the hair to fit your character’s design. PixelHair assets come with adjustable settings that allow you to fine-tune the hair length and density.
Modifying Hair Length
- Select the Hair Object:
In your scene, click on the PixelHair object to select it. - Access Particle Properties:
With the hair object selected, navigate to the Particle Properties tab. Here, you will see options related to the hair particle system. - Adjust the Hair Length:
Use the Hair Length slider to modify the length of the hair. Depending on your character’s design, you might need longer hair for a dramatic effect or shorter hair for a more practical style.
Adjusting Hair Density
- Modify the Number of Hairs:
In the same Particle Properties tab, locate the Number slider. This setting controls how many individual hairs are generated. - Experiment with Density:
Increase or decrease the number of hairs to achieve the desired fullness. For a voluminous look, higher values are preferable, while a more subtle style might require fewer strands.
Best Practices for Length and Density
- Test in Renders:
Adjust the settings and perform quick test renders to see how changes in length and density affect the overall look. - Balance with Dynamics:
Consider how hair dynamics will interact with your chosen density. Very high density might slow down simulations, so balance is key.

Step 3: Styling the Hair
Once you’ve set the basic parameters, it’s time to style the hair. This is where Blender’s grooming tools come into play, allowing you to shape and refine the PixelHair asset to perfectly match your character’s personality and design.
Entering Particle Edit Mode
- Switch Modes:
With the hair object selected, change the interaction mode from Object Mode to Particle Edit Mode. This mode gives you access to various grooming tools specifically designed for hair. - Familiarize Yourself with the Tools:
In Particle Edit Mode, you’ll have a range of tools such as Comb, Cut, Smooth, and Add. Each tool serves a specific purpose in shaping and refining the hair.
Using the Grooming Tools
- Comb Tool:
Use the Comb tool to direct the flow of hair. Adjust the brush size and strength for finer control, ensuring that the hair falls naturally. - Cut Tool:
The Cut tool is useful for trimming excess hair or creating sharper, more defined shapes. It allows you to remove strands that do not contribute to the desired look. - Smooth Tool:
If the hair appears too rough or unruly, the Smooth tool can be used to even out the strands, resulting in a more polished and natural appearance. - Add Tool:
For adding extra strands or filling in gaps, the Add tool comes in handy. It gives you the ability to fine-tune the overall volume and density of the hair.
Tips for Effective Grooming
- Work Slowly and Methodically:
Hair grooming is a delicate process. Work on small sections of the model at a time to ensure even styling. - Regularly Toggle Between Modes:
Switch back to Object Mode to review your work from different angles, then return to Particle Edit Mode for further refinements. - Experiment with Brush Settings:
Adjust the brush size and strength to find the right balance for your character’s hair. Different areas of the head may require different settings.
Step 4: Changing Hair Color
Color is a powerful element in hair creation. It can dramatically affect the mood and realism of your character. With PixelHair, you have the flexibility to customize hair color to perfectly match your artistic vision.
Adjusting Hair Material
- Open Material Properties:
Select the hair object and navigate to the Material Properties tab in Blender. - Select the Hair Material:
PixelHair assets come with pre-assigned materials that are optimized for realistic hair rendering. Select the material that is applied to your hair object. - Adjust the Base Color:
In the Principled Hair BSDF shader, modify the Base Color to match the desired hair tone. This could range from natural shades like blond, brunette, or red to more stylized colors. - Experiment with Roughness and Specular Settings:
Tweak the Roughness and Specular parameters to control how light interacts with the hair. These adjustments can add shine or matte effects, enhancing the overall realism.
Tips for Perfecting Hair Color
- Use Reference Images:
Refer to high-quality images of real hair to guide your color adjustments. - Layer Colors:
Consider using multiple layers or gradients to add depth and variation to the hair color. - Test Under Different Lighting:
Render your scene under various lighting conditions to ensure the hair color looks natural and consistent.

Step 5: Adding Hair Dynamics
For animations, static hair won’t cut it. To bring your character to life, the hair must move naturally, responding to the forces of gravity, wind, and character movement. Blender’s hair dynamics enable you to simulate this realistic motion.
Enabling Hair Dynamics
- Access Particle Properties:
With your hair object selected, go back to the Particle Properties tab. - Enable Hair Dynamics:
Find and enable the Hair Dynamics option. This activates Blender’s physics simulation for your hair. - Adjust Dynamics Settings:
Tweak parameters such as Stiffness, Damping, and Mass to control the hair’s behavior. These settings determine how the hair responds to movement, ensuring that it flows and reacts in a natural manner.
Best Practices for Simulating Dynamics
- Start with Default Settings:
Begin with the default dynamics settings and then adjust incrementally based on your scene’s needs. - Simulate Small Movements:
Test the dynamics on a small section of the hair first before applying changes to the entire asset. - Iterate and Refine:
Hair dynamics can be unpredictable. Regularly test and tweak settings until the hair moves convincingly in your scene.
Step 6: Fine-Tuning Details for Realism
Once you have the basic hair system set up, styled, colored, and animated, the final step is to refine the details. Fine-tuning is what transforms good hair into great hair, adding those subtle imperfections that make it look entirely natural.
Using Children Settings
Blender allows you to generate child particles that add extra strands around the parent hair, giving the appearance of fullness and natural variation.
- Adjust Children Amount:
In the Particle Properties tab, increase the Children Amount to add more strands to your hair. - Set Interpolation and Clumping:
Fine-tune the Interpolation and Clumping settings to control how the child hairs are distributed. Clumping helps mimic the natural grouping of hair strands. - Introduce Noise:
Add a slight amount of Noise to introduce natural imperfections. This randomness is key to avoiding an overly uniform or artificial look.
Additional Refinements
- Manual Adjustments in Particle Edit Mode:
After enabling children settings, return to Particle Edit Mode to manually adjust any areas that look too uniform or out of place. Use the comb and smooth tools for further refinement. - Texture Enhancements:
Enhance the final look by tweaking textures and materials once the dynamics and children particles are set. This can involve subtle color shifts or adjusting the roughness to better capture the light.

Why Choose PixelHair for Your 3D Characters?
While mastering hair creation manually in Blender is a valuable skill, many artists choose to use specialized asset packs like PixelHair to streamline the process and achieve professional-quality results faster. Here’s why PixelHair stands out:
High-Quality Assets
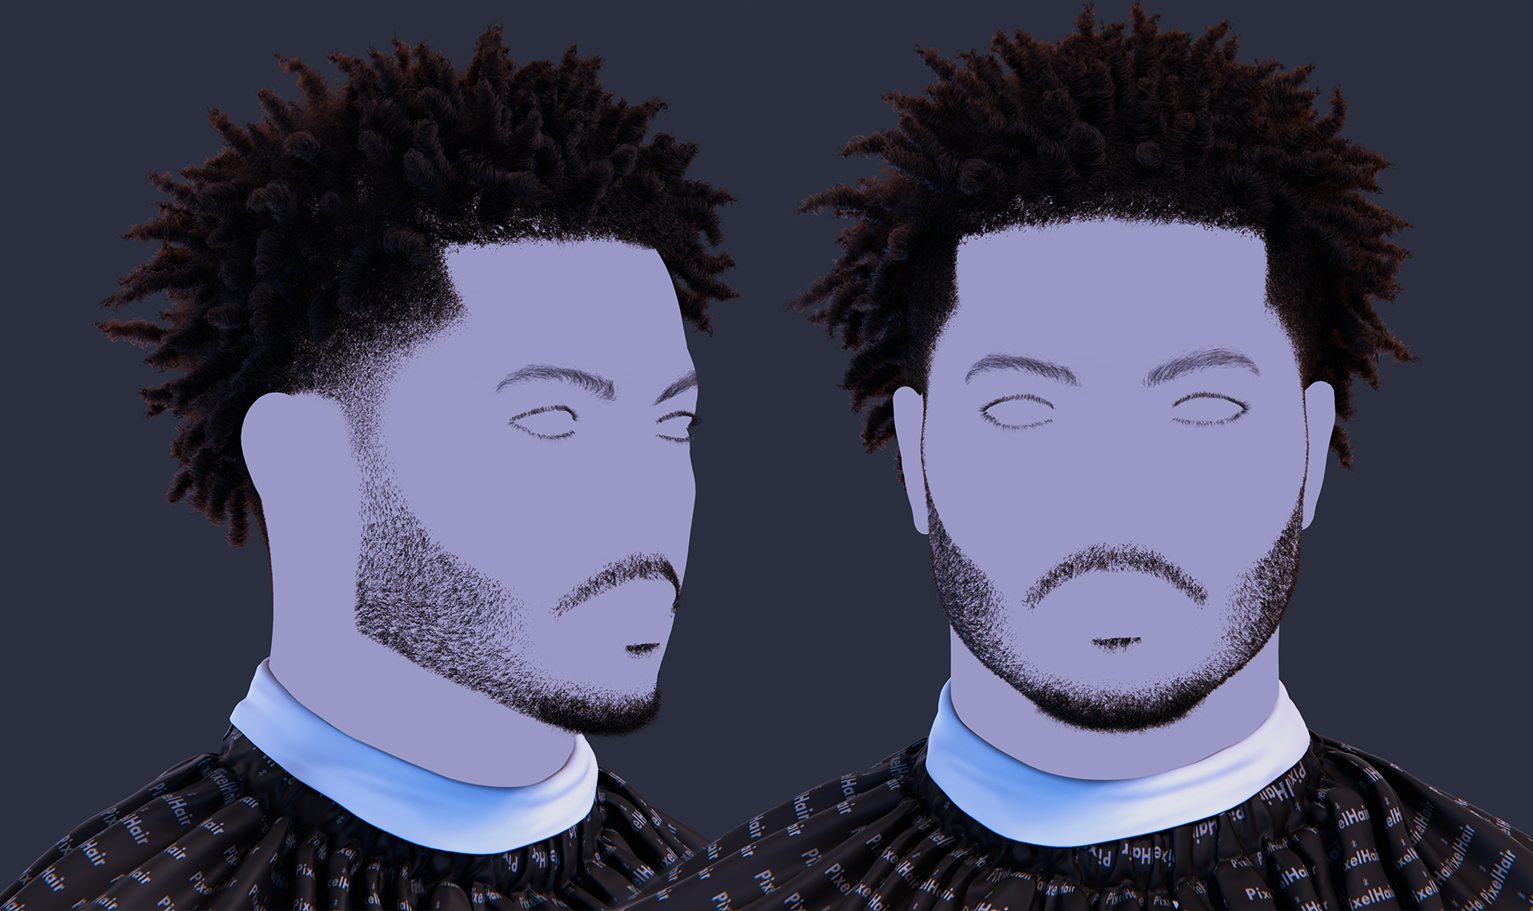
PixelHair offers a vast library of strand-based hair assets that are crafted with meticulous attention to detail. Each asset is designed to be realistic, ensuring that every strand behaves naturally and looks stunning in renders.
Customizable and Versatile
PixelHair assets are fully customizable. You can adjust hair length, density, color, and dynamics to perfectly match your character’s style. This versatility makes PixelHair suitable for a wide range of projects from human characters and animals to fantasy creatures.
Time-Saving Efficiency
By providing ready-made hair assets, PixelHair significantly reduces the time required to create realistic hair. Instead of spending hours building hair systems from scratch, you can import an asset, make minor tweaks, and achieve high-quality results quickly. This efficiency is particularly valuable for projects with tight deadlines.
Seamless Integration with Blender
PixelHair is optimized for Blender, meaning it integrates seamlessly with Blender’s native particle and hair grooming tools. This ensures that you can easily incorporate PixelHair into your existing workflow without compatibility issues or a steep learning curve.
Consistent and Reliable Results
Using PixelHair ensures a consistent base level of quality across your projects. This is particularly important in professional settings where uniformity in hair rendering can make a significant difference in the final output.
Practical Applications: Bringing Your Characters to Life
PixelHair is not just about saving time it’s about elevating the visual quality of your projects. Here are some practical applications where PixelHair truly shines:
Animations and Character Renders
For character animations, realistic hair is crucial for conveying emotion and personality. PixelHair assets provide lifelike hair that moves naturally during animations, ensuring that your characters are both visually appealing and believable.
Example:
An animator working on a feature film uses PixelHair assets to quickly apply realistic hairstyles to multiple characters. The high-quality textures and dynamic properties of PixelHair assets help create lifelike movement that enhances the overall narrative.
Game Asset Creation
In game development, efficiency and quality are paramount. PixelHair assets allows game artists to create realistic hair assets that can be used across multiple characters and environments. The pre-made assets ensure that every character has high-quality hair without the need for extensive manual work.
Example:
A game studio integrates PixelHair assets into their character design pipeline, ensuring that all characters have consistent, high-quality hair that performs well in real-time environments.
Product Design and Advertising
For product designers, realistic hair can be an essential element in marketing materials whether it’s for fashion models or other organic elements that complement a product. PixelHair assets provides detailed hair assets that enhance the overall presentation and make products stand out.
Example:
A freelance 3D artist uses PixelHair assets to create stunning visuals for a new fashion line. The realistic hair adds an extra layer of detail to the renders, helping to capture the product’s essence and attract potential buyers.
Social Media Content and VR Experiences
Content creators for social media and VR experiences demand high-quality visuals that can be produced quickly. PixelHair’s efficiency and ease of use make it an ideal choice for these fast-paced environments.
Example:
A social media influencer employs PixelHair to create eye-catching, realistic hair assets for animated content tailored to platforms like Instagram and TikTok. The quick turnaround and consistent quality allow for rapid content production without sacrificing visual appeal.

Best Practices for Customizing PixelHair Assets
To make the most of PixelHair assets, it’s important to adopt best practices that ensure your assets are perfectly tailored to your character and project needs.
1. Plan Your Character’s Style
Before importing PixelHair assets, have a clear vision of your character’s look. Gather reference images and define the overall style whether it’s sleek and modern, wild and curly, or something entirely unique. This planning will guide your customization choices.
2. Import and Organize Your Assets
Keep your Blender project organized by creating dedicated collections or layers for your hair assets. This will help you manage multiple assets, especially when working on complex scenes with several characters.
3. Adjust Basic Parameters First
When you first import a PixelHair asset, focus on adjusting the basic parameters hair length and density. Use the Particle Properties tab to fine-tune these settings before moving on to more detailed customizations.
4. Use Particle Edit Mode Effectively
Switch to Particle Edit Mode to start grooming the hair. Utilize the comb, cut, and smooth tools to shape the hair according to your character’s design. Remember to adjust brush size and strength for finer control.
5. Customize Materials and Textures
Once the hair is styled, head over to the Material Properties tab. Use the Principled Hair BSDF shader to adjust the base color, roughness, and specular values. Experiment with textures to achieve a realistic look. Layering colors or using gradients can add depth and complexity.
6. Incorporate Hair Dynamics
For animated projects, enable Hair Dynamics in the Particle Properties tab. Adjust stiffness, damping, and mass so that the hair reacts naturally to movement. Test the dynamics with a simple animation and tweak as necessary for realism.
7. Fine-Tune with Children Settings
To add volume and natural variation, use the Children Settings to generate extra strands around the parent hair. Adjust clumping, interpolation, and noise to achieve a full, natural look.
8. Iterate and Test
Hair creation is an iterative process. Regularly render test images to evaluate how your customizations appear in different lighting and motion scenarios. Adjust settings as needed and don’t be afraid to experiment.
9. Combine Techniques for Unique Results
Don’t hesitate to blend techniques. While PixelHair assets offers a robust base, you can further enhance your assets with manual tweaks in Particle Edit Mode. This hybrid approach can yield unique results that stand out.
10. Document Your Workflow
Keep notes on the settings and techniques that work best for your character. This documentation will be invaluable for future projects, helping you replicate high-quality results quickly and efficiently.
Advanced Tips and Techniques
For artists looking to push the boundaries of what’s possible with PixelHair assets, here are some advanced techniques:
Using Modifiers for Additional Control
Apply modifiers like the Shrinkwrap Modifier to ensure that hair conforms perfectly to your character’s scalp. This can be especially useful for intricate hairstyles where precision is key.
Integrating with Other Asset Packs
Consider combining PixelHair assets with other asset packs or custom hair shaders to achieve unique visual effects. For example, using a combination of PixelHair and a custom shader might yield a stylized look that stands out in your project.
Leveraging Scripting and Automation
For power users, scripting in Blender can automate repetitive tasks. You might create scripts to quickly adjust hair settings across multiple characters or to batch process render settings. This can further speed up your workflow and ensure consistency.
Optimizing for Real-Time Rendering
If you’re working on interactive projects or VR experiences, optimize your hair settings for real-time performance. This might involve reducing particle counts or simplifying shaders without sacrificing too much detail.

FAQ
- What is PixelHair?
It’s an asset pack made for Blender that gives you ready-to-use, high-quality, strand-based hair assets no more starting from scratch. - Why does hair matter for 3D characters?
Hair adds life, depth, and realism to your characters, transforming decent renders into jaw-dropping visuals. - What’s the challenge with manual hair grooming in Blender?
Manual grooming means working with Blender’s particle system lots of tweaking, a steep learning curve, and a major time investment. - How does PixelHair simplify the process?
PixelHair offers pre-made hair assets that plug right into Blender, so you can import, customize, and get realistic results quickly. - How do I import PixelHair into my project?
Just use Blender’s File > Append menu to locate the PixelHair library, select the asset you need, and append it to your scene. - Can I adjust the hair length and density for Pixelhair Assets?
Yes you can tweak settings in the Particle Properties tab to get the perfect length and fullness for your character. - How do I style the imported Pixelhair Assets?
Switch to Particle Edit Mode and use tools like Comb, Cut, Smooth, and Add to shape and refine the hair to match your vision. - Is it possible to change the hair color of PixelHair Hair Assets?
Absolutely modify the hair material’s Base Color and other shader settings in the Material Properties for the look you want. - How do I add natural movement to the hair?
Enable Hair Dynamics in the Particle Properties and adjust parameters like stiffness and damping so the hair reacts naturally to movement. - Why choose PixelHair over manual grooming?
PixelHair saves time, delivers consistent high-quality results, and integrates seamlessly with Blender ideal for tight deadlines and professional work.
Conclusion: Transforming Your 3D Characters with PixelHair
Customizing PixelHair assets for any 3D character in Blender is a powerful way to achieve stunningly realistic hair with minimal effort. While manual hair grooming offers complete creative control, it is often time-consuming and requires a high level of technical skill. PixelHair, on the other hand, provides an efficient, high-quality solution that accelerates your workflow without sacrificing detail or realism.
By following the step-by-step guide outlined in this article, you can learn to import, adjust, and fine-tune PixelHair assets to perfectly suit your character designs. From setting up the hair system and adjusting basic parameters like length and density to styling, coloring, and adding dynamic simulations, every step is designed to help you master the art of hair creation. Advanced techniques, such as fine-tuning with children settings and integrating modifiers for extra control, further enhance the quality of your renders.
PixelHair’s versatility makes it an indispensable tool for a wide range of projects. Whether you are creating character animations, designing game assets, producing architectural visualizations, or generating content for social media, PixelHair offers the flexibility and quality you need to bring your 3D characters to life. The time-saving benefits are substantial allowing you to focus on creativity rather than repetitive technical adjustments and the high-quality results ensure that your work stands out in a competitive industry.
In conclusion, whether you choose to rely solely on PixelHair assets or blend it with manual grooming techniques for a bespoke touch, the ultimate goal is to create hair that is both realistic and expressive. By leveraging the power of PixelHair assets, you can achieve a level of detail and natural movement that elevates your entire project. So dive into the world of PixelHair, experiment with its features, and transform your 3D characters with hair that truly brings them to life.
Recommended
The Ultimate Guide to the Most Popular Black Hairstyle Options
Redefining Representation: Authentic Black Hairstyles in Video Games
The Ultimate Guide to Hair for Games: Techniques, Tools, and Trends