Managing multiple camera angles and settings in Blender can quickly become complicated, especially when working on detailed animations. Moving cameras, adjusting settings, and keeping shots consistent often lead to a crowded workspace and more chances for mistakes. In today’s fast-moving 3D production world, having a smooth workflow is key to meeting deadlines without losing quality.
That’s where The View Keeper add-on comes in. This tool is built to make camera management simple and save you time while working on Blender animations.
In this guide, we’ll go over the common challenges that come with handling multiple camera angles, explain how The View Keeper works, and break down its main features and benefits. We’ll also cover real-world uses, how to set it up in your projects, and share tips to help you get the most out of it so you can spend less time managing cameras and more time bringing your ideas to life.
The Challenges of Managing Camera Angles in Blender
Before seeing how The View Keeper can improve your workflow, it helps to understand the common challenges that come with managing camera angles in Blender. For animators and 3D artists, getting the perfect shot takes more than just placing a camera in a scene. It involves careful work with composition, lighting, and movement.
Complexity and Repetition
Most animation projects need more than one angle. You might need a wide establishing shot, close-ups on characters, and smooth tracking shots to follow the action. Usually, this means duplicating cameras and adjusting each one by hand to get the framing right. Doing this over and over takes up time and makes mistakes more likely. Even small differences in camera settings can throw off the flow of your final render.
Scene Clutter
As you add more cameras and test different angles, your Blender scene can start to feel crowded. Too many cameras make it harder to navigate and stay organized. This slows down your work, especially in bigger projects with complex animations.
Manual Render Settings
Different shots often need different render settings. One camera might be set up for high-quality output, while another is used for quick previews. Changing settings like resolution, aspect ratio, and file format for each camera can be repetitive and easy to mess up. Without a clear system to handle these changes, your final work can end up looking inconsistent.
Time Constraints
When you’re working under a tight deadline, time matters. Setting up and adjusting multiple cameras and rendering each shot takes a lot of it. Without a smooth process in place, technical tasks can start getting in the way of the creative work.

Introducing The View Keeper
The View Keeper is a Blender add-on built to solve the common problems that come with managing camera angles and render settings. It gives you one simple place to handle everything, making it easier to keep your scene organized and cut out the constant need to duplicate and adjust cameras.
What Is The View Keeper?
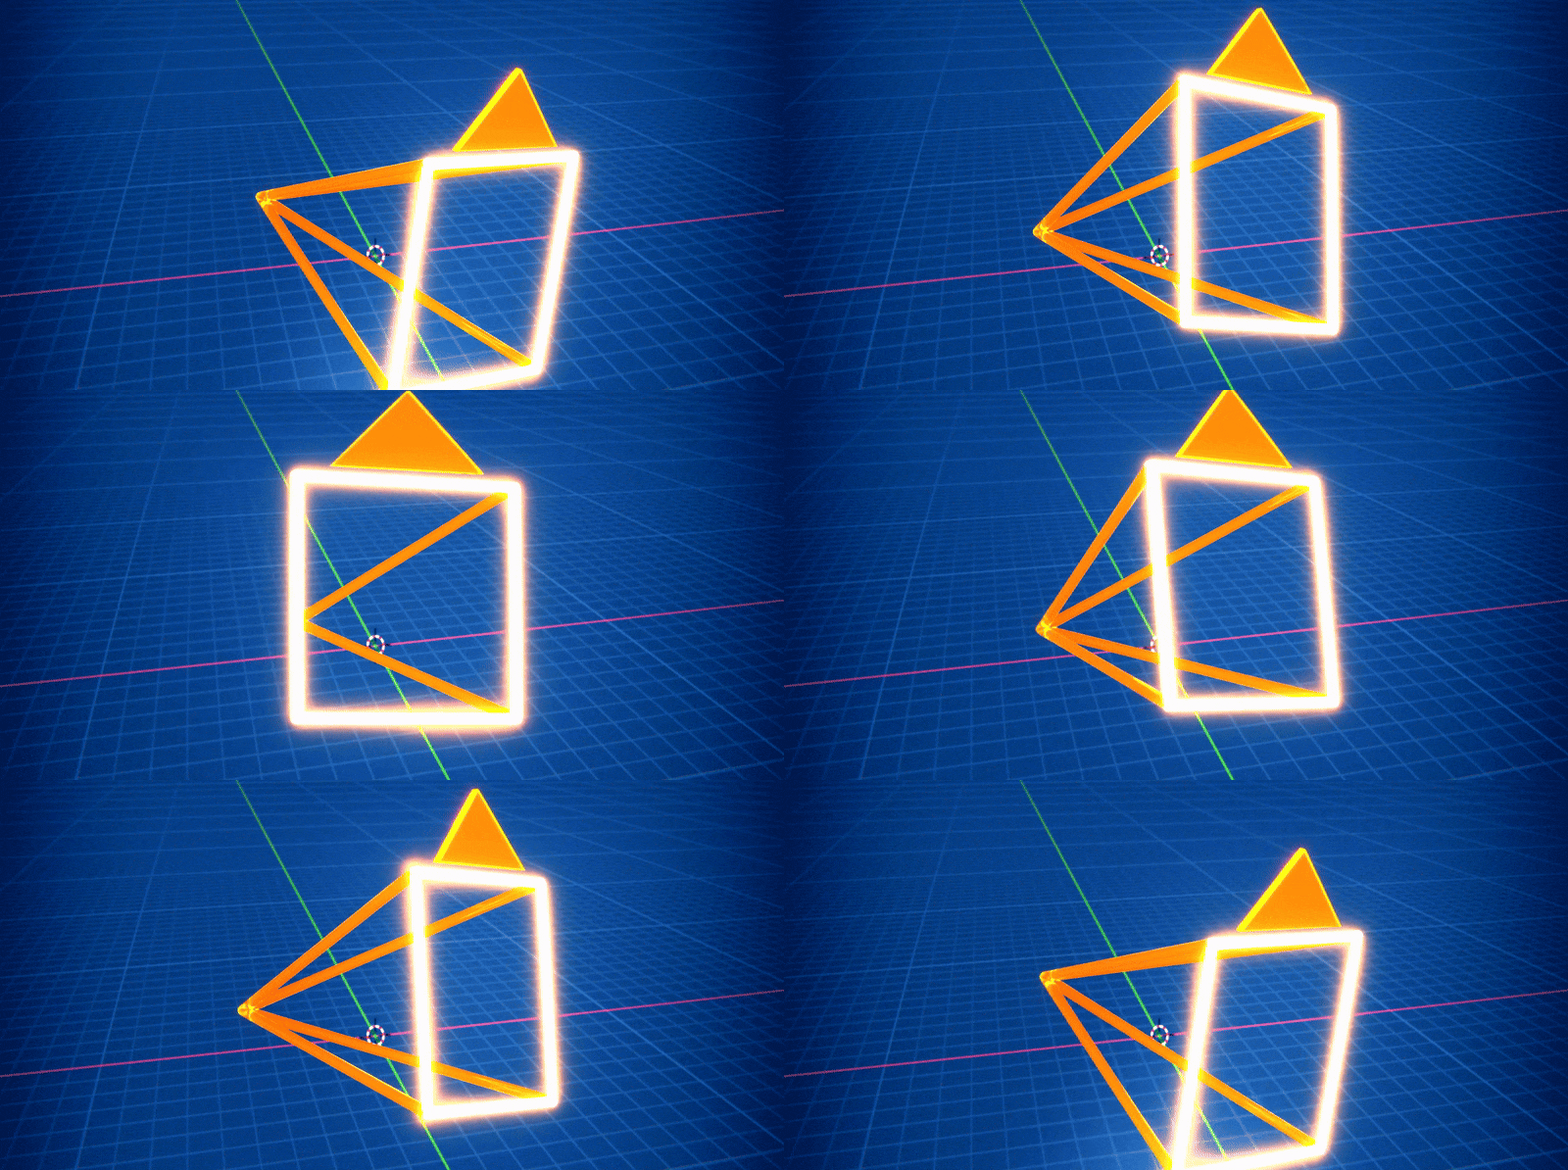
The View Keeper gives you more control over your cameras inside Blender. Instead of creating extra cameras for every shot, you can save multiple angles on a single camera, each with its own settings and composition. This makes it easy to switch between views and keep everything consistent, no matter how complex the project gets.
How It Works
When you save a camera view with The View Keeper, the add-on captures all the camera’s settings at that moment like focal length, depth of field, render resolution, and more and saves them as “records.” You can access these records from a dedicated panel inside Blender, where you can easily review, rename, and switch between different camera setups. The View Keeper also supports batch rendering, so you can render all your saved views at once, even if each one has its own unique settings.
Key Features and Benefits of The View Keeper
The View Keeper is built to help you work faster and keep your animations organized. Here’s a closer look at what it offers:
1. Storage of Multiple Camera Views
The View Keeper lets you save as many camera views as you need on a single camera object. You don’t have to duplicate cameras for every shot. Just save each angle as its own record. This keeps your scene clean and lets you test different views without filling your workspace with extra cameras.
2. Instant Switching Between Views
With one click, you can switch between any of your saved camera views. This makes it easy to compare different setups quickly. Whether you’re checking the difference between a wide shot and a close-up or testing focal lengths, switching is fast and simple, helping you make decisions without slowing down.
3. Unique Render Settings per View
Each saved camera view can have its own render settings. If you need one view at high resolution and another for quick previews, you can set those up individually. This saves you time and keeps everything consistent, without having to adjust settings every time you change shots.
4. Batch Rendering of Multiple Views
The View Keeper can render all your saved views at once, even if they each have different settings. This is a huge time-saver, especially when you’re working on a tight deadline. You won’t have to render each view one by one, and your results stay consistent across the whole project.
5. Reduction of Scene Clutter
Instead of filling your scene with duplicate cameras, The View Keeper keeps everything in one place. This helps you stay organized and makes it easier to manage large projects without getting lost in the details.
6. Automation Tools
With features like “Find Camera” and “Refresh Camera Records,” The View Keeper keeps your saved views updated automatically. These tools cut down on manual adjustments and make sure your records always match your latest settings.

Practical Applications in Animation
The View Keeper is built to make real projects easier. Here’s how it helps across different types of animation and 3D work:
Seamless Scene Transitions
In animated films, smooth camera changes are key to keeping the story flowing. With The View Keeper, you can plan your camera moves ahead of time by saving views for different parts of a scene. For example, you might save one view for a close-up during a conversation and another for a wide shot during a chase. By keyframing the transitions between these saved views, you keep the camera shifts smooth and consistent, which makes the whole animation feel more cinematic.
Experimentation with Angles
Trying out different angles is part of the creative process. The View Keeper makes it easy to test and compare different shots without duplicating cameras. You can save as many views as you want and quickly switch between them to see what works best for the scene. This makes it easier to explore ideas and lock in the shots that tell the story the best.
Client Collaboration
For freelancers and studios, clear communication with clients is important. The View Keeper makes it simple to present different camera options. You can easily share screenshots or renders of your saved views, giving clients a full look at the scene without needing to juggle multiple cameras. This saves time and helps make feedback more direct and efficient.
Complex Animations and Multi-Angle Productions
In fast-paced projects like action scenes, VR, or interactive media, managing lots of camera angles is critical. The View Keeper helps you handle all these views from one organized place. For example, in a car chase scene, you can save a distant follow shot, an inside-the-car shot, and a wide environmental shot. Switching between them is quick and easy, making sure you capture every angle exactly how you want.
Virtual Reality and Interactive Media
VR and interactive projects often need multiple views to create a full, immersive experience. The View Keeper helps you manage all those angles without slowing you down. Each view can have its own settings, and you can switch between them easily to make sure every part of the experience feels smooth and complete.
Integrating The View Keeper into Your Workflow
One of the best things about The View Keeper is how easily it fits into Blender’s interface. Here’s how you can make it part of your daily work.
Installation and Setup
- Download and Install:
Start by downloading The View Keeper from your account page on the official website. In Blender, go to the Preferences menu, open the Add-ons section, and click “Install.” After installing, enable the add-on, and a new camera management panel will appear. - Accessing the Panel:
Once it’s active, you’ll find The View Keeper panel in the N-panel of the 3D Viewport. The layout is simple, showing all your saved camera views with quick access to your settings. - Initial Configuration:
Set up the add-on based on what your project needs. This could include default render settings, how you name your camera records, and setting up shortcuts to switch views faster.
Adding and Managing Views
Once The View Keeper is ready, handling your camera setups becomes simple.
- Storing Camera Views:
After setting up a shot, save the view with The View Keeper. Each “camera record” keeps track of the settings like focal length, depth of field, and resolution. You can save as many views as you want on one camera, which keeps your scene organized and lets you test different angles without duplicates. - Editing and Renaming:
You can rename and organize your camera records in the panel. Labels like “Close-Up,” “Wide Shot,” or “POV” make it easy to find the view you need without confusion. - Instant Switching:
Switch between saved views with one click. This makes it easy to compare angles or tweak your shots quickly, saving you from having to manually reposition and reset cameras. - Batch Rendering:
When your scene is ready, The View Keeper can render all your saved views at once. Even if each view has different settings, you can render them together. This saves time, which is especially helpful when you’re working on a tight schedule.

Automating Camera Settings
The View Keeper also comes with automation tools to make things even easier.
- Find Camera:
This feature finds all the cameras in your scene and saves them as records automatically. It’s a great time-saver, especially when working on large projects with lots of cameras. - Refresh Camera Records:
If you change a camera’s settings after saving, just use the Refresh Camera Records tool. This updates the saved view without needing to start over. It keeps all your camera records current and ready to use.
Tips and Best Practices
To get the most out of The View Keeper, here are some simple ways to keep your workflow smooth and organized:
Naming Conventions
Use clear, descriptive names for each camera record. Labels like “Cam_CloseUp,” “Cam_Wide,” or “Cam_POV” make it easy to find the view you need. This becomes even more important when working on large projects with lots of angles. Good names save time and help avoid confusion.
Consistent Render Settings
Each saved view can have its own render settings, but keeping them consistent is important when needed. If you’re making content for different platforms like YouTube, Instagram, or print double-check that each view uses the right aspect ratio and resolution. The View Keeper makes it easy to set these up, but staying consistent gives your final work a professional finish.
Experimentation and Comparison
The View Keeper makes testing different shots simple. Don’t be afraid to save multiple camera views and compare them. Trying out different angles and settings helps you find the best way to tell your story or show off your scene. This back-and-forth process often leads to stronger, more engaging animations.
Batch Rendering Efficiency
Batch rendering can save you a lot of time. Instead of rendering one shot at a time, use The View Keeper to render all your saved views at once. Each one keeps its own settings, and you get a full set of renders without the extra work.
Integration with Other Blender Tools
The View Keeper works well with Blender’s built-in tools and other add-ons. For example, using it alongside keyframe animation lets you create smooth transitions between saved views. Combining these tools makes your workflow faster and more organized.
Keeping Your Scene Organized
While The View Keeper helps cut down on camera clutter, it’s still important to stay organized. Go through your saved views regularly, delete the ones you’re not using, and keep your names consistent. This makes it easier to manage complex projects and keeps your workflow running smoothly.

Real-World Examples and Case Studies
To show how The View Keeper makes a real difference, here are a few examples of how it’s been used in different projects:
Case Study 1: Animated Short Film
In an animated short film, the team needed smooth camera moves to tell the story. One scene followed a character walking through a busy city. The director wanted both wide shots of the city and close-ups of the character’s face. Normally, this would mean creating several cameras and constantly adjusting them, which adds clutter and takes time.
With The View Keeper, the team saved all the views they needed on one camera:
- A wide-angle shot for the city.
- A medium shot for balance.
- A close-up for emotion.
Each view had its own settings, and switching between them was quick and simple. When it was time to render, they used batch rendering to get all the shots at once, saving hours of work..
Case Study 2: Architectural Visualization
An architect needed to show a new building from several angles for a client. This meant setting up views from both inside and outside the building, each with its own lighting and resolution needs.
With The View Keeper, the architect created:
- A wide shot of the building’s exterior.
- An interior shot showing key design details.
- Close-ups of textures and materials.
Each view had custom settings, and the batch render feature let them create all the images in one go. This made the presentation smooth, consistent, and easy to manage.ed the architect to produce all the required images simultaneously, ensuring that the final presentation was both comprehensive and consistent.
Case Study 3: Product Advertising
A freelance 3D artist was hired to create product shots for a smartphone. The client wanted a mix of close-ups, wide shots, and detail shots to highlight the phone’s design.
The artist used The View Keeper to save all the angles on one camera. They set high-resolution settings for the detailed shots and quick settings for previews. Batch rendering made it easy to get all the images done at once, helping the artist meet the deadline without extra stress.
Case Study 4: Virtual Reality Experience
A studio creating a VR experience needed several angles to build a full, immersive space. They wanted users to experience every part of the virtual world without missing a detail.
The View Keeper helped them set up all the views they needed, each with the right settings. They batch rendered everything and brought the views together in the VR project. This saved time and made sure the experience felt smooth and complete.
Tips for Optimizing Your Workflow with The View Keeper
To get the most out of The View Keeper, here are some practical ways to keep your work organized and running smoothly:
Organize Your Camera Records
- Use Descriptive Names: Give each camera record a clear name like “Close-Up,” “Wide Shot,” or “POV.” This makes it easier to find the right view when switching between angles.
- Maintain Consistent Settings: Set up the right render settings for each view and double-check them if you’re delivering in multiple formats. Keeping things consistent helps avoid mistakes later on.
Experiment Freely
- Save Multiple Variations: Try out different camera angles and settings. The View Keeper lets you save as many as you want, so you can compare and pick the best ones.
- Batch Render for Comparison: Use batch rendering to create all your saved views at once. This makes it easy to review different shots side by side and choose what works best.

Streamline Your Scene
- Reduce Clutter: By saving multiple views on one camera, you keep your scene clean and easy to manage. This cuts down on mistakes and keeps your workflow moving.
- Automate Where Possible: Use features like “Find Camera” and “Refresh Camera Records” to handle updates automatically. This keeps everything current and saves you time.
Leverage Advanced Features
- Keyframe Transitions: For animated projects, use keyframes to switch smoothly between saved camera views. This adds movement without needing to adjust cameras manually.
- Client Feedback: When working with clients, use The View Keeper to quickly show different camera options. This makes feedback easier and speeds up revisions.
Integrate with Other Tools
- Combine with Render Layers: The View Keeper works well with Blender’s render layers. Using them together helps you manage complex scenes and keep a consistent look across your shots.
- Utilize Custom Shortcuts: Set up shortcuts for your most-used functions of The View Keeper. This helps you work faster and jump between tasks without losing time.
A Real-World Workflow Example
Here’s how The View Keeper can change the way a freelance animator handles a commercial project:
Project Overview
A freelance animator is hired to create a 30-second animated commercial for a new tech product. The project needs several key camera angles:
- Establishing Shot: A wide view showing the whole scene.
- Product Focus: A close-up highlighting the product’s design.
- Action Sequence: A dynamic shot following a character using the product.
- Detail Shot: A macro view showing small, important details.
Workflow Steps with The View Keeper
Initial Setup
The animator installs The View Keeper and sets up one camera in Blender. Then, they save separate camera records for each required shot.
Storing Camera Views
- The wide shot is saved as “Establishing_Wide.”
- The close-up is saved as “Product_CloseUp.”
- The action shot is saved as “Action_Tracking.”
- The detail shot is saved as “Detail_Macro.”

Customizing Render Settings
Each view gets its own settings. For example, the wide shot might use a high resolution with a 16:9 ratio, while the close-up is set for digital ads. These settings are saved with each camera record, so batch rendering applies the right setup automatically.
Switching and Previewing
The animator uses The View Keeper’s one-click switch to quickly preview all the shots. This makes it easy to compare views and make sure everything matches the creative vision.
Batch Rendering
Once the scene is ready, the animator uses batch rendering to output every shot at once. Each render uses its saved settings, cutting out the need to stop and adjust between shots.
Client Review and Iteration
The renders are sent to the client. If changes are needed, the animator updates the camera records and runs batch rendering again to deliver the revisions fast.
Final Output
The final shots are brought into the commercial, with smooth transitions that tie the whole piece together and make the story clear and strong.
This example shows how The View Keeper keeps the workflow simple while giving the control and flexibility needed to handle high-quality, professional animations.
Common Questions
- What is The View Keeper Blender camera add-on?
The View Keeper is a Blender camera add-on that lets you save, switch, and manage multiple camera angles on one camera to speed up your animation workflow. - How does The View Keeper Blender camera add-on save time?
The View Keeper saves time by removing duplicate cameras, automating camera switches, and batch rendering all saved views in Blender at once. - Can The View Keeper add-on handle different render settings for each camera view?
Yes, The View Keeper lets you set custom render settings for each saved camera view, including resolution, aspect ratio, and file format. - What is batch rendering in The View Keeper Blender camera add-on?
Batch rendering in The View Keeper automatically exports all saved camera views in one click, even if each view uses different render settings. - Does The View Keeper help reduce camera clutter in Blender?
Yes. The View Keeper reduces camera clutter by saving all your shots on one camera, keeping your Blender scene clean and easy to manage. - Is The View Keeper Blender camera add-on useful for client projects?
Absolutely. The View Keeper makes it easy to present multiple camera angles to clients, speed up feedback, and deliver revisions fast. - Can you animate between camera views using The View Keeper?
Yes. With The View Keeper, you can keyframe smooth transitions between saved camera views for cinematic animations in Blender. - How do you install The View Keeper camera add-on in Blender?
Download The View Keeper from the official site, install it in Blender through the Add-ons menu, and manage all camera views from the View Keeper panel. - Is The View Keeper Blender camera add-on good for VR and interactive projects?
Yes. The View Keeper helps manage multiple camera angles in VR and interactive Blender projects, keeping the workflow organized. - What Blender projects need The View Keeper camera add-on?
The View Keeper is perfect for Blender animations, product ads, architectural renders, VR scenes, and any project needing multiple clean camera setups.
Conclusion
In the world of 3D animation, handling multiple camera angles can either keep your project running smoothly or slow everything down. The View Keeper add-on for Blender is built to solve that problem. By letting you store multiple camera views on one camera, set unique render settings for each shot, and batch render everything in one go, it helps keep your workflow simple and productive.
Whether you’re a freelancer managing client work, an animator aiming for cinematic results, or part of a studio working on detailed visual effects, The View Keeper saves you time, cuts down scene clutter, and keeps your renders consistent. Since it works directly with Blender’s tools, you can stay focused on your creative work instead of getting stuck on technical tasks.
The more you use The View Keeper, the more you’ll see how flexible it is. It does more than just hold camera views. With features like automatic switching, custom render settings, batch rendering, and keyframed transitions, it gives you the control to take your projects even further.
In a busy 3D production environment, finding ways to work faster and smarter is important. The View Keeper isn’t just another add-on it’s a tool that helps you get the shot you want, no matter how complex your scene is. It takes the stress out of managing multiple camera angles so you can focus on the creative side of your work.
Using The View Keeper means having a cleaner, more organized workflow and more time to focus on your ideas. As Blender grows and 3D projects become even bigger, having a tool that keeps up with your needs will help you deliver top-quality results. If you’re looking to make your workflow better and take your animation projects to the next level, The View Keeper is worth adding to your setup.

Recommend
The Ultimate Guide to the Most Popular Black Hairstyle Options
Redefining Representation: Authentic Black Hairstyles in Video Games
The Ultimate Guide to Hair for Games: Techniques, Tools, and Trends
