


When you create an animation, you often want the camera to follow a character. This makes your story come alive and gives your scene a professional look. Imagine a movie where the camera glides smoothly behind a hero or follows a character through a busy city street. In Blender, you can achieve this. Make the camera follow a character by using constraints and keyframe animation. In this article, we will explain what it means to have a following camera, why it is useful, and how you can set it up step by step. We will also share helpful tips, real-world examples, and common troubleshooting ideas to guide you along the way.
What Does It Mean for a Camera to Follow a Character?
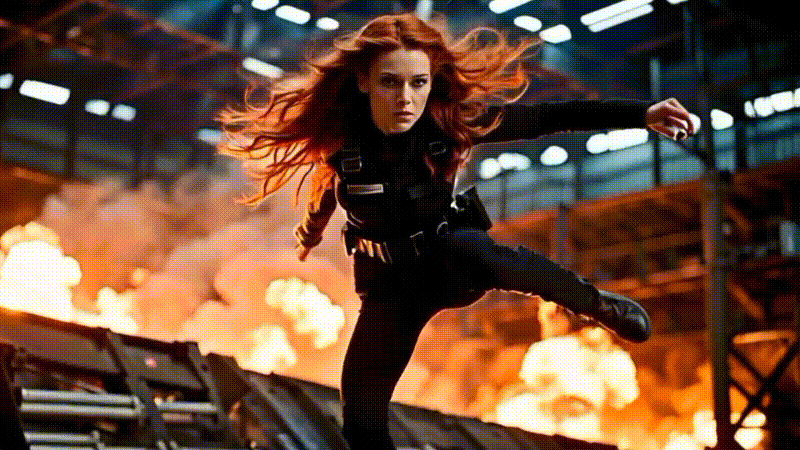
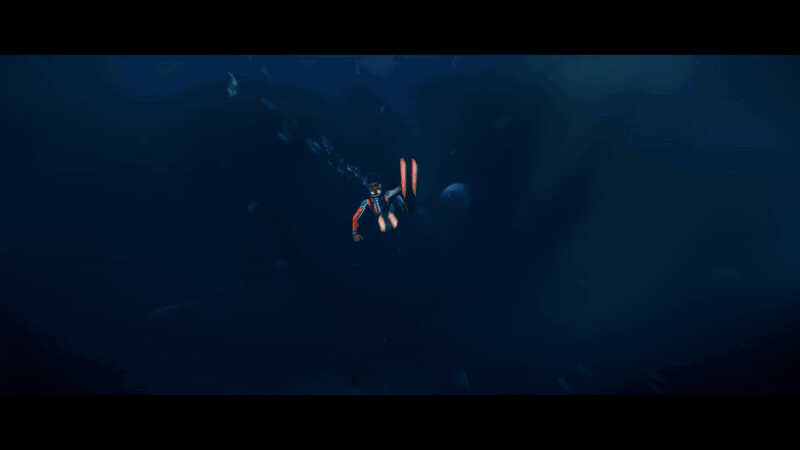
When a camera follows a character, it moves in sync with that character. The camera may track the character’s movement, keeping the character in focus at all times. This is different from a fixed camera, which stays in one position while the character moves in and out of view. A camera following a character helps to tell a story, just like in movies and video games where the camera moves along with the actor or player. Think of video game cutscenes in titles like Uncharted. The camera follows the main character smoothly, making the scene feel immersive and dynamic.
Why Make the Camera Follow a Character?
There are many reasons to have a camera follow a character in your Blender projects:
- Enhanced Storytelling: When the camera follows a character, the viewer feels connected to the action. It highlights the character’s journey and emotions.
- Dynamic Movement: A moving camera adds life to your animation. It can create tension during chase scenes or focus on details during dramatic moments.
- Cinematic Quality: Many popular films and video games use following cameras to add drama and polish. A well-executed camera follow can make your scene look like a scene from a blockbuster movie.
- Interactive Experience: In virtual reality or interactive projects, a following camera helps guide the viewer through the scene and keeps the focus on the key elements.
- Efficiency in Animation: Using constraints to follow a character saves time. Instead of manually keyframing every camera movement, you let Blender do the work automatically.
Methods to Make the Camera Follow a Character
There are several ways to set up a camera to follow a character in Blender. We will look at three common methods:
- Using the Track To Constraint
- Using the Locked Track Constraint
- Parenting the Camera to the Character
Each method has its benefits. We will explain them step by step so you can choose the one that works best for your project.
Method 1: Using the Track To Constraint
The Track To constraint is a popular and simple way to make the camera always face your character.
Step 1: Prepare Your Scene
Open your Blender project and make sure your character is in the scene. Set up your character’s movement if you have an animation already created. Also, ensure your camera is added. If you do not have a camera, press Shift + A and choose Camera.
Step 2: Select the Camera
Click on the camera in the Outliner or 3D Viewport. Press Numpad 0 to switch to Camera View so you can see what the camera sees.
Step 3: Open the Constraints Panel
On the right side of Blender, open the Properties Editor. Click on the Constraints tab (it looks like a chain icon).
Step 4: Add the Track To Constraint
Click Add Object Constraint and select Track To from the list. This constraint will force the camera to always point at a target.
Step 5: Set the Target Object
In the Track To settings, you will see a field called Target. Click on it and select your character (or an empty object attached to your character). This is the object the camera will follow.
Step 6: Adjust the Axes
In the same settings, set the To axis to -Z and the Up axis to Y. These settings are common for keeping the camera level and ensuring it points correctly at the character.
Step 7: Test Your Setup
Move your character in the 3D Viewport and observe how the camera behaves. The camera should always rotate to face your character. This makes the camera follow the character’s every move.
Method 2: Using the Locked Track Constraint
The Locked Track constraint works similarly to the Track To constraint but offers more control over the camera’s orientation.
Step 1: Select Your Camera
Again, select your camera from the Outliner or 3D Viewport and switch to Camera View by pressing Numpad 0.
Step 2: Open the Constraints Panel
Click on the Constraints tab in the Properties Editor.
Step 3: Add the Locked Track Constraint
Click Add Object Constraint and choose Locked Track from the list.
Step 4: Set the Target
In the Locked Track settings, assign your character as the Target. This tells Blender that the camera should track this object.
Step 5: Configure the Axes
Set the Track Axis to -Z and the Lock Axis to Y. This configuration keeps the camera facing the target while preventing unwanted rotations.
Step 6: Test the Movement
Move your character and observe the camera’s movement. The camera should smoothly adjust its orientation to keep the character in view without any sudden flips.
Method 3: Parenting the Camera to the Character
Parenting is a more direct method, where the camera becomes a child of the character. This means the camera moves with the character.
Step 1: Position the Camera
Place your camera in the scene where you want it relative to your character. For example, if you want a close-up shot, position the camera near the character’s face.
Step 2: Select Both Objects
Select the camera first, then hold Shift and select your character. The order of selection is important; the last object selected is the parent.
Step 3: Parent the Camera
Press Ctrl + P and choose Object (Keep Transform) from the menu. This makes the camera a child of the character, meaning it will move along with the character.
Step 4: Adjust the Relative Position
After parenting, adjust the camera’s position and rotation so that it captures the view you want. You can still move the camera independently, but it will now follow the character’s movement.
Step 5: Test the Animation
Play your animation and observe the camera’s behavior. It should move with the character, maintaining the relative position you set. This method works well for simple follow-camera setups.

Tips and Tricks for a Smooth Follow
Here are some useful tips to get the best results when making the camera follow a character in Blender:
- Use Keyframes for Fine-Tuning:
Even with constraints, you may need to adjust the camera’s position over time. Use keyframes to refine the movement and make the follow smoother. - Combine Constraints if Needed:
Sometimes, using a combination of the Track To constraint with parenting can give you both rotation control and movement flexibility. This is similar to how a film director might use multiple camera rigs to capture a scene. - Lock Transformation Values:
Once you have the camera set up, lock its transformation values to prevent accidental changes. In the Sidebar (press N), click on the padlock icons next to Location and Rotation. - Experiment with Different Angles:
Try positioning the camera at different heights and distances. A slightly elevated camera may capture the character and the environment better, while a lower angle can add drama. - Use the Graph Editor:
The Graph Editor is a powerful tool to smooth out any jerky movements in your animation. Adjust the keyframe curves for both rotation and location for a fluid motion. - Test in Camera View:
Frequently switch to Camera View (Numpad 0) to see exactly what the camera sees. This helps you catch any alignment issues early. - Utilize The View Keeper:
If you have The View Keeper, save your camera setups as records. This makes it easy to switch between different follow-camera setups without redoing your work.

Utilizing The View Keeper
The View Keeper makes it possible to save and instantly recall any camera setup you create. when working on an animation, you’re usually working with a camera that follows a charcter and combining it with multiple entirely different camera shot styles. For example, a widder camera shot to help give your audience a different perspective. You can save each of these configuration as a record using The View Keeper, all within the same project and blend file.
This means you can have a camera follow a character as they walk into a room. Then right as they start a conversation with a character, you switch to the wider shot and go back to the camera following the character when the conversation is finished. All of this you can do using The View Keeper while also being able to render everyshot all at once.
Each record saved with The View Keeper has its own resolution, file format, output folder, focus length and other camera settings. This flexibility opens up endless creative possibilities, allowing you to experiment and compare different looks quickly. The settings you save become part of your creative toolkit, enabling you to effortlessly switch back and forth between various camera setups without having to reconfigure everything every time you need a new angle captured.

Real-World Inspirations
Let’s look at some examples from different fields to see how following cameras are used in the real world:
Film and Television
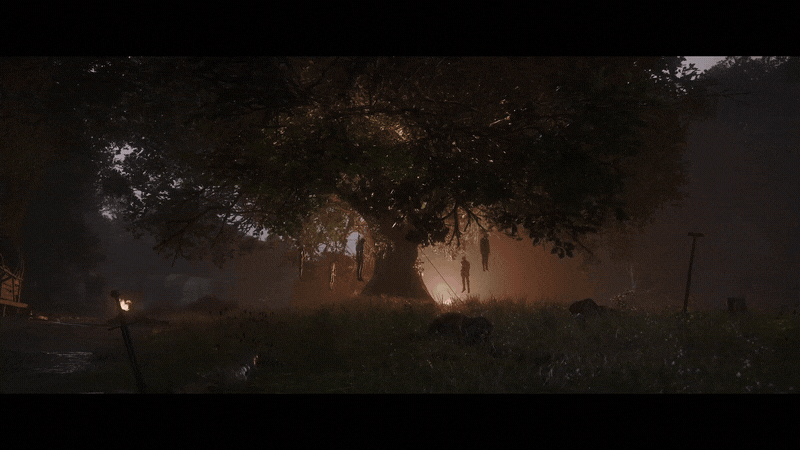
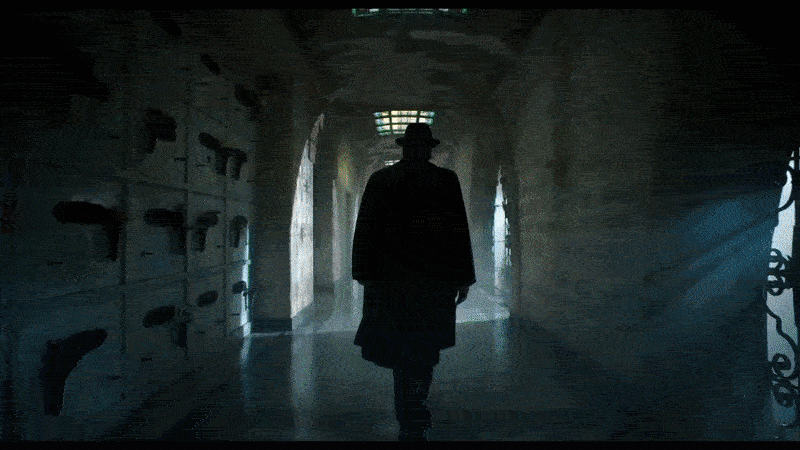
In many films, the camera follows the main character to create an immersive experience. For example, in The Dark Knight, the camera often follows Batman during intense action scenes. The steady follow makes the viewer feel part of the action. In Blender, using a Track To or Locked Track constraint can achieve a similar effect, keeping your character in focus and making the scene dynamic.
Video Games
Cutscenes in video games frequently use following cameras to capture the character’s journey. In titles like Assassin’s Creed and Uncharted, the camera tracks the protagonist’s movement smoothly, enhancing the narrative. By setting up your camera to follow a character in Blender, you can create engaging game cinematics that mimic this professional look.
Architectural Visualization
In virtual tours of buildings, a following camera can guide the viewer through a space. Imagine a virtual walkthrough where the camera glides alongside a person exploring a museum. The camera stays focused on the guide, creating a seamless and interactive experience. This technique is popular in architectural presentations and is easily achieved with parenting or tracking constraints.
Virtual Reality and Interactive Media
For VR projects, having a camera that follows a user’s movement is essential. In interactive installations or virtual tours, the camera can track a person’s position to create an immersive experience. By using Blender’s constraints, you can simulate a VR environment where the camera follows the user, giving them a natural view of the scene.
Graphic Design and Technical Illustrations
In technical illustrations or animated infographics, a following camera can help focus on important details. For example, in an animated tutorial, the camera might follow a moving part of a machine to show how it works. This method is used in many educational videos and product demos to ensure that the key elements are always in view.
Troubleshooting Common Issues
Even with clear steps, you may encounter some challenges when making the camera follow a character. Here are common issues and solutions:
- The Camera Does Not Stay on Target:
If the camera drifts away from the character, check that your target is correctly assigned in the Track To or Locked Track constraint. Make sure no other constraints are interfering. - Unwanted Rotations or Flips:
Sometimes, the camera might flip or rotate unexpectedly. Adjust the “To” and “Up” axes in your constraint settings to correct this behavior. - Jittery Camera Movement:
If the camera movement feels choppy, open the Graph Editor and smooth out the keyframe curves for rotation and location. This will help create a more fluid motion. - Misaligned Camera After Parenting:
If you parent the camera to the character and the alignment is off, try adjusting the camera’s local transformation. Use the 3D Viewport to reposition the camera relative to the character. - Difficulty in Fine-Tuning the View:
Use the viewport controls to manually adjust your view before locking the camera. Press Ctrl + Alt + Numpad 0 to align the camera to your current 3D View if needed. - Accidental Changes:
Once you have the perfect setup, lock the camera’s transformation values in the Sidebar (press N) to prevent unintended modifications during further editing.
Common Questions
- How do I make the camera follow a character in Blender?
You can use constraints such as Track To or Locked Track, or you can parent the camera to the character. - What is the Track To constraint?
The Track To constraint rotates the camera so that it always points at a target object, keeping the character in view. - How does the Locked Track constraint work?
The Locked Track constraint is similar to Track To but locks one axis to prevent unwanted rotations, ensuring a steady view. - Can I animate the camera to follow a moving character?
Yes, once you set up the constraint or parenting, you can animate your character, and the camera will follow automatically. - What if my camera does not follow the character smoothly?
Check your keyframes and the constraint settings. Use the Graph Editor to smooth out any abrupt movements. - Is it better to parent the camera or use a constraint?
It depends on your needs. Parenting is simple and direct, while constraints offer more control over rotation and focus. - Can I combine multiple methods for better results?
Yes, you can use a combination of parenting and constraints to achieve a more dynamic camera follow. - Will the camera follow during animations in real time?
Yes, once set up correctly, the camera will follow the character in real time as you play the animation. - How do I lock the camera’s settings after following a character?
You can lock the transformation values in the Sidebar by clicking the padlock icons next to Location and Rotation. - Can I save my camera follow setup for future projects?
Yes, use The View Keeper to save your camera record with all the follow settings, so you can easily recall them later.
Bringing It All Together
Making the camera follow a character in Blender is an essential skill for creating dynamic, cinematic animations. Whether you are working on a film, a video game cutscene, an architectural walkthrough, or an interactive VR experience, a following camera keeps your focus where it matters most.
The process is straightforward. You start by selecting your camera and using constraints like Track To or Locked Track to ensure it points at your character. You can also parent the camera to the character for a simpler setup. Once set up, test your animation by moving your character around in the 3D Viewport. Use keyframes and the Graph Editor to fine-tune the motion and make it as smooth as possible.
This technique brings a professional touch to your projects. Just as directors use precise camera movements to tell stories in blockbuster films, you can create engaging animations that capture every moment of your character’s journey. Real-world examples from video games, film, and architectural visualization show that a well-following camera can transform the viewer’s experience, making it immersive and dynamic.
As you practice, experiment with different camera positions and constraint settings. Try combining methods to see which one offers the best control for your scene. Lock your camera’s settings once you have the perfect shot, and consider using tools like The View Keeper to save and recall your setups quickly.
Remember, the goal is to create a smooth, natural camera movement that keeps the focus on your character at all times. With patience and practice, you will master the technique and add a powerful storytelling tool to your Blender workflow.
Final Thoughts
Animating a camera to follow a character in Blender is a powerful technique that can elevate your work to new heights. It allows you to keep the focus on your subject, create dynamic scenes, and tell a compelling visual story. Whether you are a beginner or a seasoned artist, the methods described in this article
- using constraints
- parenting
- combining techniques
will help you achieve a smooth and engaging follow-camera effect.
Take inspiration from the cinematic techniques seen in films and video games, and experiment with different settings until you find what works best for your project. With clear steps and practical tips, you now have the tools to create a following camera that adds depth and drama to your animations.
Thank you for reading this article on how to make the camera follow a character in Blender. We hope the step-by-step instructions, helpful tips, and real-world examples have given you the confidence to try this technique in your own projects. Enjoy your creative journey in Blender, and may your animations always keep your characters in focus and your stories captivating.


