


Introduction: Why Learn Character Creation in Blender 3D?
Creating 3D characters is a rewarding skill, useful in industries like games, animation, film, and VR. Blender 3D, a free and powerful software, is widely used professionally for modeling, rigging, and animation in games, films, advertisements, and TV series. Learning Blender helps you create original characters for various industries.
This guide walks you through making a character from scratch in Blender, covering concept, modeling, sculpting, texturing, rigging, animating, and rendering. It covers workflows for realistic, stylized, fantasy, and cartoon styles, helping you adapt techniques to your needs.
How to Make a Character from Scratch in Blender
Creating a 3D character in Blender involves several key steps:
- Concept and Planning: Define your character’s story, role, and style (realistic, stylized, or fantasy). Sketch front and side views, gather references, and create a reference board for anatomy, clothing, and features.
- Base Mesh Creation: Start by blocking out basic shapes (spheres, cylinders) to form your character. Use symmetry and adjust proportions to match your concept. Join shapes and use Blender’s Sculpt Mode for major shaping.
- Sculpting Details: After creating the base mesh, refine the character’s features in Sculpt Mode. Focus on primary forms, muscles, and facial details. Use Blender’s tools like the Clay Strips and Crease Brush for detailed sculpting.
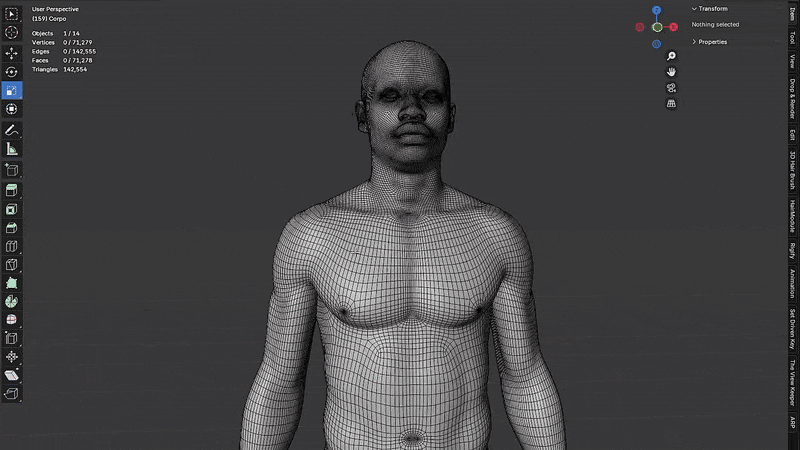
- Retopology: Once sculpting is done, retopologize the model to create a clean mesh suitable for animation. Ensure proper edge loops around joints and facial features.
- Rigging: Add an armature (skeleton) to your model, creating bones for each body part. Bind the mesh to the armature using automatic weights and adjust weight painting for smooth deformation.
- Texturing: Unwrap the model’s UVs for easy texture painting. Use high-res textures for realistic characters or hand-painted textures for stylized ones. Set up materials using the Principled BSDF shader for skin, clothing, and hair.
- Hair and Clothing: For realistic hair, use Blender’s particle system or create custom hair using Geometry Nodes. Model clothing as separate objects and use Blender’s cloth simulation for realistic fabric movement.
- Animation: Rig your character for animation and add keyframes to create movement. Use Blender’s NLA Editor for action libraries and add facial expressions using shape keys.

Two Types of 3D Character Creation in Blender (Realistic and Stylized)
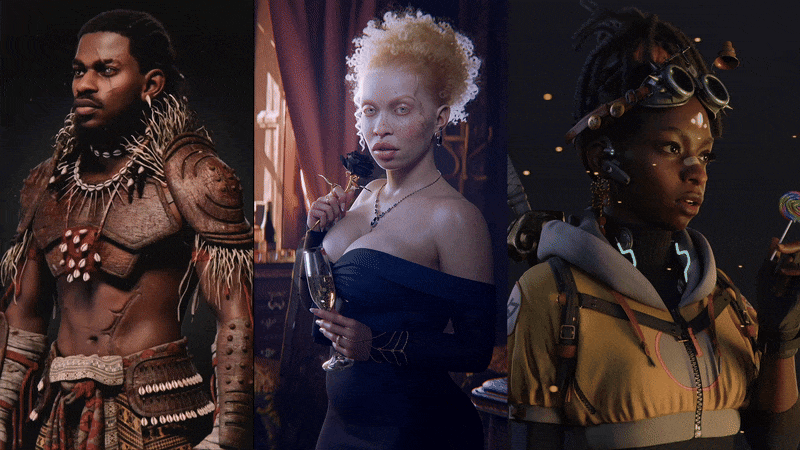
Realistic Characters aim for lifelike accuracy with detailed anatomy, natural proportions, and textures, suited for AAA games or VFX. Examples include characters from Horizon Zero Dawn or The Witcher 3. Realistic workflows involve detailed sculpting, realistic skin texturing (pores, wrinkles), realistic hair (particle hair or hair cards), and careful rigging for natural movement.
Stylized Characters allow creative freedom, exaggerating or simplifying details to create unique looks or personalities, such as characters from Overwatch or Pixar movies. Stylized workflows focus on strong silhouettes, bold colors, simplified shapes, fewer realistic surface details, and sometimes hand-painted textures or non-photorealistic shaders. Cartoon characters, with heavily skewed proportions, are a subset of stylized art.
Fantasy characters can fit either style (realistic or stylized) or mix both.
Different Workflows:
- Modeling: Realistic modeling focuses on anatomical accuracy using references; stylized modeling emphasizes character shapes and proportions.
- Texturing: Realistic textures involve detailed materials like subsurface scattering and high-res maps; stylized textures typically feature simplified shading and bold, clean colors.
- Rigging: Realistic rigs simulate muscles and subtle movements; stylized rigs often include exaggerated animations (squash-and-stretch, expressive faces).
Understanding these differences helps you select appropriate techniques for your character creation project.
Getting Started with Blender 3D
Before modeling in Blender, first download and install the latest version (it’s free). Upon launch, you’ll see Blender’s default workspace with a camera, a light, and the default cube.
Workspace Setup:
Blender’s interface is customizable, offering various workspaces like “Layout” for general modeling and “Sculpting” for detailed sculpting tasks. Enable helpful add-ons (Rigify for rigging, Bool Tool for boolean modeling) via Edit > Preferences > Add-ons. Turning on GPU rendering (in Preferences) helps speed up Cycles preview renders if you have a graphics card.
Essential Tools:
- Toolbar (left): Contains mode-specific tools (Grab, Draw, Smooth in Sculpt; Move, Rotate, Scale in Object/Edit modes).
- Outliner (top right): Lists scene objects for easy selection.
- Properties Editor (bottom right): Adjust object settings, modifiers, materials, and world settings.
- Mode menu (top-left 3D Viewport): Switch between Object Mode (moving objects), Edit Mode (polygon editing), Sculpt Mode (detailed sculpting), and Texture Paint (painting maps).
- Timeline (bottom): Used in animation.
Customize navigation settings (e.g., alt-click navigation) and drag-and-drop reference images into Blender’s viewport or Image Editor for guidance.
With these steps complete, your workspace is ready for the character creation process

Concept and Planning: Designing Your Character
Every character begins with a clear concept. Planning your character first prevents wasted time and inconsistent designs.
- Start with an Idea:
Define your character’s story, role, and theme (brave knight, futuristic robot, cartoon animal). Consider personality, age, profession, and style (realistic, stylized, fantasy, cartoon). These choices influence your character’s look (e.g., a warrior with scars and worn armor or a cartoon mascot with friendly features). - Sketching Concepts:
Draw rough sketches from front and side views (orthographic views). These sketches help you model correct proportions and can be imported into Blender as reference images. Sketch variations to quickly test ideas before committing to 3D. - Reference Gathering:
Collect real-world or stylized references for anatomy, clothing, facial features, or creatures. Create a reference board to guide your modeling and texturing process. - Character Backstory & Style Influence:
Use your character’s backstory to finalize details. For example, an elf wizard might have flowing robes and a slender build, while a cartoon space mechanic may have oversized tools and goofy accessories. Character shape (broad “T” shape for heroes, triangular shapes for villains or quirky types) is informed by the story and personality. - Planning the Technical Approach:
Decide on your technical workflow: a high-poly sculpt followed by retopology, or low-poly modeling with normal maps. Realistic characters typically involve detailed sculpting, retopology, and texture baking. Simpler stylized characters might be modeled directly with polygon modeling and mirror modifiers. Also consider specialized tools like Geometry Nodes for patterns or hair.
With your concept and technical plan ready, you can now move on to modeling the base mesh in 3D.
Building the Base Mesh: From Primitive Shapes to a Character Form
The base mesh is the foundational geometry of your character. Building a good base mesh is crucial for any character, realistic or stylized, because it establishes the proportions and topology that you’ll refine later.
Blocking Out Basic Shapes:
- Start with simple shapes (spheres for heads, cylinders for limbs, cubes for torsos).
- Position and scale these shapes to match your character’s concept.
- Use symmetry (Mirror Modifier or X-Axis Mirror) to keep both sides consistent.
- Adjust shapes to roughly pose your character.
Sculpting the Combined Form:
- Join basic shapes, then sculpt major forms in Sculpt Mode using brushes (Grab, Clay Strips, Smooth).
- Focus on anatomy landmarks (ribcage, hips) for realism or exaggerated shapes for stylized characters.
- Use X-axis symmetry and avoid adding fine details yet; prioritize proportions and volume.
Retopology – Creating Clean Topology:
- After sculpting, retopology creates a clean mesh suitable for animation.
- Blender’s Shrinkwrap modifier and snapping tools help retopologize by placing polygons neatly over your sculpt.
- Place edge loops strategically: around eyes, mouth, elbows, knees, shoulders, hips, and fingers for good animation deformation.
- Realistic characters often reuse standard human topology; stylized characters may need custom topology.
- Keep the topology symmetrical at this stage; add asymmetry (scars, hair) later.
Ensuring Animation-Friendly Topology:
- Use quad polygons for predictable animation deformations; avoid triangles or n-gons.
- Place multiple loops at joints (e.g., elbows, knees) for smoother bending.
- Define clear loops at lips, eyelids, clothing edges, and other key landmarks.
- Refer to topology guides for ideal layouts, including poles near the mouth and between eyes for better facial expressions.
After retopology, you’ll have a clean, animation-ready mesh. UV unwrap at this stage for easier texturing later. With this foundation complete, you’re ready to move on to sculpting finer details.

Advanced Sculpting Techniques for Detailed Character Modeling
After creating a clean base mesh, you move to advanced sculpting in Blender to add detailed character features.
Sculpting Setup:
- Use a Multiresolution modifier on your base mesh to sculpt high-res details while preserving the original geometry.
- Alternatively, use Dyntopo (Dynamic Topology) for freeform sculpting, but you’ll need to retopo again or bake details later.
Sculpting Stages:
- Primary Forms: Basic shapes (done during base mesh creation).
- Secondary Forms: Define muscles, facial features, and skin or cloth folds.
- Tertiary Details: Small details (skin pores, wrinkles, patterns).
Best Blender Sculpting Brushes:
- Clay Strips/Clay Build-Up: Adds controlled volume (muscles, stylized shapes).
- Crease Brush: Creates sharp wrinkles, lines, or separation (realistic skin folds or creature scales).
- Smooth Brush: Softens surfaces and transitions. Avoid over-smoothing stylized characters.
- Grab and Snake Hook: Adjust proportions (Grab), pull out hair or horns (Snake Hook with Dyntopo).
- Inflate/Deflate: Adds puffiness or hollows areas.
- Masking and Elastic Deform: Sculpt isolated areas or quickly pose limbs without rigging.
Frequently use wireframe or matcap views to check your surface. Keep symmetry during early stages, but introduce slight asymmetry later for realism or keep symmetry for stylized characters.
Refining Facial Features:
- Eyes: Upper eyelid overlaps lower; crease above the eyelid.
- Nose: Define shape; use masking and Inflate/Deflate for nostrils.
- Lips: Separate upper and lower clearly using masks and Crease brush.
- Ears: Sculpt carefully; add “Y”-shaped cartilage details.
- Hands: Sculpt knuckles and fingernails clearly.
- Fantasy Elements: Sculpt detailed patterns (scales, horns) and replicate using alpha brushes or custom brush textures.
Workflow Differences:
- Realistic Sculpting: Highly detailed (pores, wrinkles, veins). Consider performance; sculpt separately (head/body) if poly count becomes high.
- Stylized Sculpting: Focuses on clean shapes, fewer fine details.
Retopology Revisited (if needed):
- Sometimes topology needs adjustments after sculpting details.
- Finalize topology early to avoid extra retopo work later.
After advanced sculpting, you have a detailed character model ready for rigging and texturing. High-poly details will later be baked into normal or displacement maps, especially for game or real-time use.

Rigging Your Character: Preparing for Animation
Rigging is creating a skeleton (armature) for your character and attaching the mesh to it, so you can animate it in Blender.
Creating the Armature:
- Add an Armature (Shift+A > Armature), enable In Front in viewport display for visibility.
- Create bones in neutral poses (T-pose or A-pose).
- Main bones:
- Spine: Pelvis, spine, chest, neck, head.
- Legs: Thigh, shin, foot, toe; ensure knee joint placement.
- Arms: Clavicle, upper arm, forearm, hand; slight elbow bend helps IK.
- Hands/Fingers: Three bones per finger for realism; simpler for cartoons.
- Head/Jaw: Separate jaw bone for mouth movement; facial rigging typically done with shapekeys or additional bones.
- Extra Appendages: Tail, wings, tentacles as needed.
- Set up parent-child bone relationships for logical movement.
Skinning (Weight Painting):
- Select mesh and armature, press Ctrl+P > With Automatic Weights to auto-bind mesh to bones.
- Adjust weights manually in Weight Paint mode (red for full influence, blue for none).
- Common trouble spots: shoulders, hips, fingers; manually paint these areas.
- Use Normalize and Clean to ensure proper weight distribution.
Pose Testing:
- Pose your character to identify weight painting issues.
- Correct problem areas with additional weight painting, helper bones, Blender’s Corrective Smooth modifier, or shapekeys.
- Cartoon rigs may have stretchy bones for stylized animations; realistic rigs often use inverse kinematics (IK) constraints for natural bending.
Blender’s Rigify add-on can auto-generate a full humanoid rig with IK/FK switches for faster setup.
With rigging complete, your character is ready to animate. Next step is texturing to add colors and materials.
Texturing and Material Setup: Bringing Your Character to Life
Texturing gives your character skin, fabric patterns, and eye details. It involves UV unwrapping, texture painting or baking, and setting materials.
UV Unwrapping:
- Maps your 3D mesh onto a flat 2D surface for textures.
- Mark seams in Edit Mode at logical edges (e.g., torso back, inside arms/legs, around neck, fingers, or where materials meet).
- Unwrap mesh (U > Unwrap) to flatten into islands shown in Blender’s UV Editor.
- Avoid texture stretching (use Blender’s checkerboard to test even UV distribution).
- Typical islands: head, torso, limbs, maintain consistent texel density for uniform detail.

Texture Creation:
- Realistic: High-res textures (Diffuse/Albedo, Normal maps, Roughness, Subsurface Scattering for skin). Use external tools (Substance Painter, Photoshop) or procedural textures.
- Stylized/Cartoon: Hand-painted textures (Blender’s Texture Paint) or flat colors with subtle shading.
Material Setup (Shader Editor):
- Use Principled BSDF shader (physically based, versatile).
- Skin: Base Color texture, Subsurface Scattering for realism, Normal and Roughness maps for detail and shininess.
- Eyes: Glossy Principled BSDF or Emission shader (for cartoon eyes).
- Hair: Specialized Principled Hair BSDF for particle hair or alpha-mapped hair cards.
Painting Techniques (Texture Paint):
- Paint directly on the model to fix seams or add details like freckles, blush, or stylized shading.
- Use stencils for tattoos or logos.
Clothing & Accessories:
- Separate objects/materials per clothing piece.
- Metal: Metallic property, Roughness for edge wear.
- Fabric: Use Subsurface or Sheen for fuzziness; normal maps for fabric weave detail.
- Add subtle bump textures even on stylized characters (leather grain, wood patterns).
UV Mapping Differences by Style:
- Realistic characters use complex UV layouts or multiple UV tiles (UDIMs) for detail.
- Stylized characters often use simpler UV layouts, possibly reusing UV islands (e.g., mirrored arms).
After texturing, your character looks colored and detailed. Next, add hair and clothing details using Blender’s hair and cloth systems.
Adding Hair and Clothing: Enhancing Your Character’s Realism
Hair and clothing significantly enhance your character’s realism. Blender provides powerful tools for creating these details.

Hair Creation:
- Particle Hair System:
- Emit strands from scalp mesh.
- Groom in Particle Edit mode (comb, cut, style).
- Supports dynamics (physics-based motion) and realistic shading.
- Hair Curves (Geometry Nodes, Blender 3.3+):
- Node-based approach allows stacking effects (frizz, clump, braids).
- Adds detailed effects procedurally.
- Grooming Tips:
- Balance hair density to optimize performance.
- Use child strands to add volume without heavy performance impact.
- PixelHair Assets:
- Premade, customizable hair models ready to use.
- Includes a fitted hair cap for easy alignment using shrink-wrap modifier.
- Saves significant time for complex hairstyles.
- Tweakable settings for customization.
Clothing and Accessories:
- Modeling:
- Duplicate character mesh (e.g., torso for shirts) and shape into clothing.
- Separate objects for accessories (belts, armor, jewelry).
- Use Mirror Modifier for symmetric items.
- Cloth Simulation:
- Use Blender Cloth physics to create realistic draping.
- Character mesh acts as collision object.
- Manual Sculpting:
- Stylized folds and shapes created by hand.
Accessory Integration:
- Model belts, jewelry, armor as separate objects.
- Small props (guns, books) parented to character bones or integrated into rig.
Style Differences:
- Realistic:
- High-resolution particle hair or complex mesh conversions.
- Detailed fabric folds via simulation or sculpting.
- Realistic textures and shading.
- Stylized:
- Modeled hair shapes or fewer, thicker strands.
- Simpler forms with painted highlights and clean designs.
- Advanced Geometry Nodes:
- Create detailed patterns (braids, beads, scales, chainmail) for unique stylized or fantasy elements.

PixelHair vs Manual Hair Creation:
- PixelHair saves significant setup time, especially for realism.
- Manual methods ideal for custom, stylized looks.
Final Rigging Check:
- Bind hair and clothing to rig (weighting or Surface Deform modifier).
- Pose test to ensure proper deformation and alignment.
With hair, clothing, and accessories complete and rig-tested, your character is now fully modeled and ready for animation.
Animating Your Character: Basics of Movement and Expression
Animation in Blender involves placing keyframes on your rig to create movement and expressions.
Basic Animation Steps:
- Select your rig, pose it, and insert keyframes (I key, usually LocRotScale) at different timeline frames.
- Blender saves poses over time, allowing animation like waving or jumping.
- Refine animation using the Graph Editor for smooth movement and timing adjustments.
- Use Blender’s NLA Editor or action libraries for blending and saving actions like walk or jump cycles.
Facial Expressions:
- Bone-driven: Rotate/move bones (like jaw or brows) to create expressions.
- Shape Keys (Morph Targets): Create shape keys for specific expressions (smile, blink, etc.) and animate these using keyframes.
Expressiveness:
- Clear poses and body language convey character personality clearly.
- Confident characters use open poses; shy ones hunch or appear closed off.
Animation Tools & Tips:
- Use Blender’s Timeline, Graph Editor, and Auto-Keying to speed up workflow.
- Onion-skinning or scrubbing timeline helps visualize animation flow.
- Reference videos (your own movements) help create realistic motion.
Style Considerations:
- Realistic animations: Subtle movements and detailed expressions.
- Stylized animations: Exaggerated poses, squash-and-stretch effects, bold expressions.
Next, common issues and troubleshooting tips will be discussed to polish your character animations.

Troubleshooting Common Issues in Character Creation
Even experienced Blender artists encounter technical issues. Here are some common problems in the character creation process and how to fix them:
- Messy Topology / Smoothing Artifacts:
Problem: Model appears lumpy or shading looks incorrect due to stray vertices, interior faces, incorrect normals, or non-uniform scale.
Solution: Clean geometry (Delete Loose/Merge by Distance), recalculate normals (Shift+N), and apply object scale (Ctrl+A > Scale). - Texture Seams Visible:
Problem: Visible texture seams appear along UV borders in renders.
Solution: Paint textures with margin beyond UV borders, fix seams using Blender’s Clone or Smear brushes, and verify interpolation and color space settings (e.g., Normal maps set to Non-Color). - Rigging Weight Problems:
Problem: Incorrect mesh movement during posing (e.g., torso moves when bending the arm).
Solution: Adjust vertex weights manually in Weight Paint mode (painting unwanted influence areas to zero or correct areas to full). Normalize weights to fix distribution issues. - Rigid or Candy-Wrap Deformations:
Problem: Joints (like elbows/knees) deform unnaturally when bent, creating odd twisting or collapse.
Solution: Add pole targets for IK rigs, create corrective shape keys, or add extra loops of geometry around joints. - Hair Unrealistic or Too Sparse:
Problem: Particle hair looks unnatural, sparse, or penetrates mesh.
Solution: Increase child strands for density, add roughness randomness, improve shader settings, enable body collision, or manually groom problem areas. - Cloth Penetration:
Problem: Cloth simulation causes clothes to penetrate character’s body.
Solution: Improve collision quality and distance settings, use Solidify modifier, pin cloth vertices, or manually sculpt corrections. - Slow Viewport / High Poly Count:
Problem: Lag due to high-poly models or dense hair.
Solution: Preview at lower Multires levels, use Simplify settings, hide heavy objects temporarily, or preview in Eevee. - Lighting/Material Look Different in Final Render:
Problem: Differences between preview (Eevee) and final render (Cycles) cause unexpected results.
Solution: Test consistently in the chosen render engine; confirm materials and effects compatibility. - Exporting Issues:
Problem: Issues when exporting to game engines (incorrect orientation, missing hair, animations not working).
Solution: Apply transforms, bake animations or shape keys, convert particle hair to mesh/cards for compatibility.
Solving these common problems ensures smoother workflow and better final results.

Expert Tips and Best Practices
To wrap up the creation workflow, here are some expert tips and best practices from seasoned Blender character artists that can improve your efficiency and the final quality:
- Iterate and Save Versions:
Professionals frequently redo model parts. Save incremental file versions (e.g., v1, v2) before big changes to allow rollback. - Use References Constantly:
Always use reference images (anatomy or concept art) during modeling, sculpting, and texturing for accuracy and consistency. - Optimize Topology for Movement:
Place loops around areas that bend (mouth, eyes, shoulders) to ensure smooth animation, even for stylized characters. - Leverage Shape Keys:
Use shape keys (morph targets) for difficult deformations (facial expressions, body squashes). Drive them with bones for flexibility and control. - Geometry Nodes for Reusability:
Use Blender’s Geometry Nodes for repetitive details (buttons, spikes) or procedural variations (ear/nose shapes for crowd characters). - Rig Test Early:
Rig and test posing on your base mesh early to catch proportion or topology issues before high-detail work. - Use Appropriate Texture Resolution:
Avoid excessively large textures for small or distant objects. Match texture detail to object visibility and importance, and test texel density with a checker grid. - Choose Render Engine Wisely (Cycles vs Eevee):
Use Cycles for realistic shading and Eevee for fast previews or stylized results. Many artists preview quickly in Eevee and finalize in Cycles. - Keep Learning from Community:
Use Blender community resources (forums, Reddit, YouTube) for troubleshooting, tutorials, and new methods. - Good Scene Organization:
Clearly name all objects, bones, and materials. Use Collections to neatly group related items for easier scene management.
By applying these practices, you improve efficiency, quality, and workflow clarity, making your character creation process smoother and more professional.
Lighting and Rendering Your Character
Good lighting can make or break the presentation of your 3D character. After spending so much time creating it, you want the renders to showcase all those details. Blender offers two render engines for final output: Cycles and Eevee, each with strengths.
Scene Lighting Setup:
- Use a three-point lighting setup:
- Key Light: Main, bright, front-side.
- Fill Light: Softer, opposite side, reduces shadows.
- Rim Light: Behind, highlights edges.
- Adjust light colors (warm key, cool fill) for realism.
- Use an HDRI environment in Blender’s World settings for realistic ambient light and reflections.
Choosing Cycles vs Eevee:
- Cycles: Realistic, physically accurate, slower, best for lifelike characters.
- Eevee: Real-time, fast, great for stylized looks, less realistic (limited global illumination and reflections).
Combining Both:
- Eevee for quick tests and look development.
- Cycles for final realistic renders (materials like skin and subsurface scattering).

Final Rendering Tips:
- Use camera focal length around 85mm to avoid distortion.
- Enable Depth of Field, focus typically on eyes for portraits.
- In Cycles, use denoising (Optix/OpenImageDenoiser) to reduce noise.
- In Eevee, enable Contact Shadows, Screen Space Reflections, Soft Shadows, and Ambient Occlusion for better detail.
- Choose a contrasting background (gradient or solid color).
- Render at least 1080p resolution or higher (4K for detailed portfolio shots).
- Check render results carefully and apply post-processing for color corrections or effects.
Proper lighting and rendering will greatly enhance the visual quality and presentation of your character.
Case Studies: Real-World Examples of Blender Projects with Great Character Designs
Analyzing examples of well-executed character projects can provide insight into effective workflows. Let’s look at a couple of scenarios and how Blender was used to achieve impressive character results:
Case Study 1:
Realistic Character for AAA Game (Fan Art Model) – An artist recreates a character from a AAA game (for example, The Witcher 3’s Geralt) in Blender:
- Workflow: They begin with a base mesh (either manually created or from MetaHuman), sculpt detailed features (scars, pores, wrinkles) in Blender using the Multires modifier, and bake normal maps to preserve details. Hair is created using hair cards, shaped from particle combing, converted to mesh planes with textures.
- Adaptation: Since the style is realistic, they carefully create physically-based materials: skin with roughness and subsurface scattering, metal shaders for swords, and micro-detailed leather armor. They render in Cycles for realistic lighting and shading, producing a character suitable for use in modern game engines.
Case Study 2:
Stylized Character for Animation (Blender Studio Open Movie) – Blender’s open movie Sprite Fright (2021) features highly stylized characters (cartoonish proportions but 3D detail):
- Workflow: They began by sculpting initial shapes in Blender, then retopologized for clean, animation-friendly meshes. Because it’s stylized, they focused on strong shapes and clear forms rather than fine details like skin pores. Expressive shape keys and clearly defined forms were important. They likely used Rigify or custom rigs for body animation and detailed facial rigs or shape keys for expressions.
- Hair and clothes: For hair and clothing, they used solid, simple modeled hair and manually sculpted appealing cloth folds, possibly using Blender’s Cloth sculpt tools. Geometry Nodes might have been mainly used for environment props rather than the characters, though it could add repetitive character details like freckles.
- Outcome: The characters were rendered in Cycles with stylized lighting, showing that good topology, clear sculpting, and expressive rigging remain essential, even without ultra-realistic detail.
Case Study 3:
Fantasy Creature (Indie Project) – An independent creator uses Blender to make a fantasy creature, say a dragon or a monster:
- Workflow: They started with sculpting basic shapes, then used retopology to make clean meshes. Geometry Nodes efficiently distributed scales across the body using weight painting for density control. Particle systems (or Geometry Nodes hair) created spikes or fur.
- Texturing: Textures were painted in Blender, using masks to separate colors for scales and skin, and possibly baked an ambient occlusion map for extra depth.
- Outcome: The final result was rigged and rendered (likely in Cycles) with atmospheric effects like volumetric fog, producing a realistic, cinematic-quality scene.
Blender’s tools adapt well to different character styles:
- Realistic characters: Detailed high-poly sculpting and detailed textures.
- Stylized characters: Strong, clean shapes, fewer textures, and expressive rigs.
- Fantasy characters: Combine sculpting and procedural workflows (like Geometry Nodes for scales or feathers).
Choosing the correct workflow depends on your style. Blender can handle all styles, but you’ll spend more or less time on sculpting, texturing, or procedural setups based on your project’s needs.

FAQ
- Can I create a high-quality realistic character in Blender, or do I need ZBrush and other software?
Blender alone can create high-quality realistic characters, handling detailed sculpts with Multiresolution and realistic renders with Cycles. Some artists prefer ZBrush for sculpting or Substance Painter for textures, but Blender provides a full pipeline and continues to improve. - How long does it take to make a character in Blender?
A simple stylized character can take a few days; a detailed realistic one might require weeks. Beginners typically spend longer. Speed increases with experience, but modeling, texturing, and rigging still take significant time. - Do I need a drawing tablet for sculpting and texture painting in Blender?
Not required, but highly recommended. Tablets allow natural pressure-sensitive strokes, improving control and quality, especially for sculpting and texture painting. - My character will be used in a game engine. Any specific things I should do differently?
Yes. Keep polygon counts low, use normal maps, limit materials, convert particle hair to hair cards or mesh, and carefully export rigs and shape keys. Regularly test in your game engine early to catch issues. - What are Geometry Nodes and how can they help in character creation?
Geometry Nodes is Blender’s procedural geometry system used to generate hair, fur, scales, or other repetitive details procedurally. It allows adjustable variations quickly, saving time on detailed or repetitive modeling. - What is PixelHair exactly, and is it free?
PixelHair is a commercial hair asset pack available on Yelzkizi. It’s paid, providing ready-made, realistic hair presets with particle systems and mesh caps for Blender characters, saving time compared to manual hair creation. - My sculpted mesh is super high-poly. How do I reduce it for animation?
Retopologize your sculpt into a clean low-poly mesh. Then, bake high-poly details into normal, displacement, and ambient occlusion maps. This method maintains detail with efficient poly counts suitable for animation. - Should I rig or texture first?
Common workflow: model → sculpt → retopo → UV unwrap → texture → rig. Texture in a neutral T-pose to avoid UV/pose issues. Rigging typically happens after texturing to simplify the process. - Eevee isn’t showing my character’s subsurface scattering or hair shadows correctly. What can I do?
Eevee has limitations. Enable Subsurface Translucency in material settings, use Contact Shadows for lights, and set hair materials to Alpha Hashed for better shadows. For full realism, use Cycles instead. - What resources do you recommend to continue learning character creation in Blender?
Official Blender manual, Blender Studio courses, YouTube channels (CG Cookie, YanSculpts), books by Oliver Villar, and online communities (Blender Artists, Reddit). Continuous practice with diverse characters helps skill growth.
Conclusion: Continuing Your Journey in Blender 3D Character Creation
You’ve learned Blender’s full character creation workflow, from initial concept through final rendering. Character creation is an artistic journey that combines creativity and technical skills.
Moving forward:
- Practice with Increasing Difficulty:
Regularly make new characters, starting simple (cartoon) and gradually increasing complexity (realistic busts, creatures). - Build a Portfolio:
Collect your best renders to track growth, showcase your skills, and highlight progress. - Explore Advanced Techniques:
Experiment with facial animations using Shape Keys, advanced rigging (Auto-Rig Pro, Mixamo), corrective modifiers, or external tools (Marvelous Designer) for cloth. - Stay Updated on Blender Features:
Regularly check Blender’s updates (Geometry Nodes, new shaders, improved sculpting). New features often simplify tasks or enhance quality. - Keep Learning and Growing:
Even professionals always improve by trying new styles, tools, and workflows. Embrace the ongoing learning process as part of becoming a skilled Blender character artist.
Now you’re ready to continue exploring Blender, growing your skills, and building an impressive portfolio.

References & Additional Resources
- Blender Official Manual – Character Modeling, Sculpting, and Animation Sectionsdocs.blender.org. Comprehensive documentation of tools and features.
- Blender Studio: Realistic Human Character Workflow – Article series on realistic character creation pipelinestudio.blender.orgstudio.blender.org.
- Wingfox Blog – Game Art: Difference between Realistic and Stylized80.lv. Great insights on how approach changes with art style.
- 80.lv Article – Realistic vs. Stylized: Technique Overview80.lv. Breakdown by an industry artist covering execution differences in workflow.
- Yarsa Labs Blog – Eevee vs. Cycles: Which to Choose?blog.yarsalabs.com. Helps decide the render engine based on project needs.
- PixelHair Official Page – PixelHair 3D Hair Assets for BlenderYelzkizi. Resource for premade realistic hair.
- en.wikipedia.org
- blender.org
- cgcookie.com
- commons.wikimedia.org
Recommended
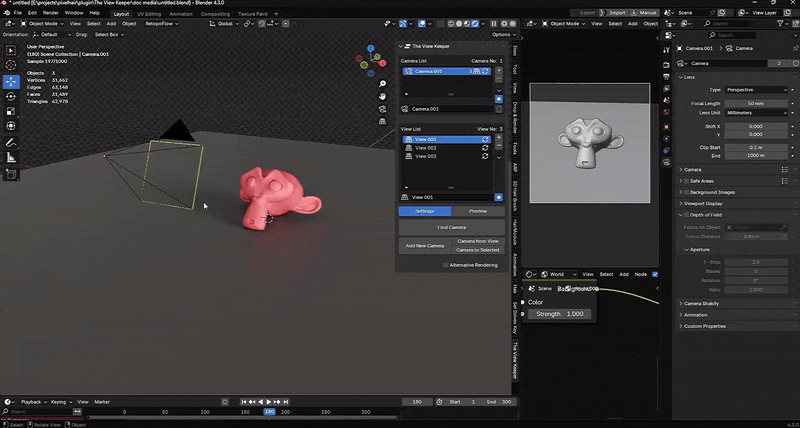
Blender Rendering Made Easy: Using The View Keeper for Multi-Shot Projects
Top 10 Blender Render Farm Services for Faster, High-Quality Renders
How do I make the camera move along a curve in Blender?
Can you have multiple cameras in one Blender scene?
PixelHair vs. Manual Hair Grooming in Blender: Which is Better?
Best Blender Render Settings: Ultimate Guide to High-Quality Renders Without Wasting Time


