

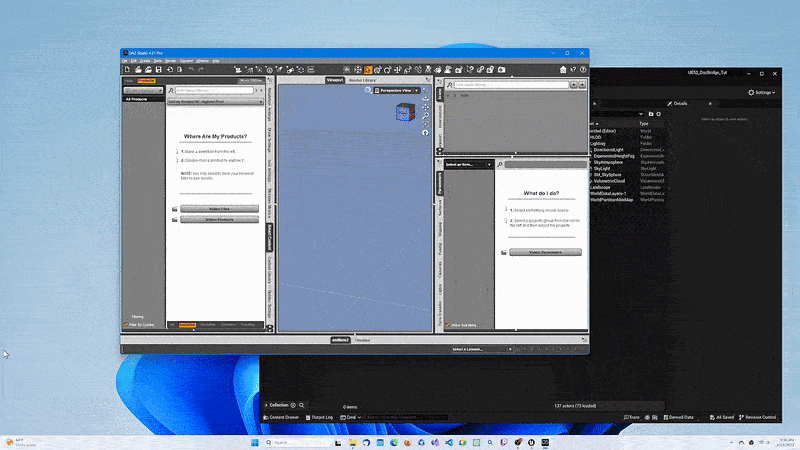


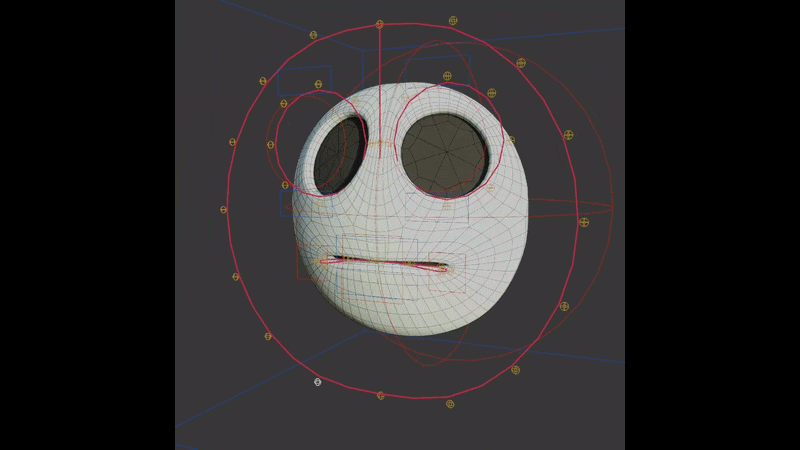
Facial rigging is the process of creating a system of controls and deformations that allow an animator to manipulate a character’s facial expressions and lip movements. In Blender, a well-crafted facial rig is essential for bringing characters to life – from subtle eye blinks to exaggerated cartoon smiles. In fact, good facial rigging is the foundation of good facial animation, enabling expressive, believable characters.
This guide provides a detailed overview of facial rigging in Blender, why it matters, and step-by-step instructions for various techniques (shape keys, bones, and hybrid methods). We’ll also cover advanced topics like combining shape keys with bones, weight painting tips, using drivers for controls, lip sync setup, Rigify automation, common mistakes to avoid, exporting to game engines, workflow optimizations, and more. Whether you’re a beginner or an experienced rigger, this article will help you improve your facial rigging workflow with practical insights and relevant references.

What is Facial Rigging and Why It’s Important
Facial rigging involves configuring a static 3D face to move and express emotions by adding deformers like bones or shape keys to the face mesh, along with controllers for animators to pose the face. A well-crafted rig enables precise control over facial features such as eyes, mouth, and brows, ensuring detailed deformations. This allows characters to perform actions like raising an eyebrow independently or combining muscle movements for complex expressions. Without a robust rig, facial animations appear limited and unconvincing.
For realistic characters, capturing human facial muscle movements is vital, while stylized characters benefit from flexible rigs for exaggerated expressions. The importance lies in its impact on the believability and expressiveness of a character’s performance, making careful rigging essential for natural or artfully exaggerated smiles, frowns, or lip-sync. High-end film rigs often use numerous custom blendshapes for precision, while Blender’s open movie rigs combine facial bones, corrective blendshapes, and other deformers to achieve desired motion. Even solo artists can enhance their work by mastering facial rigging, as it creates immersive, lifelike characters.
Overview of Facial Rigging Techniques in Blender
Blender provides three primary facial rigging methods, each with distinct benefits:
- Bone-Based Rigging (Armature Deform): Utilizes an armature with bones for jaw, cheeks, lips, and brows, bound to the mesh via weight painting. Bone movements deform the mesh like a puppet, offering continuous, rotation-based motion ideal for jaw or eye movements and efficient for real-time applications. However, achieving precise facial shapes requires many bones and meticulous weight painting.
- Shape Key-Based Rigging (Blendshapes): Involves creating shape keys for specific expressions or phonemes, allowing animators to model exact deformations like smiles or blinks. These artist-sculpted shapes ensure accuracy but are time-consuming to set up and may interpolate linearly, requiring corrective shapes for natural results.
- Hybrid (Bones + Shape Keys): Combines bones for major movements and shape keys for fine-tuned corrections, such as a bone opening the jaw while a shape key adjusts cheek folding. This approach, common in Blender productions, leverages the strengths of both systems for optimal results.
Common methods include bone-based rigs with numerous facial bones, shape key-based rigs with sculpted target shapes, and curve-based rigs for stylized characters, with hybrids often yielding the best outcomes. The choice depends on project needs: shape keys suit cartoons for exaggerated shapes, bones favor real-time game characters for performance, and hybrids balance broad movement with precise sculpting.

Setting Up a Basic Facial Rig in Blender (Step-by-Step)
This section outlines creating a facial rig using shape keys, armature bones, and a hybrid approach, allowing flexibility to combine techniques.
Using Shape Keys for Facial Expressions
Shape keys enable mesh deformation into specific shapes for expressions like smiles or blinks. Steps include:
- Prepare the Mesh: Ensure good topology with edge loops around the mouth and eyes, as shape keys rely on sufficient geometry for effective deformation.
- Add Basis Shape Key: In Object Mode, select the mesh, access Shape Keys in Object Data Properties, and add a Basis key (neutral face) and a new key (e.g., “Smile”).
- Model the Expression: In Edit Mode, sculpt the new shape key (e.g., raise mouth corners for a smile). Adjust the Shape Key Value slider to test the transition.
- Create Additional Shape Keys: Add keys for expressions like “Frown,” “Blink.L,” “Blink.R,” or “JawOpen,” and phoneme shapes for lip-sync like “Ah” or “Oo.”
- Test the Shapes: Verify individual and combined shapes work correctly, adding corrective shapes if combinations distort unnaturally.
Shape keys form a powerful foundation, often driven by controllers or bones via drivers for animator-friendly control. Focus on key expressions and use mirroring tools for symmetry.
Using Bones (Armature) for Facial Rigging
A bone-based rig uses an armature with small bones to deform facial parts via weight painting. Steps include:
- Add an Armature: Create an armature object, renaming it (e.g., “FaceRig”), and add bones in Edit Mode for:
- Jaw bone: Positioned at the chin for rotation.
- Eye bones: For eyeball rotation and aim targets.
- Eyelid bones: Multiple per lid for smooth bending.
- Brow bones: Several per eyebrow for raising/lowering.
- Lip bones: Multiple for upper/lower lips and corners.
- Cheek or nose bones: As needed, with symmetrical naming (e.g., “brow.L”).
- Parent Mesh to Armature: Parent the mesh to the armature with empty groups or automatic weights, refining auto-weights if needed.
- Weight Painting: Refine weights in Weight Paint mode, using:
- Isolate regions: Enable face selection masking to limit painting areas.
- Gradients and blur: Use Gradient tools for smooth transitions and Blur for edges.
- Mirror weights: Enable X-Mirror for symmetrical painting.
- Limit influences: Restrict each vertex to 2-4 bones, using Auto Normalize.
- Check deformation: Test extreme poses to adjust weights or add bones.
Bone rigs are effective for real-time applications due to their rotational freedom, but complex rigs may need many bones, often supplemented by shape keys in a hybrid approach.

A Hybrid Approach: Bones for Structure, Shape Keys for Detail
The hybrid method uses bones for major motions and shape keys for precise corrections, combining steps from both methods:
- Create and weight facial bones for general movements like jaw opening or brow raising.
- Add shape keys for specific expressions or correctives, sculpting them to fix issues like collapsing cheeks during wide jaw movements.
- Drive shape keys with bone movement using drivers, e.g., linking a jaw bone’s rotation to a corrective shape key for cheek shaping, ensuring automatic activation.
- Test the rig to confirm bones and shape keys work together seamlessly.
This approach, common in Blender projects, uses bones for structural control and shape keys for detailed sculpting, with drivers linking them for animator-friendly operation.
Best Weight Painting Techniques for Facial Deformation
Weight painting ensures smooth, believable deformations for bone-based facial rigs. Best practices include:
- Establish Proper Topology First: Ensure sufficient edge loops around eyes and mouth, as poor geometry hinders weight painting.
- Use Symmetry: Enable X-mirror or use the Weight Mirror tool for symmetrical bones and vertex groups.
- Face Selection Masking: Restrict painting to specific faces using Face Selection Masking or connected geometry selection.
- Gradient and Auto Normalize: Use Gradient tools for smooth weight transitions and Auto Normalize to maintain 100% weight distribution.
- Limit Bone Influence Area: Restrict each bone’s influence to a small region, creating falloff zones with weight values.
- Blend Between Bones: Use the Blur brush to soften transitions between bone influences.
- Special Tricks for Auto Weights: Adjust bone placement for localized influence and manually weight separate mesh pieces like teeth.
- Use Bendy Bones or Spline IK: Employ Bendy Bones for smooth curves in areas like eyebrows, simplifying weight painting.
- Test Extreme Poses: Pose bones to extremes to identify and fix collapsing or odd deformations.
Weight painting is challenging but critical, often requiring corrective shape keys for perfection. Strategic bone placement and good topology ease the process, with tools like Voxel Heat Diffuse Skinning as advanced aids.

Using Drivers to Control Facial Expressions
Drivers link one property to another, simplifying animation by automating deformations. Practical uses include:
- Bone to Shape Key (Direct): Drive a shape key (e.g., jaw corrective) with a bone’s rotation, setting the driver curve to map rotation to shape influence.
- Control Sliders (Custom Properties): Create a custom property (e.g., “Smile” slider) to drive multiple shape keys for symmetrical expressions.
- One Bone, Multiple Shape Keys: Use a single bone’s movement directions to trigger different shape key combinations via scripted expressions.
- Shape Key Driving Another Shape Key or Bone: Less common, e.g., an eye squint shape key driving a skin fold bone.
- Using Drivers for Visemes: Drive lip-sync shape keys with a phoneme control for coordinated mouth shapes, though direct keyframing is often preferred.
Steps to set up a driver (e.g., bone driving a smile shape key):
- Right-click the shape key’s Value slider, select “Add Driver.”
- In Graph Editor’s Drivers mode, set the driver to use the bone’s Y Location, mapping movement to shape key value.
- Fine-tune the driver curve or use scripted expressions for precise control.
Drivers streamline complex rigs, condensing multiple controls into single bone movements, but excessive drivers can slow performance. They act as the glue between controls and deformations, enhancing realism and animation efficiency.
Setting Up a Facial Rig for Lip Sync Animation
Lip sync rigging enables mouth and jaw movements for speech, using shape keys for visemes or a hybrid approach. Steps include:
- Define Visemes (Phoneme Shapes): Create shape keys for key mouth shapes like A/I (wide open), O (round), E (wide grin), U (pursed), F/V (teeth on lip), L (tongue up), M/B/P (closed). Reference standard viseme charts and sculpt with the jaw bone neutral.
- Integrate with the Rig:
- Manual Shape Key Animation: Keyframe viseme shape keys in the Dope Sheet to match dialogue timing.
- Driver Control Approach: Use sliders or bones to drive viseme shape keys, exposing them as custom properties for easier control.
- Jaw and Lip Bones: Use a jaw bone for opening/closing, combined with shape keys for precise lip shapes (e.g., “M” shape key with slight jaw closure).
- Lip Sync Workflow:
- Load dialogue audio into the Video Sequencer.
- Use the Dope Sheet or Pose Library to store and apply mouth poses.
- Keyframe jaw bone and shape keys per phoneme, adjusting for smooth transitions.
- Use add-ons like Rhubarb Lip Sync for automated shape key keyframing.
Ensure viseme shape keys are animated separately from driver-controlled expression shape keys to avoid conflicts. A hybrid approach (jaw bone for broad movement, shape keys for lip details) is common, with additional eye/brow controls for lively speech animation. For game engines, ensure compatibility with bone or shape key animations.

Using Blender’s Rigify Add-on for Facial Rigging Automation
Blender’s Rigify add-on streamlines facial rigging by automating the creation of complex rig structures using predefined templates, significantly reducing the effort needed for manual bone placement and weight painting. To use Rigify, enable it via Edit -> Preferences -> Add-ons, search for “Rigify,” and activate it to access rig templates in the Add Armature menu. Rigify operates by positioning a metarig (a template armature) to match your character, then generating a final rig with control and deform bones.
For facial rigging, the human metarig includes bones for the jaw, eyes, eyelids, brows, and more. The workflow involves adding a human metarig (Shift+A → Armature → Human), adjusting its face bones in Edit Mode to align with features like the jaw hinge and eyelid edges, and selecting Generate Rig in the Armature properties to produce a rig with custom bone shapes and constraints. The mesh is bound to the rig using automatic weights or manual painting, targeting deform bones (DEF prefixes) driven by control bones (CTRL prefixes). Rigify’s face rig provides:
- A structured bone hierarchy with constraints that emulate facial muscle movements for natural deformation.
- Bendy bone configurations for smooth lip, eyelid, and cheek deformations, utilizing systems like “cloud” or “pitchipoy” for flexibility.
- Intuitive control widgets for eyes and jaw, plus tweak controls on separate layers for detailed adjustments.
- Modular options in Blender 3+, allowing customization of features like cheek puff or tongue inclusion.
Rigify automates much of the setup, but weight painting, particularly for lips, eyelids, teeth, and tongue, often requires manual refinement due to auto-weight limitations. It’s ideal for humanoid faces, though non-human characters may need metarig adjustments. Community extensions like CloudRig enhance facial features, and Rigify serves as a foundation for adding shape keys for complex expressions.
Common Mistakes in Facial Rigging (and How to Avoid Them)
Beginners often encounter issues in facial rigging that can derail their efforts. Key mistakes and their solutions include:
- Poor Topology Leading to Bad Deformations: Insufficient edge loops around the mouth or eyes result in unnatural deformations that weight painting can’t fully correct. Ensure the mesh has proper topology with loops around facial orifices before rigging; retopologize if necessary to support smooth animation.
- Not Applying Scale/Rotation: Unapplied scale or rotation on the mesh or armature leads to erratic weight and driver behavior. Apply transforms (Ctrl+A → Rotation & Scale) to both mesh and armature prior to rigging to align coordinate systems.
- Excessive Bone Influence/Weight Paint Overlaps: Assigning multiple bones with high weights to the same vertices causes unpredictable deformations. Use normalized weights, limit each vertex to 2-4 bone influences, and apply Normalize All or Limit Total tools to maintain control.
- Forgetting to Weight Inner Mouth/Eyes: Neglecting to rig teeth, tongue, or eyeballs results in static elements during jaw movement. Weight or parent eyeballs to eye bones, upper teeth to head bone, and lower teeth/tongue to jaw bone, ensuring they follow the rig.
- Shape Keys vs. Armature Modifier Order: Incorrect modifier order disrupts shape key functionality, as they’re calculated before armature deformation. Create shape keys in the bind pose and ensure the Armature modifier follows shape keys; use drivers for pose-dependent correctives.
- Driven vs. Animated Shape Key Conflict: Animating a shape key with an active driver causes conflicts, as drivers override keyframes. Separate driven shape keys (for automatic effects) from those manually animated to avoid interference.
- Too Many Drivers or Expressions Slow the Rig: Excessive or complex drivers can lag rig performance during posing. Use drivers for significant relationships, opt for simpler modifier functions over heavy Python scripts, and test rig performance as complexity increases.
- Bone Roll Misalignment: Incorrect bone roll alignments cause unintuitive vertex movement during posing. In Edit Mode, adjust bone rolls (Ctrl+R) to align local axes, ensuring predictable rotations (e.g., Y-axis down the bone for twisting).
- Using Automatic Weights and Expecting Perfection: Auto-weights provide a starting point but often produce messy results, especially for lips or eyelids. Manually refine weights after auto-weighting, fix non-manifold geometry, or join meshes to resolve issues like “bone heat failed” errors.
- Not Utilizing “Preserve Volume” (Dual Quaternion): Disabling the Armature modifier’s Preserve Volume option leads to volume loss in deformations. Keep Preserve Volume enabled for smoother facial deformations, particularly around twisting areas.
- Overlooking Facial Muscle Realism: Uniform or overly stiff movements diminish realism. Include separate left and right controls for eyes, brows, and mouth to allow subtle asymmetry, enhancing lifelike expressions in realistic rigs.
Community forums like Blender Artists provide solutions for issues such as Rigify generation errors or export problems, leveraging collective experience.

Exporting a Facial Rig to Unreal Engine and Unity
Exporting Blender facial rigs to game engines like Unreal Engine (UE4/UE5) and Unity requires careful setup to ensure bones and shape keys translate effectively.
Exporting to Unreal Engine (UE4/UE5)
Unreal Engine supports bone-based skeletal animation and shape keys as morph targets. For FBX export:
- Bones/Armature: Export only deform bones by enabling Only Deform Bones in FBX settings, and apply scale/rotation to the armature and mesh to ensure proper import scale and orientation.
- Shape Keys (Morph Targets): Enable Shape Keys in FBX Geometry settings and check Import Morph Targets in Unreal’s FBX Import dialog to include shape keys as morph targets in the Skeletal Mesh.
- Animation: Export bone or shape key animations with the Export Animations option enabled, allowing Unreal to import them as Animation Sequences or enabling recreation in Sequencer or Anim Blueprints.
- Materials and Normals: Import Blender’s normals to preserve lighting accuracy for morphs, as Unreal may recompute them otherwise, potentially affecting appearance.
Test morph targets in Persona and verify the skeleton hierarchy to avoid issues like extra root bones. Optimize performance by limiting morph target usage and bone counts, typically using bones for major movements like jaw and eyes, and morphs for detailed expressions.
Exporting to Unity
Unity supports skeletal animation and blend shapes via FBX or direct .blend import, with FBX offering more control:
- Bones: Export only deform bones, ensuring vertices adhere to Unity’s four-bone influence limit using the Limit Total tool to prevent truncation.
- Blend Shapes: Enable Shape Keys in FBX and confirm Import BlendShapes is active in Unity’s Model Import settings to list blend shapes in the SkinnedMeshRenderer for testing.
- Animation: Export bone and blend shape animations, which Unity imports as AnimationClips or allows control via scripting (SetBlendShapeWeight) or AnimationClips in the Animation window for blend shapes.
Apply all modifiers, zero shape keys at frame 0, and use simple names to avoid export issues. Test animations in Unity to confirm the pipeline, adjusting settings as needed.
Both engines support Blender rigs with proper configuration, enabling cutscene animations or in-engine control for gameplay, such as through Unity’s timeline or Unreal’s AnimBlueprint.

Automation Tools to Speed Up Facial Rigging
Several tools and add-ons beyond Rigify accelerate facial rigging:
- Faceit Add-on: A Blender Market add-on that semi-automatically generates facial shape keys and control rigs based on preset expressions (e.g., FACS, ARKit), supporting ARKit mocap integration. It places markers on the face, generates editable shape keys, and creates a driver-linked control rig, integrating with body rigs like Rigify for comprehensive setups.
- Auto-Rig Pro (ARP) – Face Module: A paid add-on offering game-friendly facial rigs with predefined deform bones and controllers, combinable with Faceit for enhanced shape key and driver setups, featuring a picker interface for easier control.
- BlenRig: A complex, production-tested rig from Blender Institute projects, available via Blender Cloud, with an advanced facial setup, though less common today due to Rigify’s improvements.
- Mixamo Face: Limited to preserving blend shapes for visemes on certain characters, offering minimal facial rigging support.
- External Morph Target Generators: Tools like Jali generate viseme shapes for lip sync, useful for external integration with Blender.
- Geometry Nodes: Experimental setups using geometry nodes to create procedural deformers or shape-key-like effects, not yet mainstream but promising for advanced rigging.
- Custom Python Scripts: Scripts automate tasks like mirroring shape keys or generating multiple drivers, leveraging community resources for efficiency.
These tools, particularly Faceit and ARP, drastically reduce rigging time, ensure game engine compatibility, and support mocap, with Faceit excelling in ARKit-based animation setups.
Workflow Optimizations and Expert Tips (Realistic vs Stylized)
Optimizing facial rigging enhances efficiency and animator usability. Key tips include:
- Plan with References: For realistic rigs, use the Facial Action Coding System (FACS) to replicate muscle-based expressions, ensuring all human movements are possible. For stylized rigs, sketch extreme poses to define the expressive range needed, guiding control placement.
- Use Pose Libraries: Store facial expressions (e.g., joy, anger, phonemes) in Blender’s Asset Browser to test rig capabilities and provide animators with reusable poses, streamlining animation for both realistic and stylized characters.
- Symmetry and Then Break It: Rig and weight paint symmetrically to save time, but include separate left/right controls for realistic rigs to enable subtle asymmetry; stylized rigs may retain symmetry for graphic styles but should allow independent tweaks.
- Bendy Bones and Curves for Stylized Rigs: Use bendy bones with 3-5 segments for smooth, cartoon-style lip or brow curves, controlling curvature via handle scaling to achieve squash-and-stretch effects ideal for stylized characters.
- Corrective Shape Keys for Realism: Sculpt corrective shape keys to fix skin folds or bulges in extreme poses (e.g., cheek lift during wide mouth + squint), using add-ons to simplify creation for realistic rigs; stylized rigs may need fewer or none based on style.
- Limit Degrees of Freedom: Apply constraints like limiting jaw rotation to realistic ranges to prevent errors in realistic rigs, but allow flexibility in stylized rigs for exaggerated movements unless the style demands strict limits.
- Use Proxy Deformers: Employ a low-poly Mesh Deform cage to simplify weight painting for realistic rigs, binding the cage to bones and the high-res mesh to the cage for smooth deformations, though this adds setup complexity.
- Organize Face Controls Clearly: Use color-coded controllers, bone groups, or custom UI panels (via Python) to make controls intuitive, ensuring animators can easily access facial controls through selection sets or dedicated layers.
- Test with Animation Scenarios: Perform quick animation tests (e.g., lip-sync or expression changes) to identify issues like shape key interpolation errors or eye tracking, refining the rig for smooth transitions.
- Realistic Skin Sliding vs Stylized Solidness: Mimic skin sliding over bone with subtle bone movements or shape keys for realistic rigs; stylized rigs simplify to unified movement, reducing complexity unless extreme exaggeration is needed.
Realistic rigs prioritize anatomical fidelity with extensive controls, while stylized rigs focus on expressive range, potentially with fewer but more flexible controls. Optimize for animator simplicity by hiding unnecessary controls and balancing complexity with usability.

Frequently Asked Questions (FAQ)
- Should I use bones or shape keys for facial rigging?
Bones are ideal for real-time performance and broad movements like jaw or eye rotation, while shape keys provide precise, artist-sculpted expressions. A hybrid approach—bones for structural elements and shape keys for detailed expressions—often delivers optimal results. For games, bones prioritize performance; for films, shape keys enhance nuanced facial details. - How many shape keys do I need for a good facial rig?
A basic rig requires ~10-20 shape keys, including blink, smile, frown, brow movements, and phonemes (e.g., “A,” “O,” “M”). Feature-quality rigs may use dozens, incorporating corrective keys. Focus on modular shapes covering key expressions, using drivers to simplify management of complex setups. - What are corrective shape keys and when should I use them?
Corrective shape keys address deformation issues in bone-driven poses, such as cheek pinching during a wide jaw and smile combination. Use them to maintain volume and enhance realism in extreme poses, elevating rig quality beyond what weight painting alone can achieve. - How can I mirror shape keys from one side of the face to the other?
In Edit Mode, use Blend From Shape or Mirror Shape Key on a symmetric mesh, or apply Symmetrize with .L/.R naming conventions. Add-ons streamline mirroring, but ensure the base mesh is symmetric to avoid complications. - The shape keys on my character don’t export to Unity/Unreal, what did I do wrong?
Check that Shape Keys and Import Morph Targets/BlendShapes are enabled in FBX export and engine import settings. Apply all modifiers, zero shape keys at frame 0, and test with a simple animation to confirm the pipeline. Ensure shape keys are on the skinned mesh. - Can I rig a face without good topology (like using a hi-res scan)?
Rigging a high-res scan without proper topology is difficult, leading to poor deformations. Use a low-poly proxy mesh with edge loops and a Mesh Deform modifier, or retopologize the scan to ensure smooth, predictable rigging results. - My character’s eyes won’t follow the rig (they stay in place when head moves). How do I rig eyes and eyelids properly?
Parent or weight eyeballs 100% to eye bones, which should be children of the head bone. Use eyelid bones or shape keys for blinking, with track-to constraints for partial eye following. Weight or parent teeth/tongue to jaw/head bones to ensure proper movement. - What are drivers in Blender rigging, and are they necessary for facial rigs?
Drivers link properties, such as bone movements to shape key values, automating complex relationships for intuitive animation. While not mandatory, drivers are highly recommended for all but the simplest rigs, enabling efficient control of expressions and corrective shapes. - The face deforms weirdly when I rotate the head or move the character – what’s wrong?
Incorrect deformations during head or character movement may stem from multiple Armature modifiers, unapplied transforms, or improper bone inheritance. Ensure a single Armature modifier, aligned origins, and local transform drivers to maintain consistent behavior. - Are there any ready-made face rigs or templates I can use?
Options include Rigify (built-in), BlenRig (Blender Cloud), Faceit add-on for quick customized rigs, and community rigs on BlendSwap or BlenderKit. Study rigs like Rain or Victor from Blender Cloud, adjusting templates to match your character’s proportions.
This guide provides a comprehensive approach to crafting versatile, animator-friendly facial rigs, enhancing character animations for films or games through iterative refinement.
Sources:
Blender Studio
- Blender Studio (homepage)
- Project Storm (Blender Studio project page)
- Storm – Character Rig (facial rig / shapekeys context)
- Blender Studio blog: “Proposal: Facial Rigging with shape keys”
- Blender Studio training: “Facial Rigging” (Storm workflow course page)
Blender Manual (official)
- Blender Manual (latest index/home)
- Shape Keys (official manual section)
- Rigify (official manual section)
Official Rigify developer documentation
- Rigify Add-on API (Blender Developer Documentation)
Blender Artists Community discussions
- Blender Artists (homepage)
- “Shape Keys or Bones in Facial Rig” (discussion thread)
- “Lattices vs shape keys for facial rigging?” (discussion thread)
- “How do I add speech shape keys to a Rigify rig?” (discussion thread)
- “Best way to connect my facial rig to rigify” (discussion thread)
80.lv industry articles on facial rigging
- “Blender Studio Presents New Character to Help Artists with Facial Rigging” (80.lv)
- “Animating Speech & Mastering Facial Rigging: Guidelines for Game Developers” (80.lv)
Polycount forum
- Polycount (homepage)
- Polycount forum (category list)
- “Blendshapes/Shape keys/Morphtargets… (facial ones)” (thread)
- “Face Rigging vs Using Morph Targets…” (thread)
Sources and Citations
- Blender Studio (studio.blender.org) — Blender Studio. (n.d.). Blender Studio [Website]. Retrieved March 5, 2026, from studio.blender.org.
- Blender Studio blog (facial rigging / shape keys) — Blender Studio. (2025, February 24). Proposal: Facial Rigging with shape keys [Blog post]. Retrieved March 5, 2026, from studio.blender.org/blog/proposal-facial-rigging-with-shape-keys/.
- Blender Studio training (facial rigging course) — Blender Studio. (n.d.). Facial Rigging [Training course]. Retrieved March 5, 2026, from studio.blender.org/training/facial-rigging/.
- Blender Manual (official) — Shape Keys — Blender Foundation. (n.d.). Shape Keys — Blender Manual [Documentation]. Retrieved March 5, 2026, from docs.blender.org/manual/en/latest/animation/shape_keys/index.html.
- Blender Manual (official) — Rigify — Blender Foundation. (n.d.). Rigify — Blender Manual [Documentation]. Retrieved March 5, 2026, from docs.blender.org/manual/en/latest/addons/rigging/rigify/index.html.
- Blender Developer Documentation (official) — Rigify — Blender Developer Documentation. (n.d.). Rigify Add-on API [Developer documentation]. Retrieved March 5, 2026, from developer.blender.org/docs/features/animation/rigify/.
- Blender Artists Community (blenderartists.org) — Blender Artists Community. (n.d.). Blender Artists Community [Forum]. Retrieved March 5, 2026, from blenderartists.org.
- Blender Artists discussion (shape keys vs bones) — Blender Artists Community. (2010, August 25). Shape Keys or Bones in Facial Rig [Forum thread]. Retrieved March 5, 2026, from blenderartists.org/t/shape-keys-or-bones-in-facial-rig/485832.
- Blender Artists discussion (Rigify + speech shape keys) — Blender Artists Community. (2023, December 30). How do I add speech shape keys to a Rigify rig? [Forum thread]. Retrieved March 5, 2026, from blenderartists.org/t/how-do-i-add-speech-shape-keys-to-a-rigify-rig/1506997.
- Industry article (facial rigging) — 80 Level. (2025, May 27). Blender Studio Presents New Character to Help Artists with Facial Rigging [Article]. Retrieved March 5, 2026, from 80.lv/articles/blender-studio-presents-new-character-to-help-artists-with-facial-rigging.
- Polycount forum (polycount.com) — Polycount. (n.d.). Polycount Forum [Forum]. Retrieved March 5, 2026, from polycount.com/forum.
- Polycount discussion (rigging vs morph targets) — Polycount. (2018, March 18). Face Rigging vs Using Morph Targets for Animating Face Expressions [Forum thread]. Retrieved March 5, 2026, from polycount.com/discussion/199253/face-rigging-vs-using-morph-targets-for-animating-face-expressions.
- Unreal Engine forums (forums.unrealengine.com) — Epic Developer Community Forums. (2018, May 24). Morphs V/S Bones for Facial Rigging [Forum thread]. Retrieved March 5, 2026, from forums.unrealengine.com/t/morphs-v-s-bones-for-facial-rigging/111257.
- Epic official docs (morph targets) — Epic Games. (n.d.). FBX Morph Target Pipeline in Unreal Engine [Documentation]. Retrieved March 5, 2026, from dev.epicgames.com/documentation/en-us/unreal-engine/fbx-morph-target-pipeline-in-unreal-engine.
- Epic tutorial (Control Rig driving morphs/blendshapes) — Epic Games. (2022, May 12). Driving Blend Shapes or Morph Targets using Control Rig [Tutorial]. Retrieved March 5, 2026, from dev.epicgames.com/community/learning/tutorials/p4Xx/driving-blend-shapes-or-morph-targets-using-control-rig.
Recommended
- AI in Game Development (2026): Wins, Losses, and How to Use AI for Critique & Feedback
- Can I Improve My Metahuman in Blender? A Comprehensive Guide
- How to Make Your Own Character for Unreal Engine 5: A Step-by-Step Creation Guide
- Cascadeur: The Ultimate AI-Powered 3D Animation Software for Game Developers and Animators
- Simplifying Camera Control in Blender with The View Keeper Plugin
- Endorphin 3D Animation Tutorial: NaturalMotion Behavioral Physics Workflow (DMS + FBX Export)
- How to Make a City in Blender: A Step-by-Step Guide for 3D Environment Creation
- Diverse and Attractive Video Game Characters: Exploring Stellar Blade, Hades, and More
- How do I parent a camera to an object in Blender?
- Virtual Influencers: AI-Generated vs 3D-Modeled – Which Is Better?


