


Virtual reality (VR) is transforming the way we experience digital content by creating immersive environments that transport viewers into three-dimensional worlds. Whether you’re designing a VR game, a virtual tour, or a cinematic experience, setting up a VR camera in Blender is a crucial first step. In this comprehensive guide, we’ll walk you through everything you need to know. From understanding what a VR camera is and why it’s essential, to step-by-step instructions for configuring your scene, enabling VR features, and optimizing your workflow. We’ll also explore advanced tips and real-world examples to help you master VR camera setups in Blender.
Introduction
Virtual reality is no longer a niche technology reserved for specialized industries, it has become a mainstream medium for storytelling, gaming, architectural visualization, and interactive experiences. Blender, an open-source 3D creation suite, provides robust tools to help you create immersive VR environments. One of the critical steps in creating VR environments is setting up a VR camera that accurately captures your scene and delivers an engaging, lifelike experience.
In this article, we delve into the specifics of setting up a VR camera in Blender. We will cover the foundational concepts, detailed steps for configuration, integration with VR hardware, and best practices to optimize your workflow. Whether you are a seasoned Blender artist or just beginning your journey in 3D, this guide aims to provide you with the knowledge and tools to create stunning VR experiences.
Understanding VR Cameras
Before diving into the setup process, it’s important to understand what a VR camera is and how it differs from a conventional 2D camera.
What Is a VR Camera?
A VR camera in Blender is designed to simulate the way humans see the world in three dimensions. Unlike a standard camera, which captures a flat, two-dimensional image, a VR camera is configured to capture a 360-degree view, often in a stereoscopic format. This means it renders two slightly different images (one for each eye) to mimic human binocular vision, which creates a sense of depth and immersion.
Key characteristics of a VR camera include:
- Wide Field of View: VR cameras are set to capture an expansive view, often using panoramic settings such as equirectangular projection.
- Stereoscopic Vision: For a true VR experience, the camera can output two views (left and right) to simulate depth perception.
- Real-World Scale: VR setups often require careful calibration of scene scale to ensure that virtual objects appear at realistic sizes.
- Interactive Perspective: The VR camera’s position and orientation are frequently linked to user input or headset tracking, allowing the viewer to look around naturally.
Understanding these characteristics helps you adjust your settings in Blender to achieve a convincing VR effect.

Why Use a VR Camera in Blender?
Using a VR camera in Blender opens up a multitude of creative opportunities:
Immersive Storytelling
By capturing scenes from a 360-degree perspective, a VR camera allows your audience to feel as if they are part of the action. Whether it’s an intense chase scene in a game or a serene architectural walkthrough, VR immerses the viewer in a way traditional 2D media cannot.
Enhanced User Experience
In virtual reality, the user’s perspective is paramount. A well-configured VR camera can help simulate natural human vision, making the experience more comfortable and engaging. Stereoscopic rendering and accurate depth cues contribute to a realistic and immersive environment.
Versatility Across Projects
VR is not limited to gaming. It has applications in education, training, real estate, art installations, and more. A VR camera setup in Blender lets you create content for multiple platforms, from interactive VR headsets to 360-degree videos on social media.
Creative Flexibility
Using VR cameras, you can experiment with unconventional angles and perspectives. The wide field of view and customizable settings allow for creative storytelling techniques, such as shifting viewpoints and dynamic transitions that enhance the narrative.
Preparing Your Blender Environment for VR
Before setting up your VR camera, it’s essential to prepare your Blender environment:
Update to the Latest Version
Ensure you are using the latest version of Blender (e.g., Blender 4.3 or later) as VR features and compatibility are continually improved. Newer versions come with enhanced tools for VR content creation, ensuring a smoother experience.
Organize Your Scene
Keep your scene organized:
- Name Your Objects: Clearly label your camera, lights, and key scene elements.
- Layer Management: Use collections to organize different parts of your scene, making it easier to manage complex setups.
- Scene Scale: Adjust your scene scale to match real-world dimensions. Accurate scaling is crucial for VR to ensure that the viewer’s perception of space is realistic.
Optimize Hardware Performance
VR content creation can be resource-intensive. Ensure that your computer meets the recommended specifications for Blender VR workflows. A powerful GPU, ample RAM, and a modern CPU will help render your scenes efficiently, minimizing lag and ensuring a smooth VR experience.
Enabling VR Scene Inspection
Blender includes a built-in add-on called VR Scene Inspection, which allows you to view your scenes in VR directly from Blender. This is an essential step for testing and refining your VR camera setup.
How to Enable VR Scene Inspection
- Open Blender Preferences:
Go to Edit > Preferences. - Access the Add-ons Tab:
In the Preferences window, click on the Add-ons tab. - Search for VR Scene Inspection:
Type “VR Scene Inspection” in the search bar. - Enable the Add-on:
Check the box next to the VR Scene Inspection add-on to enable it.
Once enabled, you can access VR Scene Inspection from the 3D Viewport’s Sidebar under the VR tab. This tool allows you to start a VR session and view your scene in real time using your VR headset.

Configuring the VR Camera Settings
After enabling VR support in Blender, it’s time to configure your camera for VR. This involves adjusting several key settings to create an immersive VR experience.
Adjusting the Field of View
The field of view (FOV) is a critical setting for a VR camera. It determines how much of the scene the camera captures at once.
- Select Your Camera:
Click on your camera in the Outliner or 3D Viewport. - Open the Camera Properties Panel:
Click on the camera icon in the Properties Editor. - Set a Wide Field of View:
For VR, a wide FOV is typically required—values between 90 and 110 degrees are common. You can adjust this by modifying the focal length. Lower focal lengths (e.g., 8mm to 16mm) result in a wider FOV.

Setting Up Stereoscopic Vision
A key aspect of VR is stereoscopy, which simulates human binocular vision by providing two slightly different images for the left and right eyes.
- Switch to Panoramic Mode:
In the Camera Properties panel, change the camera type to Panoramic. - Choose the Equirectangular Projection:
This projection is ideal for VR as it captures a 360-degree view. - Enable Stereoscopy:
Go to the Stereoscopy settings (found in Output Properties which is below the Render Properties) and enable stereoscopic rendering. - Go to the Stereoscopy settings (This time found in Camera Data settings) Adjust the interocular distance to match the average human eye separation (around 6.5–7.5 cm).

Optimizing Clipping Distances
Properly setting the near and far clipping distances ensures that all relevant objects in your scene are rendered correctly, which is vital for immersive VR.
- Locate the Clipping Settings:
In the Camera Properties panel, scroll down to the Clipping section. - Set the Near Clipping Distance:
A low value (e.g., 0.1 meters) ensures that objects close to the camera are visible. - Set the Far Clipping Distance:
Adjust the far clipping value based on the scale of your scene. For expansive VR environments, this might be set to several hundred meters.
Integrating VR Hardware with Blender
Setting up your VR camera in Blender is only part of the process, you also need to integrate your VR hardware for testing and deployment.
Compatible VR Headsets
Blender supports a range of VR headsets, including:
- Oculus Rift and Quest 2
- HTC Vive
- Valve Index
- Windows Mixed Reality Headsets
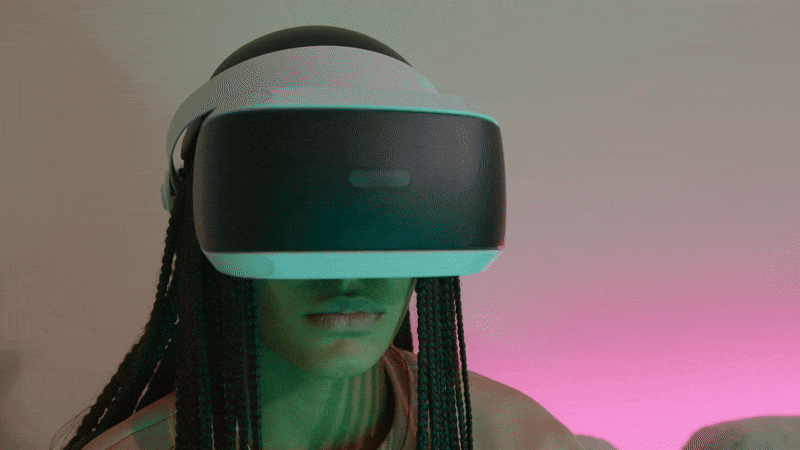
Connecting Your VR Headset
- Ensure Proper Drivers:
Make sure your VR headset drivers are installed and updated. - Connect to Your Computer:
Follow the manufacturer’s instructions to connect your VR headset. - Start a VR Session:
Use the VR Scene Inspection add-on to start a VR session directly from Blender. This will allow you to see your scene in VR and adjust camera settings as needed.
Testing in VR
Regularly test your VR setup to ensure that your camera settings and scene configuration work correctly in a real-world environment. This is crucial for identifying any issues with scale, performance, or user comfort.
Enhancing Workflow with The View Keeper
For those who manage complex VR projects, The View Keeper is an essential tool. It helps you store and recall multiple camera setups, making it easier to experiment with various configurations.
How The View Keeper Enhances Your VR Workflow
- Store Multiple Camera Records:
Save different VR camera setups as records, each with unique settings such as FOV, focal length, clipping distances, and sensor size. - Quickly Switch Between Setups:
Instantly recall and switch between saved configurations. This is especially useful when you need to compare different VR perspectives or when you’re working on multiple angles within the same project. - Render Multiple Views Simultaneously:
Each camera record can have its own render resolution, file format, and output folder. This flexibility is ideal for VR projects that require different outputs. For example, a stereoscopic view for a VR headset and a standard 360° view for online sharing. - Organized and Efficient Workflow:
By keeping all your VR camera settings organized in one place, The View Keeper streamlines your workflow, reducing setup time and minimizing errors.
Using The View Keeper, you can quickly experiment with different VR camera configurations without having to manually reconfigure settings each time. This makes it an indispensable part of your VR workflow in Blender.
Real-World Inspirations and Applications
Immersive Film and Television
Directors in film and television often use VR techniques to create immersive storytelling experiences. By setting up a VR camera in Blender, you can simulate a first-person perspective that places viewers directly in the scene. Imagine a VR short film where the audience feels as if they are walking alongside the protagonist, experiencing the environment in real time.
Video Game Development
Many video games now incorporate VR elements to enhance immersion. A VR camera setup in Blender can be used to create cinematic cutscenes or interactive gameplay experiences. In first-person games, the camera captures the world as the player sees it, enhancing the feeling of presence. By fine-tuning your VR camera settings, you can replicate the immersive quality found in popular titles.
Architectural Visualization
Architectural walkthroughs are one of the most common applications of VR. Using a VR camera in Blender, architects can create virtual tours of buildings and spaces, allowing clients to experience the design from a first-person perspective. This technique helps convey the spatial relationships and scale of a design more effectively than traditional renderings.
Virtual Reality Experiences
In the realm of VR experiences, realism and immersion are key. Whether it’s a VR art installation, a virtual museum tour, or an interactive training simulation, setting up an effective VR camera in Blender is critical. With the proper configuration, adjusted FOV, stereoscopic settings, and optimized clipping distances you can create an environment that feels truly lifelike and engaging.
Product Demonstrations
VR is increasingly used in product demonstrations and marketing. A VR camera can showcase a product from multiple angles, highlighting its features in a dynamic and interactive way. By animating the VR camera, you can create engaging visual presentations that draw the viewer into the product experience.
Troubleshooting Common Issues
Even with careful planning, you may encounter challenges when setting up a VR camera in Blender. Here are some common issues and their solutions:
Performance and Frame Rate Issues
- Low Frame Rates:
VR requires high frame rates (at least 75-90 FPS) to ensure a comfortable experience. If your scene is lagging, consider reducing the far clipping distance or optimizing your models and textures. - Hardware Limitations:
Ensure your computer meets the recommended specifications for VR content creation. Upgrading your GPU or increasing RAM can help improve performance.
Incorrect Field of View or Stereoscopy Settings
- Wide or Narrow FOV:
If the field of view doesn’t feel right, adjust the camera’s focal length and sensor size. Experiment with different settings using The View Keeper until you achieve a natural perspective. - Stereoscopic Misalignment:
Verify the interocular distance in the stereoscopy settings. A typical value is around 6.5–7.5 cm. Incorrect values can lead to discomfort or a less immersive experience.
Issues with Clipping Distances
- Objects Not Visible:
If important objects are being clipped out of your view, adjust the near and far clipping distances in the Camera Properties panel. - Artifacts and Z-Fighting:
Very low near clipping values may cause visual artifacts. Increase the near clipping value slightly to avoid these issues while still capturing the necessary detail.
VR Scene Inspection Problems
- Headset Connection Issues:
Make sure your VR headset is properly connected, and all drivers are up to date. Use the VR Scene Inspection add-on to verify that your scene displays correctly in VR. - Calibration and Tracking Errors:
Regularly calibrate your VR headset to ensure accurate tracking. Check for any latency or drift, and adjust the settings in the VR Scene Inspection panel as needed.
Managing Multiple Camera Configurations
If you’re experimenting with different VR camera setups, use The View Keeper to store and manage your configurations. This tool helps prevent issues caused by manual reconfiguration and keeps your workflow organized.
- Switching Between Setups:
Save multiple camera records with different settings. If one configuration isn’t working as expected, you can quickly switch to another without redoing your work. - Render Consistency:
Ensure that each saved record in The View Keeper has the correct output settings. This helps maintain consistency across your renders, especially when exporting for different VR platforms.
People Also Ask
- How do I set up a VR camera in Blender?
To set up a VR camera, you need to configure the camera’s field of view, enable stereoscopic settings, adjust clipping distances, and integrate VR hardware using the VR Scene Inspection add-on. - What is the VR Scene Inspection add-on?
It is a built-in Blender add-on that allows you to view and inspect your 3D scene in virtual reality using a compatible headset. - Can I use stereoscopy for VR in Blender?
Yes, by enabling stereoscopic settings in the Camera Properties panel and adjusting the interocular distance, you can create a stereoscopic VR view. - How do I optimize my VR scene for performance?
Optimize performance by reducing the far clipping distance, simplifying complex models, using efficient textures, and ensuring your hardware meets VR specifications. - What are the best practices for setting up a VR camera?
Best practices include using a wide field of view, enabling stereoscopy, properly calibrating your headset, and testing your scene regularly in VR. - How do I ensure a comfortable VR experience?
Ensure a high frame rate (at least 75-90 FPS), accurate stereoscopic settings, and a well-optimized scene to prevent motion sickness and maintain immersion. - Can I store multiple and render VR camera setups?
Yes, tools like The View Keeper let you save and quickly switch between multiple camera configurations, which is especially useful for complex VR projects. - How do I integrate my VR headset with Blender?
Connect your VR headset to your computer, install the necessary drivers and VR API (like OpenXR), and enable the VR Scene Inspection add-on in Blender. - What file formats should I use for VR content?
For models and scenes, use formats like FBX, OBJ, or glTF. For VR videos, formats such as MP4 are common. Ensure compatibility with your target VR platform. - How do I troubleshoot issues with VR camera tracking?
Check your headset calibration, update drivers, adjust camera settings (FOV, clipping distances), and use the VR Scene Inspection add-on to monitor performance and tracking.
Bringing It All Together
Setting up a VR camera in Blender is a multifaceted process that involves both technical and creative considerations. By carefully configuring your camera settings, enabling the VR Scene Inspection add-on, and integrating your VR hardware, you can create an immersive virtual experience that transports viewers into a three-dimensional world.
Begin by preparing your Blender environment, organize your scene, and ensure your hardware is up to par. Enable VR Scene Inspection to test your setup directly in your VR headset. Configure your camera for a wide field of view and stereoscopic output, and adjust clipping distances to capture the full range of your scene. Fine-tune these settings using the Timeline and Graph Editor to ensure smooth and realistic camera movement.
For advanced projects, tools like The View Keeper offer a powerful way to manage multiple camera configurations. With The View Keeper, you can save and recall different VR camera setups, making it easier to experiment with various settings without reconfiguring your scene each time. This versatility is crucial when rendering multiple outputs or comparing different visual styles, as each saved record can include its own render resolution, file format, and output folder.
Real-world applications for VR camera setups in Blender are abundant. From immersive film and television experiences to engaging video game cutscenes, architectural walkthroughs, and interactive product demonstrations, a well-configured VR camera enhances the viewer’s experience. The ability to seamlessly switch between different camera setups and fine-tune every detail ensures that your VR content is both captivating and professional.
By following the detailed steps and best practices outlined in this guide, you can master the art of setting up a VR camera in Blender. Experiment with different configurations, utilize advanced tools like The View Keeper, and continuously test your setup in VR to achieve the perfect balance of performance and visual fidelity.
Final Thoughts
Creating a VR camera setup in Blender is an essential skill for any 3D artist or VR content creator. It opens up new possibilities for immersive storytelling, dynamic visuals, and interactive experiences. By understanding the fundamentals of VR camera configuration adjusting the field of view, enabling stereoscopic vision and integrating VR hardware you lay the foundation for creating truly engaging virtual environments.
We hope this comprehensive guide has provided you with the detailed insights and practical tips you need to set up a VR camera in Blender. Whether you’re developing a virtual tour, a cinematic VR experience, or an interactive game, the techniques and best practices discussed here will help you create immersive and engaging virtual worlds. Enjoy your creative journey in Blender, and may your VR projects captivate and inspire your audience every step of the way!


