


Creating hair is one of the most challenging yet rewarding aspects of 3D art. Whether you’re working on realistic characters or stylized designs, hair adds personality and life to your creations. Blender, the free and open‑source 3D creation suite, offers multiple tools for hair creation, from particle systems to the new geometry nodes hair curves. In this ultimate guide, we’ll explore why hair creation is essential, break down Blender’s hair tools, compare particle systems versus geometry nodes, and walk you through step‑by‑step instructions for creating hair using both methods. We’ll also cover advanced node group setups, materials and shading tips, best practices, troubleshooting advice, and frequently asked questions.
Introduction: Why Hair Creation is Essential in 3D Art
In 3D art, hair is a critical element for character design, enhancing realism and expressiveness. Whether for film, gaming, or digital art, convincing hair can convey emotions, cultural identities, and aesthetic styles. This guide will explore creating both realistic and stylized hair in Blender, focusing on particle systems and geometry nodes hair curves.
Hair is more than just a decorative element, it’s a defining feature of character and style. In 3D art, realistic hair can elevate a character, adding depth, motion, and emotion. Whether you aim for the wild realism of human hair or the fantastical flair of stylized designs, mastering hair creation is crucial for any 3D artist. Not only does hair enhance realism, but it also contributes to the overall visual storytelling, making your projects more engaging and lifelike.

How to Make Hair in Blender
Blender offers several methods for creating hair, each with its own strengths and challenges. Traditionally, Blender’s particle hair system was the go‑to method, allowing artists to generate thousands of individual hair strands that respond to physics and lighting. More recently, geometry nodes hair curves have emerged as a powerful alternative, offering procedural control and flexibility that can streamline the creation of both realistic and stylized hair. In this guide, we’ll explain both approaches and help you decide which method fits your project needs.
- Particle Systems: Each particle represents a hair strand, suitable for dynamic simulations with physics interactions.
- Geometry Nodes Hair Curves: Uses curve objects for procedural generation, ideal for static or highly customized hairstyles.
Understanding both methods allows artists to choose based on project needs, whether for animated films requiring dynamic hair or static character renders needing detailed styling.
Understanding Blender’s Tools for Hair: Particle Systems vs. Geometry Nodes Hair Curves
Blender Hair Tools at a Glance
Blender provides two main systems for creating hair:
- Hair Particle System:
This system generates hair strands as particles that can be styled, simulated, and rendered. It’s well‑suited for photorealistic hair, though it can be computationally intensive. Support dynamics for realistic movement, integrating with physics simulations. - Geometry Nodes Hair Curves:
A more recent development that uses Blender’s procedural node system to generate hair curves. Use curve objects manipulated via nodes, offering procedural control. This method offers greater flexibility and can be easier to integrate into both photorealistic and stylized workflows. Efficient for large datasets due to instanced curves, with extensive styling options. Introduced in Blender 3.0, providing modern flexibility for static or posed hair.
Particle Hair System vs. Geometry Nodes Hair Curves
Comparing the two:
| Aspect | Particle Systems | Geometry Nodes Hair Curves |
|---|---|---|
| Representation | Particles as hair strands | Curve objects for hair strands |
| Dynamics | Supports physics simulations for movement | Can use Geometry Nodes for simulation and physics |
| Styling | Uses particle editing tools, less flexible | Highly customizable with node groups, flexible |
| Performance | Can be slow for large numbers, overhead | Efficient for large amounts, procedural |
| Customization | Highly restrictive | Allows for a lot of creativity and styles using Geometry Nodes |
This comparison highlights particle systems for dynamic needs and geometry nodes for efficiency and customization. Choosing between the two depends on your project’s goals

Step-by-Step Guide: Creating Basic Hair in Blender with the Particle Hair System
Setting Up the Particle Hair System
- Create Your Base Mesh:
Start with a scalp or object where hair will grow. Ensure that the mesh has good topology for hair growth. - Add a Particle System:
In the Properties panel, add a new particle system and change the type to “Hair.” - Adjust Hair Length and Density:
Use the particle settings to control hair length, number of hairs, and randomness. - Style the Hair:
Enter Particle Edit mode to comb, cut, and style the hair. This step is crucial for achieving a natural look. - Material and Rendering:
Assign a material, use Principled Hair BSDF for realism - Render Settings:
Configure render properties for hair, such as setting up the appropriate shaders and ensuring that hair passes through Cycles or Eevee render engines.
Advantages of the Particle Hair System
- Detail and Realism:
Generates individual strands that can simulate natural physics and interactions. - Customizability:
Though limited, it offers numerous settings to tweak hair density, length, curl, and clumping.
This method is straightforward, suitable for beginners, and integrates well with dynamics for animated hair.
Step-by-Step Guide: Creating Basic Hair in Blender with Geometry Nodes Hair Curves
Setting Up Geometry Nodes Hair Curves
- Prepare Your Base Object:
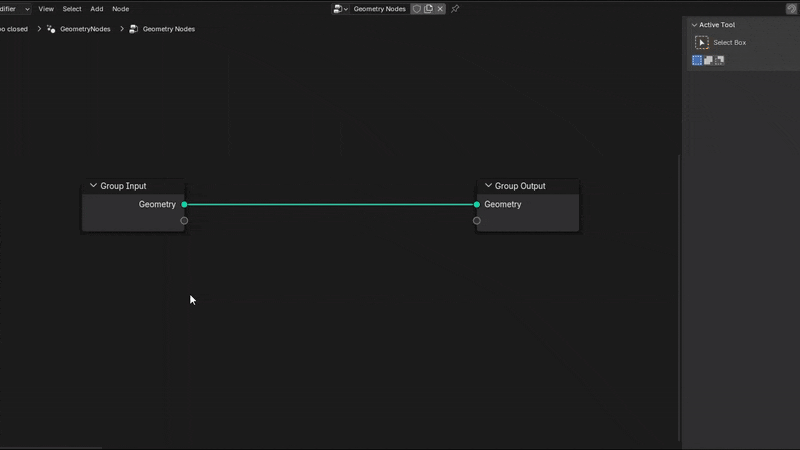
As with particle hair, start with a scalp mesh. Ensure that it is properly UV‑unwrapped if textures are needed. - Add Empty Hair Curve to Base Object and Geometry Nodes Modifier:
Select your object, go to add > curves > add empty hair. Add a Geometry Nodes modifier to the empty hair. Create a new node tree. - Generate Hair Curves:
Use nodes such as “Generate Hair Curves” togenerate hair curves on your base object. - Style with Preset Node Groups:
Incorporate preset node groups for hair curves that include options for clumping, frizz, curl, and other effects. Apply node groups like “Curl Hair Curves” for curls, “Frizz Hair Curves” for noise, chain multiple for complex styles. - Customize Parameters:
Adjust parameters such as curve length, density, and randomness to achieve the desired look. - Attach to Surface:
Use “Attach Hair Curves to Surface” to ensure proper attachment. - Link to Shaders:
Connect the geometry nodes output to hair shaders in the Shader Editor, ensuring realistic rendering in Cycles or Eevee.

Which Is Better: Geometry Nodes Hair Curves or Particle Hair System?
The answer depends on your needs:
- For Realism:
The both systems excels in generating photorealistic hair with natural physics. For highly detailed, natural hair, the particle system is typically better. However, geometry nodes excel in flexibility and are ideal for stylized looks. - For Procedural Flexibility:
Geometry nodes hair curves offer more control over style and are ideal for stylized projects or when you need to create variations quickly. - Workflow Considerations:
Geometry nodes can be easier to integrate into non‑linear, procedural workflows and allow you to use custom node groups for advanced effects. - For Speed:
The particle system can produce results quickly due to it’s limited preset settings. There is no need for a node set up
Geometry Nodes Hair Curves Default Preset Node Groups
Blender’s Hair asset includes default preset node groups for quick starts, such as basic hair generation and styling, providing templates for common hairstyles.
- Attach Hair Curves to Surface Node Group:
This node group attaches generated hair curves to a specific surface, ensuring they originate from the correct positions on the base object. Ensures hair curves stick to the surface of the base mesh. - Blend Hair Curves Node Group:
Blends or mixes different sets of hair curves, useful for creating transitions between various parts of a hairstyle. Smooths the transition between different hair segments for a natural flow. - Braid Hair Curves Node Group:
Arranges hair curves into braided patterns, ideal for creating plaits or intricate designs. Simulates braided hair by intertwining curves. - Clump Hair Curves:
Groups hair curves into clumps, adding natural variation and volume to the hairstyle. Groups hair strands together to mimic natural clumping. - Create Guide Index Map Node Group:
Generates a map to guide the distribution and direction of hair curves, aiding in controlled styling. Generates an index map to guide hair placement and density. - Curl Hair Curves Node Group:
Adds curls or waves to hair curves, enhancing the natural or stylized look. Adds curl to the hair for a more dynamic look. - Curve Info Node Group:
Provides information about curve properties, such as length or tangent, for further manipulation. Provides data on curve attributes to control further modifications. - Curve Root Node Group:
Defines the root properties of hair curves, controlling their starting points and behavior. - Curve Segment Node Group:
Manipulates individual segments of hair curves, allowing for detailed adjustments. - Curve Tip Node Group:
Controls the tip properties of hair curves, such as thickness or shape, for realistic ends. - Displace Hair Curves Node Group:
Displaces hair curves based on various factors, adding irregularities for natural looks. Adds random displacement to mimic natural irregularities. - Duplicate Hair Curves Node Group:
Duplicates hair curves, useful for creating denser hairstyles or symmetrical designs. Allows you to create duplicates for added density. - Frizz Hair Curves Node Group:
Adds frizziness or disorder to hair curves, enhancing realism or stylized effects. Introduces frizz for a realistic, unstyled look. - Generate Hair Curves Node Group:
Creates initial hair curves based on surface properties, setting the foundation for styling. Procedurally generate hair curves across the scalp. - Hair Attachment Node Group:
Ensures hair curves are properly attached and aligned with the base object. Controls how hair attaches to the surface. - Hair Curves Noise Node Group:
Adds noise to hair curves, introducing randomness for natural variation. - Interpolate Hair Curves Node Group:
Interpolates between different hair curve sets, smoothing transitions or creating blends. Smooths out transitions between different curve sections. - Redistribute Curves Node Group:
Redistributes hair curves for even coverage or specific patterns, optimizing distribution. Adjusts hair density distribution. - Restore Curve Segment Length Node Group:
Maintains consistent segment lengths in hair curves, ensuring uniform appearance. Maintains consistent hair strand lengths. - Roll Hair Curves Node Group:
Rotates hair curves around their axes, useful for twisting or curling effects. Rotates hair strands for a natural fall. - Rotate Hair Curves Node Group:
Rotates hair curves for directional control, aiding in styling and alignment. Precisely controls the rotation of hair curves. - Set Hair Curve Profile Node Group:
Defines the profile (e.g., thickness) of hair curves, crucial for realistic rendering. Defines the cross‑sectional shape of hair strands. - Shrinkwrap Hair Curves Node Group:
Conforms hair curves to a target surface, useful for fitting hair to complex shapes. Ensures hair curves follow the contours of the base mesh. - Smooth Hair Curves Node Group:
Smooths hair curves for a cleaner, more polished look, reducing jaggedness. Further refines the appearance by smoothing curves. - Straighten Hair Curves Node Group:
Straightens hair curves, useful for creating sleek or formal hairstyles. Corrects overly curly or twisted strands. - Trim Hair Curves Node Group:
Trims hair curves to specific lengths, controlling overall appearance. Allows you to cut and trim hair to the desired length.

Materials & Shading: Making Your Hair Look Realistic
Once you’ve created your hair using either the particle system or geometry nodes, the next step is shading.
To achieve realistic hair:
- Shader Setup: Utilize Blender’s Shader Editor to fine‑tune hair materials. Consider using hair-specific shaders that support anisotropic reflections for added realism. Use Principled Hair BSDF for realistic shading.
- Color Variations: Introduce subtle color gradients and variation to mimic natural hair, whether it’s for realistic human hair or creative stylized designs.
- Optimize lighting with direct and indirect sources to capture highlights and shadows.
- Use post-processing effects for enhanced visuals.
Pixelhair – Essential Hair Asset Collection for Hair in Blender
For those looking to speed up production or add a high‑level of detail quickly, Pixelhair offers a collection of pre‑made, realistic hair assets specifically designed for Blender. These assets can also be used as a foundation for further customization, saving you time while still delivering professional results. Pixelhair is particularly useful when you need consistent, high‑quality hair without starting from scratch.
Pixelhair offers pre-made hair models, compatible with Blender’s tools, saving time with customizable, high-quality assets for various hairstyles.
Troubleshooting and Best Practices for Hair Grooming
Even with powerful tools, hair creation can be challenging. Here are some tips to ensure smooth results:
- Test Your Settings:
Always run test renders to see how your hair appears under different lighting conditions. - Optimize:
Optimize child particles, hair resolution or instanced curves for performance. - Keep Node Trees Organized:
Label and group your geometry nodes for easier adjustments. - Use Constraints:
Adjust dynamics for natural movement, using constraints. - Backup Your Work:
Experiment with node groups and save versions frequently for iteration. Regularly save presets and node groups so you can revert to a previous version if needed. - Learn from the Community:
Engage with forums and Blender communities for additional tips and troubleshooting advice.

FAQ
- What’s the difference between particle system hair and geometry nodes hair curves?
Particle systems are made from the blender particles with limited control and customization, geometry nodes hair curves are made using nodes offering more procedural control, customization and freedom. - Can I use both methods together?
Yes, but they may need separate handling for rendering and dynamics. - How to make hair look more realistic?
Use Principled Hair BSDF, texture mapping, and proper lighting. - Best way to style hair in Blender?
Particle systems use editing tools; geometry nodes use node groups. - Does Blender support GPU rendering for hair?
Yes, both Cycles and Eevee support GPU rendering for faster results. - How to optimize 3D hair for better performance?
Use child particles or instanced curves to reduce computational load. - How does Pixelhair work with Blender’s native tools?
Provides pre-made models, compatible with particle systems and geometry nodes, customizable within Blender. - What are the primary methods for creating hair in Blender?
Blender offers a particle hair system and geometry nodes hair curves. The particle system is great for quick hair creation, while geometry nodes provide procedural control. - Which method is better for realistic hair?
For highly detailed, natural hair, the particle system is typically better. However, geometry nodes excel in flexibility and are ideal for stylized looks. - Can I combine particle hair with geometry nodes?
Generally, you choose one method per project, but advanced users sometimes integrate elements of both for unique effects. - What node groups are essential for styling hair with geometry nodes?
Essential groups include default presets, blend, braid, clump, curl, displace, frizz, and trim node groups, among others. - How do I create realistic hair shaders in Blender?
Utilize the principled hair BSDF in the Shader Editor for realistic shading. - What is Pixelhair and how does it help?
Pixelhair is an asset collection offering pre‑made, realistic hair models designed for Blender, saving time and ensuring quality. - Are there performance differences between the particle system and geometry nodes hair curves?
Yes. Particle hair is more resource‑intensive but offers high detail, while geometry nodes are more efficient and offer procedural flexibility. - Which method should I use for my project?
It depends on your needs: use particle hair for quick realism and geometry nodes for more customized procedural hair.
Conclusion: Elevate Your 3D Art with Mastery of Hair in Blender
Hair creation is a critical element in 3D art that adds personality and depth to your characters and scenes. Blender offers robust solutions for hair generation, from the traditional particle hair system to the innovative geometry nodes hair curves. Each method has its own strengths, whether you’re striving for photorealistic detail or a bold, stylized look.
In this guide, we explored the core concepts behind Blender’s hair tools, compared the particle system with geometry nodes, and provided step‑by‑step instructions for creating basic hair using both methods. We dove deep into the advanced node groups available for geometry nodes hair curves, discussed materials and shading techniques to enhance realism, and introduced Pixelhair as an essential asset collection for Blender artists.
Moreover, we covered best practices, troubleshooting tips, and answered frequently asked questions to help you navigate common challenges. With this knowledge, you’re better equipped to harness Blender’s full potential and create hair that truly elevates your 3D art.
Whether you’re a beginner or a seasoned professional, mastering hair in Blender will expand your creative capabilities and allow you to produce work that stands out. Embrace these techniques, experiment with both methods, and let your creativity flow, one strand at a time.

Key Citations
- Blender Documentation: Hair
- Blender Guru: Geometry Nodes Hair
- Pixelhair Official Website
- Blender Stack Exchange: Hair-related Questions
- CG Cookie: Hair Tutorials
Recommended
What Is Camera Focal Length in Blender?
Creating Smooth Camera Transitions in Blender Using The View Keeper
How do I make the camera orbit around an object in Blender?
Is Blender CPU or GPU Intensive? A Complete Guide to Performance in Blender
Blender Camera Angles: Capturing the Perfect Shot with The View Keeper
The Ultimate Guide to Hair for Games: Techniques, Tools, and Trends
How to Save Time in Blender Animations with The View Keeper: A Comprehensive Guide
Advanced Camera Switching Techniques with The View Keeper in Blender
How do I add a background image to the camera view in Blender?


