


Introduction
The Redistribute Curve Points preset in Blender’s hair grooming system evenly spaces control points along curves, ensuring uniform segment lengths without manual adjustments. Introduced in Blender 3.5, it is part of the Essentials Asset Library and can be added via drag-and-drop or the Asset Browser.
Uses:
- Fixes uneven point distribution caused by sculpting brushes or modifiers (e.g., Snake Hook).
- Maintains overall curve shape while ensuring smooth, predictable deformations.
- Works with hair curves, Bézier, and poly curves (useful for cables, ropes, etc.).
- Helps beginners simplify grooming and allows advanced users to integrate it into custom rigs.
While its functionality remains unchanged in newer Blender versions, the surrounding hair system has improved, offering more direct editing options.
Input Sockets
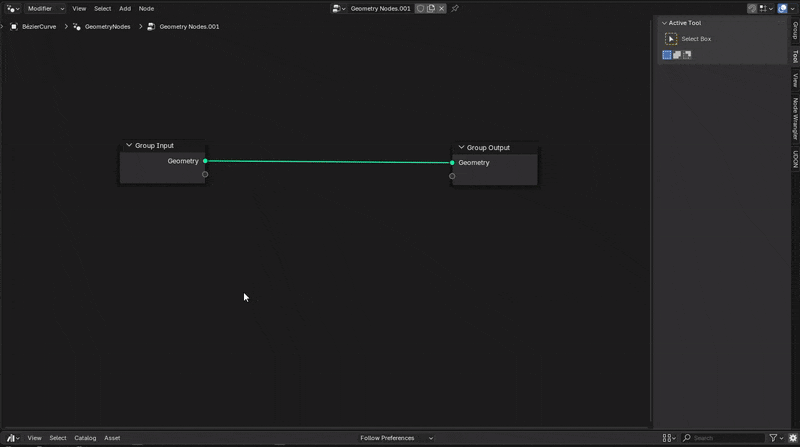
The Redistribute Curve Points node group has three input sockets. These inputs allow you to feed in the curves to be processed and adjust how the redistribution operates:
Curves Input Socket
The Curves input socket takes a Curves geometry input, typically from a prior hair generation or grooming node. It processes each curve by repositioning its existing control points to ensure uniform spacing without adding or removing points or strands. All attributes (e.g., strand index, radius, UV) are preserved. Ensure the correct curve set is supplied when working with multiple curve groups or guide curves.

Factor Input Socket
The Factor input (0.0 to 1.0) controls the strength of the redistribution effect. A Factor of 1.0 fully evens out point spacing, while 0.0 leaves curves unchanged. Intermediate values blend between the original and uniform positions, allowing partial smoothing while preserving some manual grooming details. It can be keyframed or driven by fields (e.g., texture masks) for varied effects. Lowering the Factor below 1.0 retains some unevenness, and using values like 0.8 prevents drastic shape changes while still improving spacing.
Feature Awareness Input Socket
The Feature Awareness input is a boolean toggle that helps preserve defining curve features during redistribution. When disabled, points are spaced strictly evenly, which may slightly alter shapes with intentionally dense areas (e.g., curls or sharp bends). When enabled, the node maintains overall evenness while preserving key details, preventing features like waves or bends from being overly smoothed. Use it when maintaining irregularities is important, but leave it off for strictly uniform spacing, such as in physics simulations. Experimenting with the toggle can help determine its impact on your specific hair curves.
(Note: Feature Awareness is an input rather than a fixed property so that it can be controlled dynamically or even driven per strand if needed. Typically it’s just a global on/off. Internally, this might use the curve’s curvature or some heuristic to decide how to redistribute points in a way that retains “features.” The specifics are not exposed, but it offers a balance between shape preservation and even spacing.)
Output Sockets
The Redistribute Curve Points node group has a single output:
Curves Output Socket
The Curves output provides the redistributed curves with evenly spaced control points while preserving the number of strands, points per strand, and overall hair length. No curves are added or removed, only internal points are repositioned. This ensures consistent segment lengths, improving effects like clumping, curls, and physics. The node is commonly used before styling operations to enhance predictability. The hairstyle’s overall shape remains unchanged, with roots and tips fixed. The output can be used in further node operations or exported for rendering, ensuring a smoother and more uniform hair structure.

Faster Hair in Blender Using PixelHair 3D Hair Asset Collection
Creating a complex hairstyle from scratch with geometry nodes can be time-consuming and technically demanding. PixelHair steps in as an alternative solution, offering a 3D Hair Asset Collection of pre-made, realistic hairstyles that can be used in Blender and other platforms. Developed by artist Yelzkizi, PixelHair provides a library of groomed hair assets that users can import and apply to their characters, bypassing the need to manually generate and style hair strand by strand. In this section, we’ll explore how PixelHair can speed up hair creation, how it compares to using geometry nodes for hair, the developer’s plans to integrate geometry nodes hair, and how PixelHair works with game engines like Unreal Engine for real-time rendering.
PixelHair Overview: A Time-Saving Hair Asset Library
PixelHair is a collection of high-quality, pre-groomed 3D hair assets for Blender, designed to streamline the hair creation process. Instead of manually crafting hair with particle systems or geometry nodes, artists can choose from a variety of ready-made hairstyles, such as afros, braids, and curls, and import them directly into their scene. Each asset comes as a fully groomed Blender file, which can be appended or dragged in via the Asset Browser, saving hours of manual work. PixelHair is particularly useful for beginners, freelancers, and studios with tight deadlines, offering a professional starting point that can be further customized in Particle Edit mode or through curve adjustments.
Compared to creating hair from scratch using geometry nodes, PixelHair provides a much faster alternative, as the assets already include subtle grooming details like strand bending, clumping, and tapering. While geometry nodes allow for complete control, they require technical knowledge and significant tweaking. PixelHair eliminates much of this complexity, though it can still be integrated into a geometry-nodes workflow if needed, such as converting particle hair to curves or applying additional procedural effects. Ultimately, it serves as a powerful shortcut, giving artists immediate results while maintaining flexibility for further refinements.
Geometry Nodes Hair Integration: Plans for PixelHair
Blender’s hair system is evolving, with geometry nodes playing an increasing role in hair grooming. Currently, PixelHair assets use Blender’s traditional particle hair system, but the developer, Yelzkizi, plans to update them for the new Geometry Nodes hair system once it becomes fully mature. In a Q&A, Yelzkizi confirmed that while PixelHair currently relies on the particle system, future versions will incorporate geometry-nodes-based hair.
This transition means that as Blender’s hair nodes improve, with features like full editability, physics, and collisions, PixelHair assets could be provided as hair curve objects with geometry node modifiers instead of (or alongside) particle hair. This would allow users to adjust node parameters for more customization, making PixelHair more flexible and future-proof. Until then, users working with both PixelHair and geometry nodes (such as the Redistribute Curve Points preset) may need to manually convert particle hair to curves using Blender’s built-in converters. Once PixelHair fully adopts geometry nodes, this conversion step will no longer be necessary.
In summary, PixelHair currently offers particle-based hair assets, but future updates will bring fully node-based hair assets that integrate seamlessly with Blender’s evolving hair system. This transition will provide both the convenience of pre-made hairstyles and the procedural flexibility of geometry nodes.

PixelHair in Unreal Engine and Real-Time Rendering
PixelHair is designed to work not only in Blender but also in Unreal Engine, particularly with Epic’s MetaHuman framework. PixelHair hairstyles can be exported from Blender as Alembic (.abc) files and imported into Unreal Engine’s groom system for real-time applications. The assets are optimized for Unreal, ensuring that strand alignment and density are preserved for a realistic appearance. This allows artists to achieve high-quality, dynamic hair in real-time, with support for physics and animation.
However, real-time performance is a key consideration. While PixelHair strives for efficiency, high-fidelity hair can be demanding on hardware. For game environments, optimization may be necessary, such as reducing child strand count or using hair cards (textured strips) instead of full strand-based hair. Though PixelHair is primarily focused on strand-based realism, users can leverage its styles to create optimized game-ready versions if needed.
In summary, PixelHair provides a seamless bridge between Blender and Unreal Engine, allowing artists to design high-quality hair in Blender and deploy it in real-time applications. This eliminates the need for low-detail hair solutions or extensive manual work. As real-time rendering technology advances, PixelHair’s strand-based hair assets will become even more viable, making it a valuable resource for both high-end games and cinematic projects.
FAQs
Below are 10 frequently asked questions about the Redistribute Curve Points preset and related hair grooming topics, along with their answers:
- What is the purpose of the Redistribute Curve Points preset?
It’s a Blender geometry node that evenly spaces control points on curves for smoother, uniform hair strands. - How do I use Redistribute Curve Points in Blender?
Redistribute Curve Points is a Blender Asset for Geometry Nodes. Drag it in, connect inputs/outputs, and adjust settings. It works within Geometry Nodes, not Particle Edit mode. - Does Redistribute Curve Points add or remove any control points on my curves?
No, it doesn’t add or remove points, only adjusts their spacing. To change the number of points, use nodes like Resample Curve. This preserves the hairstyle’s shape while refining point distribution. - How is this different from the Resample Curve node?
Resample Curve changes point count; Redistribute Curve Points adjusts spacing without altering shape. Use both for resolution control and even spacing. - Will using Redistribute Curve Points change the shape or length of my hair strands?
The node preserves curve length and overall shape but slightly adjusts interpolation due to point repositioning. Endpoints remain fixed, and Feature Awareness helps retain sharp bends. Changes are subtle, mainly affecting point distribution. - What exactly does the Feature Awareness toggle do?
Feature Awareness preserves sharp shapes during redistribution. Off gives even spacing; on retains details. - Can I control the strength of the effect?
The Factor input controls the effect, from 0 (no change) to 1 (fully even spacing). Intermediate values blend the original and even positions, allowing fine-tuning. It can also be animated or varied per curve for advanced effects. - Where do I find this node group in Blender and what versions support it?
Redistribute Curve Points is in Blender 3.5+ under the Hair catalog in the Asset Browser. Enable the Essentials asset library if needed. - Can I use Redistribute Curve Points on curves that are not hair, say a regular curve or a curve-based rope?
Redistribute Curve Points is in Blender 3.5+ under the Hair catalog in the Asset Browser. Enable the Essentials asset library if needed. - After using Redistribute Curve Points, what are some next steps or complementary nodes I might use?
After redistributing points, you can apply deformation nodes like Curl or Clump for styling, ensuring consistency. Even spacing helps with simulations and soft body physics. Restore Curve Segment Length can revert stretched segments if needed. Typically, you first set point count (Resample), then Redistribute, then style. Even spacing also makes manual sculpting more predictable.

Best Practices
To get the most out of the Redistribute Curve Points node (and avoid common mistakes), keep these best practices in mind:
- Use after Major Shape Changes: Apply the redistribution after you’ve done big deformations to the hair curves. For example, if you’ve pulled strands around with brushes or used procedural noise that stretched some segments, drop this node afterward to even things back out. This gives you a clean, uniform starting point for any further fine styling.
- Resample then Redistribute: If your hair strands don’t have enough control points for smooth bending, first use a Resample Curve node to increase the point count (set to a Count or a desired segment Length). Follow that with Redistribute Curve Points to smoothly space the newly added points. This combo ensures you get both the right resolution and even spacing. (Conversely, if you had too many points, you could resample to fewer and then redistribute.)
- Tweak Factor for Natural Look: Don’t assume you must use Factor = 1. While 1 gives perfectly even spacing, hair in reality isn’t perfectly uniform. Sometimes a slight reduction (e.g., Factor 0.8 or 0.9) can preserve a touch of the original variance, yielding a more natural result. It’s a subtle artistic choice – full evenness can look very neat, but a tiny bit of randomness might feel more organic. Use your eye and adjust the Factor as needed.
- Enable Feature Awareness for Styled Features: If you notice that applying this node removes a deliberate styling detail (like a tight kink or a clustered section you intended), try enabling Feature Awareness. It’s there to prevent “smoothing away” important features of the curve. In many cases it will strike a good balance – you get mostly even spacing while keeping that detail. If feature awareness is on and you still want a certain feature preserved more, you may need to handle that manually (for instance, by not including that strand in the node’s selection and doing it by hand).
- Check Results in Edit/Sculpt Mode: After redistributing, it can help to tab into Edit Mode on the hair or use Curve Draw overlays to visually inspect the spacing. You should see nicely even gaps between points. If something looks off, you might have had an unexpected input or maybe feature awareness kept something – double-check and adjust. Similarly, run a Sculpt Smooth brush lightly over the strands if needed; often redistributing makes things smooth enough that minimal sculpt smoothing is required.
- Avoid Overusing in Stack: While the node isn’t very heavy computationally (it’s operating per curve on a limited number of points), using it redundantly can slow things down. You typically only need to use it once in a modifier stack at the appropriate stage. Using it multiple times (without reason) or on top of itself won’t improve spacing further (once evenly spaced, running it again does nothing). So place it wisely and keep your node tree efficient.
- Preserve Length for Simulations: One advantage of this node is that it keeps hair lengths consistent, which is beneficial if you plan to run physics simulations on the hair curves (like soft body or cloth simulations). There’s no specific action needed from your side except knowing that you don’t have to then use any “length correction” , the hair is already uniformly sectioned. If something (like a simulation or another modifier) later stretches the hair and you want to revert, consider using Restore Curve Segment Length to get back the even lengths that Redistribute had set.
- Don’t Expect New Styling: Remember that Redistribute Curve Points won’t change the overall style or silhouette of your hair – it’s a structural adjustment. Beginners sometimes add the node expecting it to fix frizz or make the hair curly or such – it won’t do that. It purely handles point spacing. To actually style hair, use it in combination with the proper nodes (Curl, Clump, etc.) or brushes. Think of it as a preparatory or cleanup step rather than a styling step.
- Save Original if Needed: If you are concerned about possibly losing the original point layout, consider duplicating your hair object or using a separate node branch before redistributing. This way you have a backup of the original spacing if you ever need to compare or revert. Generally it’s not an issue, but on an important project it never hurts to keep the original data (you could also store the original curve in an attribute or use the Store Named Attribute node to save original point positions, then use Restore Curve Segment Length which can utilize a stored state, according to Blender’s docs).
By following these practices, you’ll ensure that you use the Redistribute Curve Points preset effectively and integrate it smoothly into your hair creation workflow. It can significantly improve the quality and manageability of your hair curves, but like any tool, it’s best used with intention and understanding of its role.
References & Additional Resources
- Blender Manual – Redistribute Curve Points: Official documentation for the node group, succinctly describing its function and inputsdocs.blender.org. This is a good reference for the basic definition of the preset straight from Blender’s latest manual.
- Blender 3.5 Release Notes – Hair Assets: Overview of Blender’s introduction of built-in hair asset node groupsblender.org. Mentions that Blender 3.5 ships with an Essentials asset library containing tools like Redistribute Curve Points, giving context to how and when this preset was added.
- Blender Stack Exchange – “How can I modify/add more segments to my hair?”: Community Q&A where the Redistribute Curve Points asset is recommended for smoothing hair after using the Snake Hook brushblender.stackexchange.com. Provides a practical use-case from early adopters of the new hair system.
- Houdini Guide Groom Reference (SideFX Docs): Interestingly, SideFX Houdini (a high-end 3D software) has a similar concept in its grooming toolkit, where you can redistribute guide curve pointssidefx.com. While not Blender-specific, SideFX documentation explains the concept (“keep the same number of points, but evenly spread them along the strand”) which is exactly what Blender’s node does. This cross-reference can be useful for users familiar with other grooming tools, illustrating that Blender’s approach aligns with industry-standard practices.
- Additional Blender Manual Pages (Hair Nodes): For completeness, check out related nodes in the manual such as Restore Curve Segment Length (complements Redistribute), Attach Hair Curves to Surface (often used in conjunction if you generate curves separately), and the various Hair Deformation and Guide nodes. Blender’s manual sections on these will help you build a mental map of the entire hair grooming pipeline, with Redistribute Curve Points being one piece of the puzzleblender.stackexchange.com. Understanding the context of all hair nodes will let you know when to best employ the Redistribute preset versus other tools.
Each of these resources will deepen your understanding and help troubleshoot any issues when working with the Redistribute Curve Points node and Blender’s hair system in general. Whether you’re sticking to Blender’s native tools or supplementing with asset libraries like PixelHair, knowing where to find information is key. Happy grooming!
Recommended
What is the camera’s field of view in Blender?
A Beginner’s Guide to The View Keeper Add-on for Blender
How do I animate a zoom effect with the Blender camera?
The Debate Over Arcane’s Animation Style
Nipsey Hussle’s Braids: A Symbol of His Legacy
Unlocking Cinematic Power: The Best 5 Blender Camera Add-ons to Elevate Your Workflow
The Best Beards in Video Games: Iconic Characters and Their Legendary Facial Hair
How do I make the camera follow a character in Blender?
Advanced Camera Switching Techniques with The View Keeper in Blender


