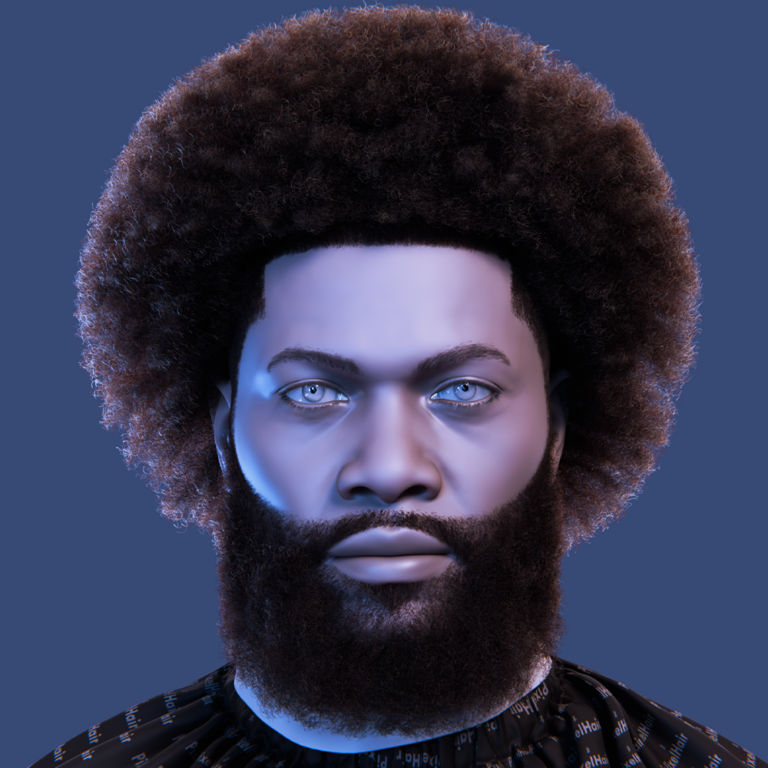
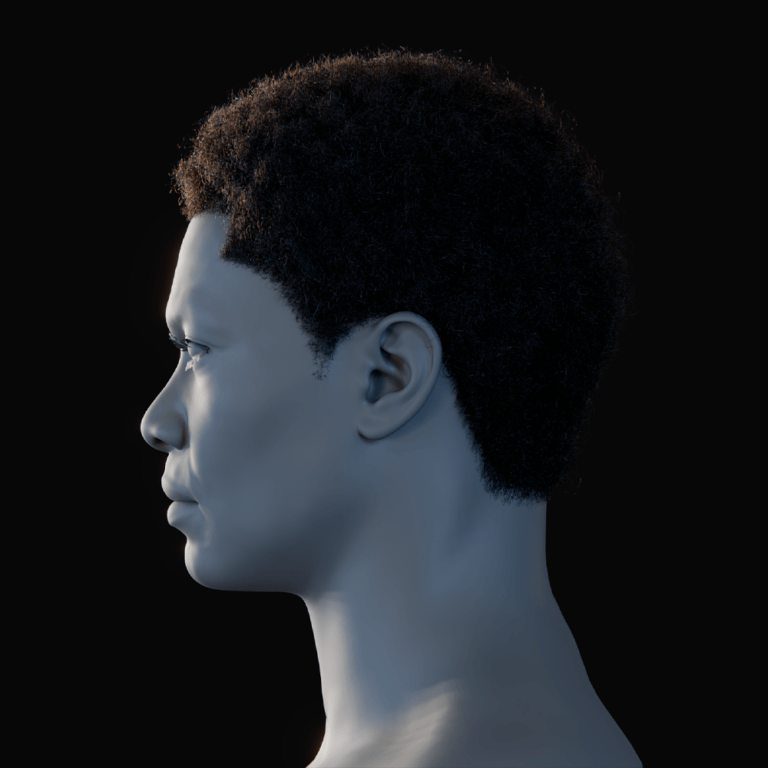
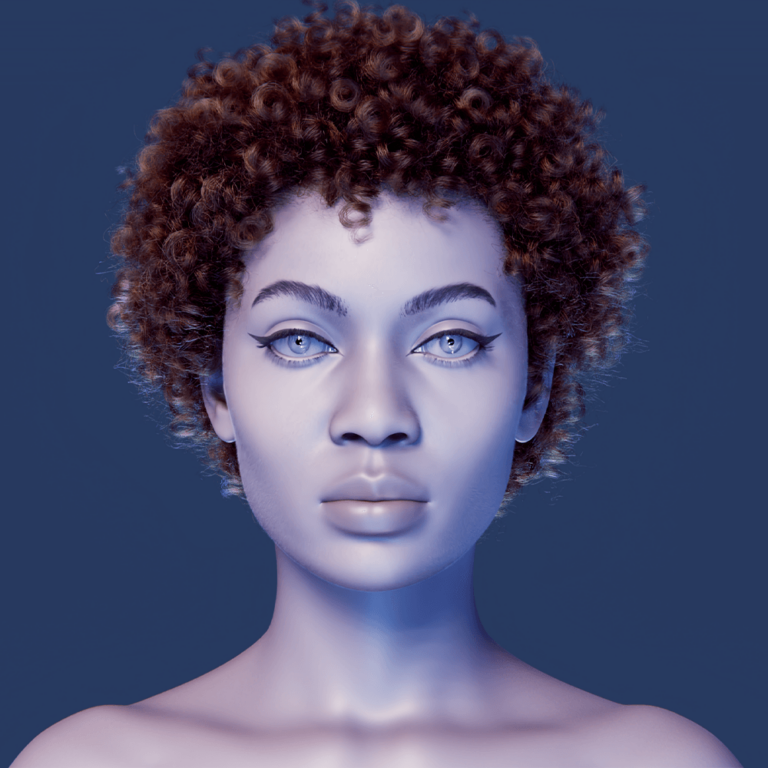
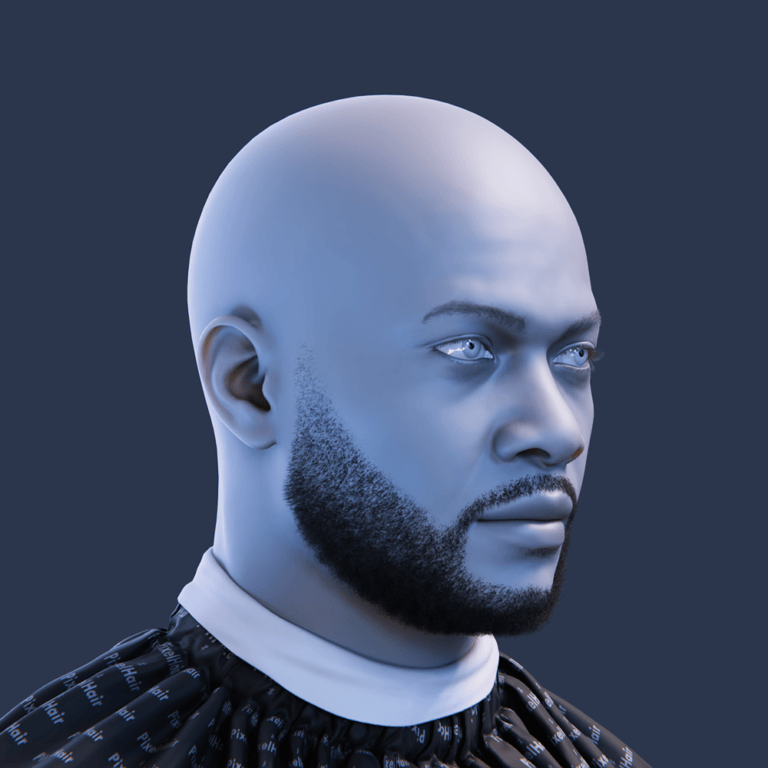
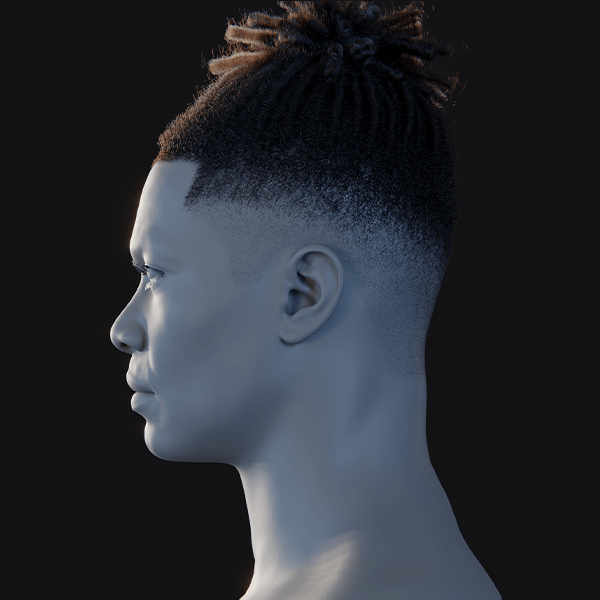
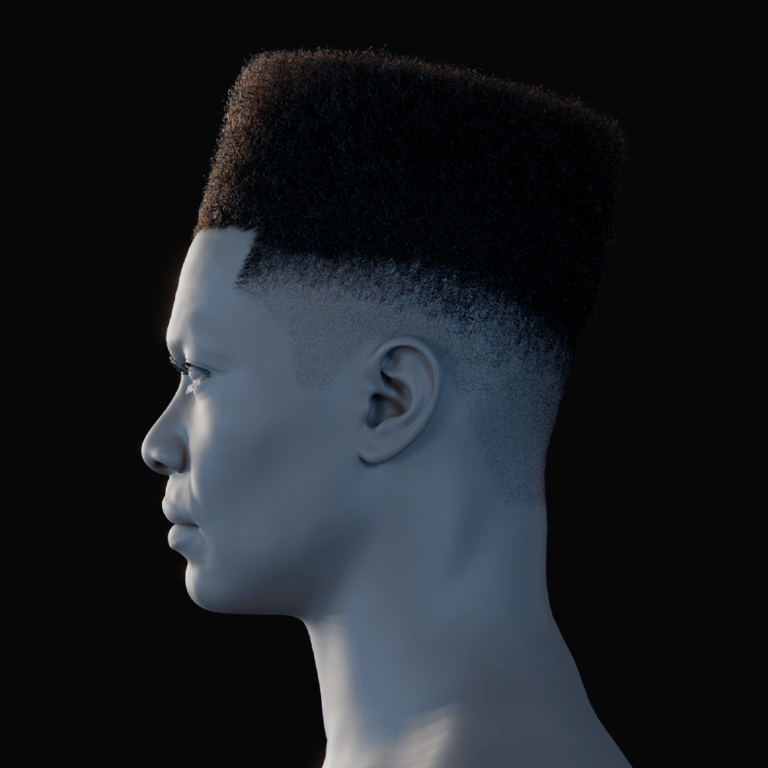
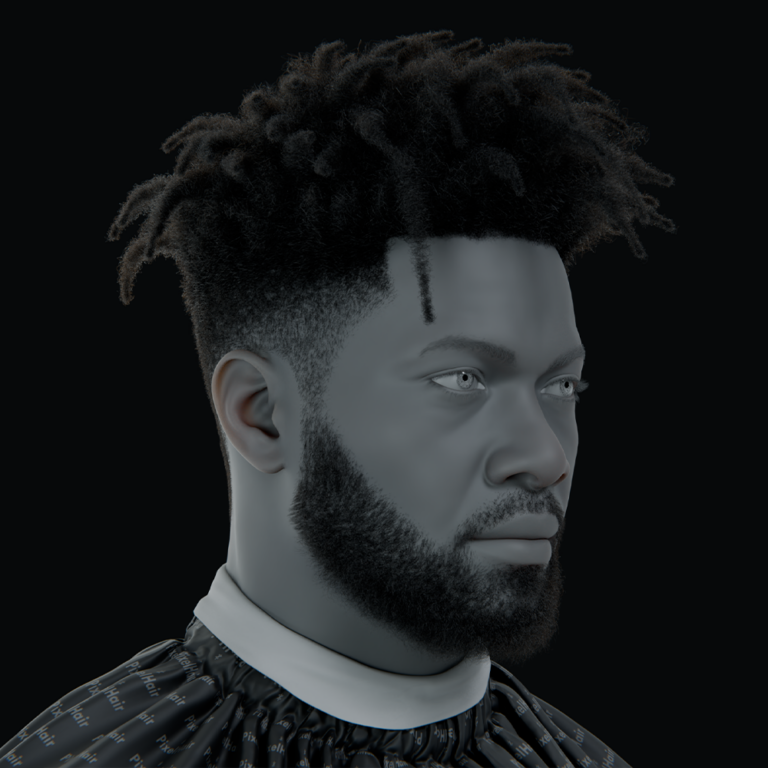
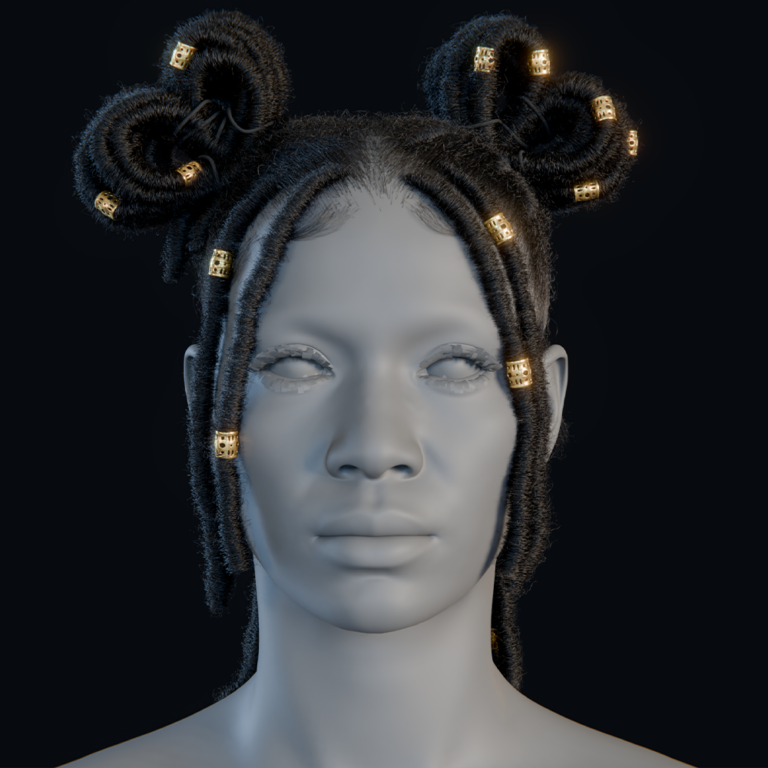
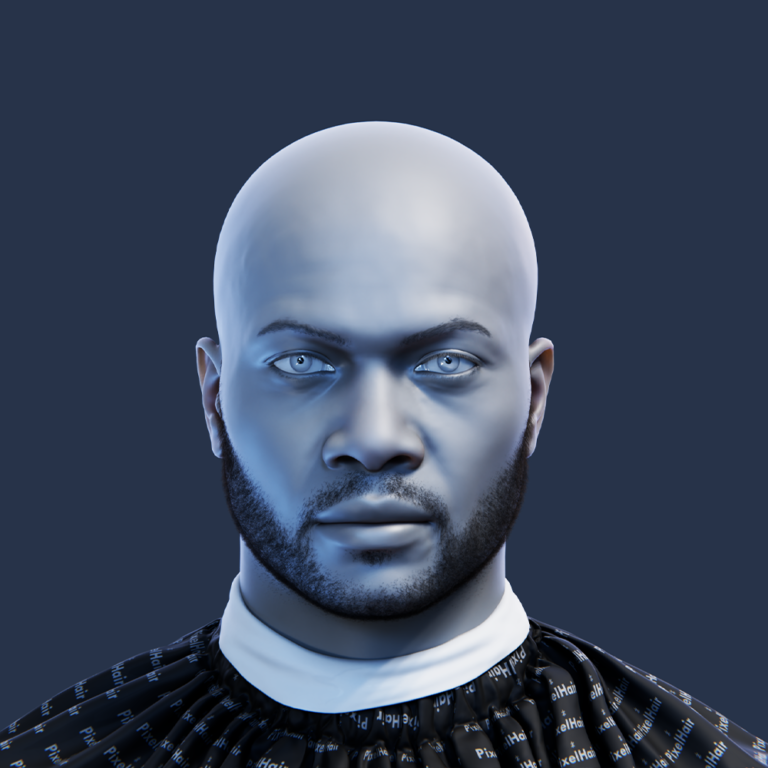
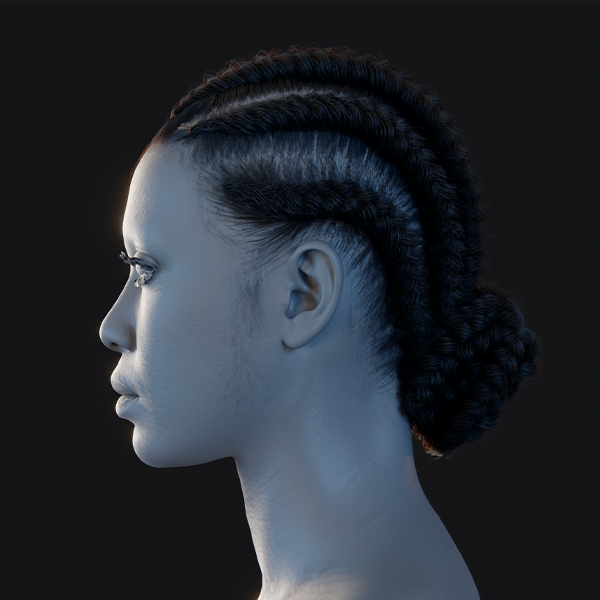
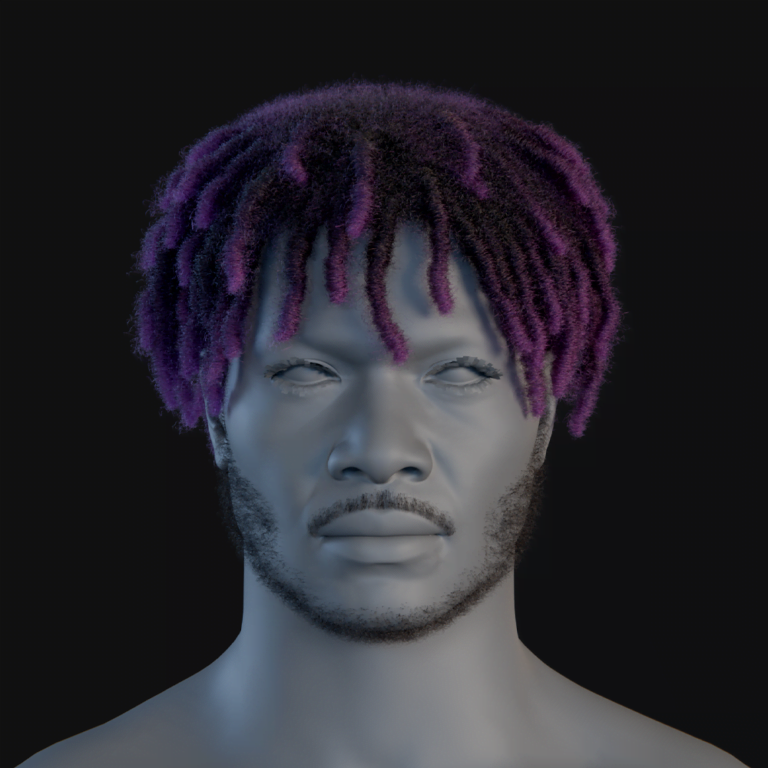
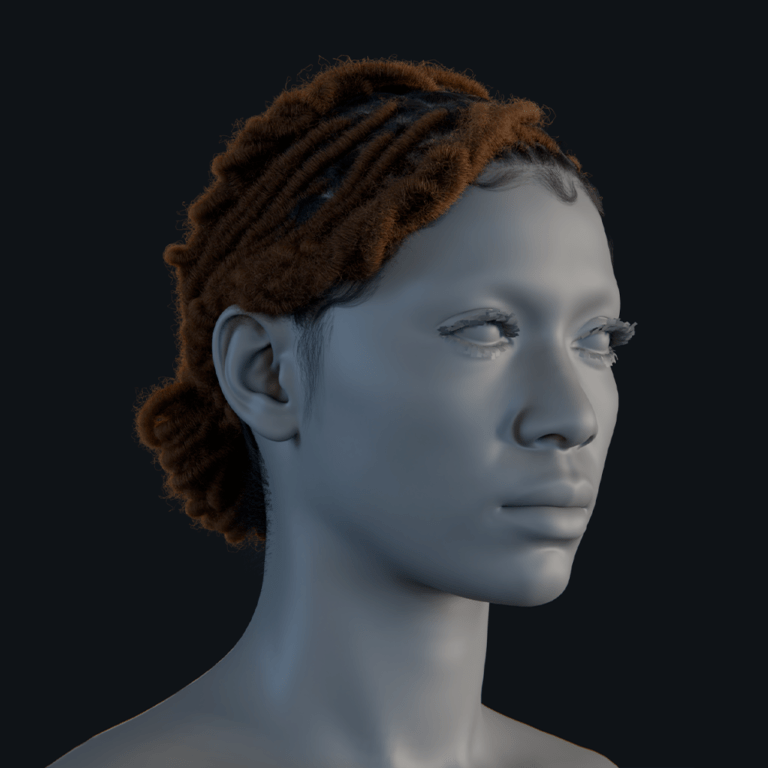
What is the best workflow between Character Creator and Blender?
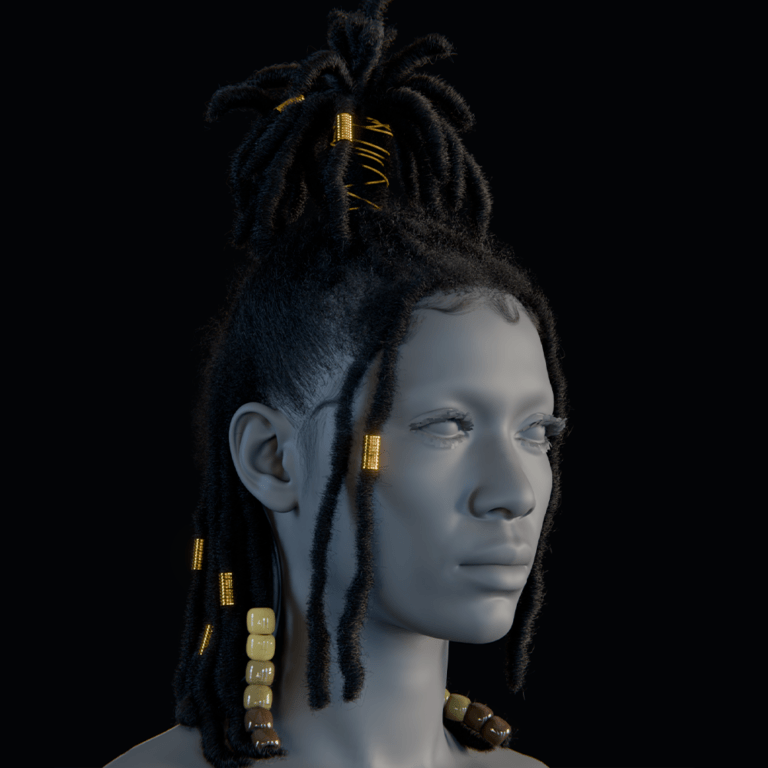
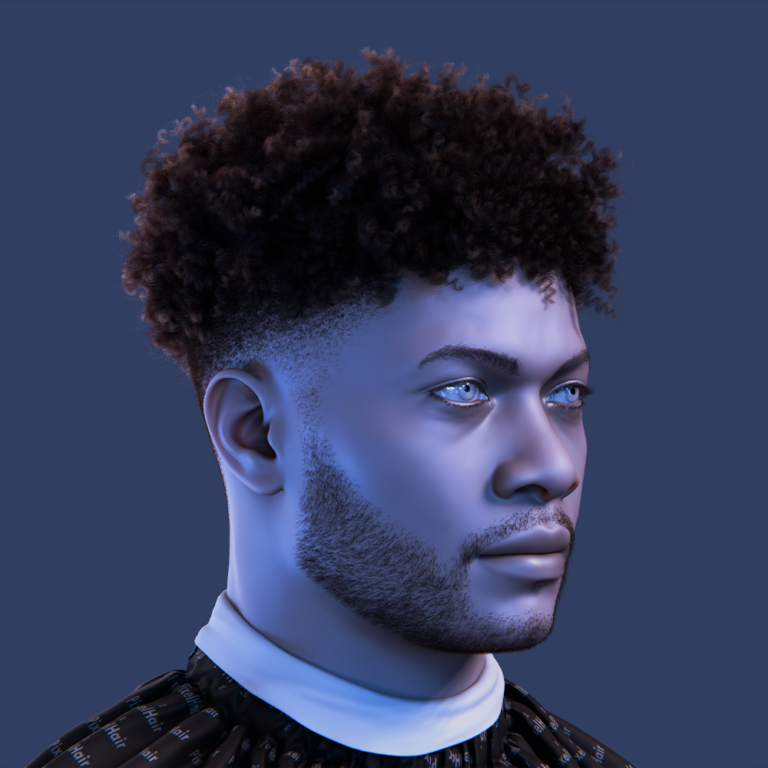
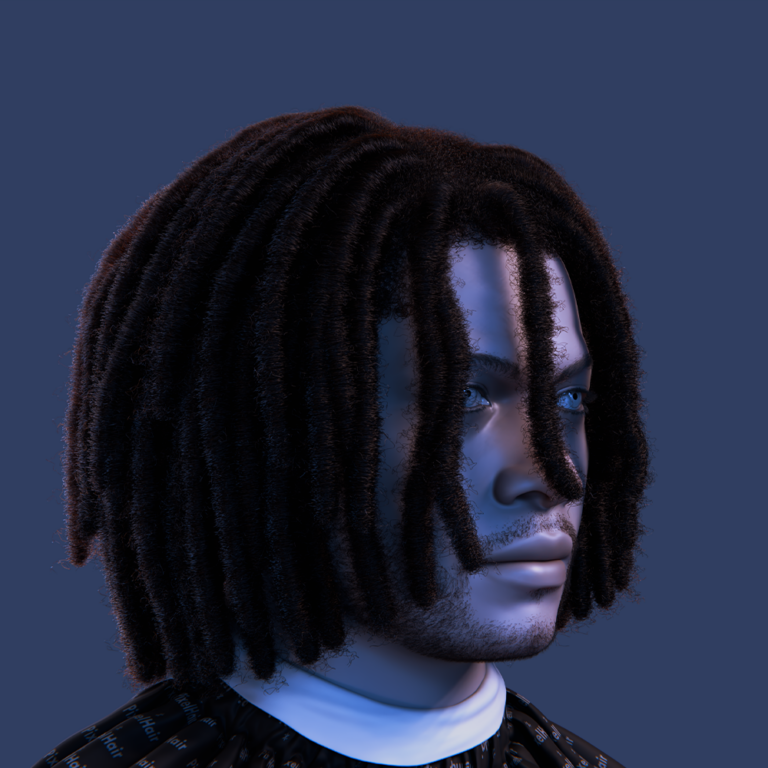
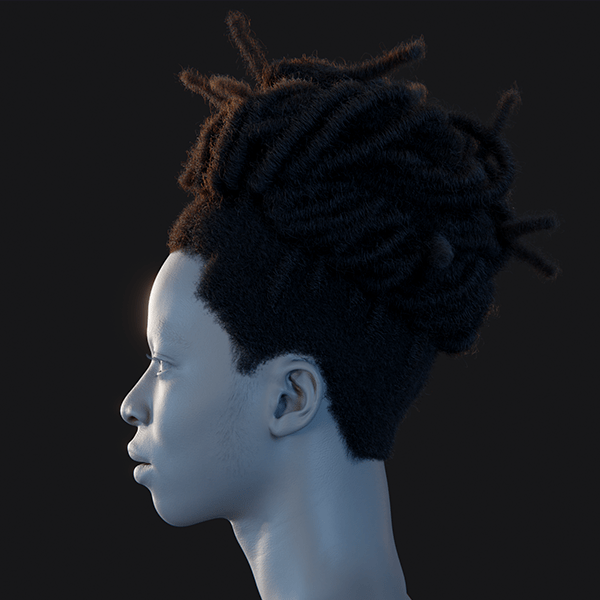
Character Creator 4 (CC4) and Blender 4.x can be tightly integrated to produce both realistic and stylized 3D characters for games (real-time) and films (offline rendering). The best workflow leverages CC4’s powerful character generation and Reallusion’s Blender Auto Setup add-on for a smooth transfer into Blender. In practice, this means:
- Design and rig in CC4, using its high-quality base meshes, morphs, and facial rig. CC4 can generate characters with detailed skin shaders (for realism) or more cartoonish proportions (for stylized looks).
- Export via FBX using the “Blender” preset, which ensures compatible bone orientation, scale, and includes all necessary textures and morphs for Blender. This yields a fully rigged character file.
- Import into Blender with the CC/iC Blender Tools add-on (also called Blender Auto Setup). This free plugin automatically sets up the character in Blender with correct materials and a control rig (Rigify). It spares you from manual re-rigging or reconnecting dozens of textures.
- Animate or refine in Blender as needed – Blender’s tools let you pose, animate, sculpt, or add physics to the CC character. The Rigify rig provides IK/FK controls for animation, while shape keys carry over facial expressions for lip-sync and emotive poses.
- Round-trip if needed – After editing in Blender (for example, creating new clothing or adjusting a morph), you can send assets or morphs back to Character Creator to update your character or create new sliders. This maintains a seamless pipeline without losing progress.
By following this CC-to-Blender workflow, artists ensure that characters retain high fidelity and rig functionality across both platforms. Both realistic characters (with skin, hair, and subtle facial rigging) and stylized characters (with exaggerated features or proportions) can be handled. Stylized models may need minor pose/animation tweaks due to their unique proportions, but the core pipeline remains the same. Overall, the combination of CC4 and Blender marries Character Creator’s rapid character design with Blender’s robust animation and rendering, giving a flexible 3D pipeline from creation to final output.

How do I export a character from Character Creator to Blender?
Exporting a character from CC4 to Blender is straightforward using FBX export. Here are the general steps:
- Prepare Your Character: Finish any character edits in CC4 (morphs, textures, clothing, etc.). If you plan to export facial expressions or custom poses, ensure they are applied or saved. For animation export, have the motion ready on the character timeline.
- Open the Export Panel: In Character Creator, go to File > Export > FBX > Clothed Character. This opens the FBX export options.
- Select Target Preset “Blender”: CC4 provides presets for various tools – choose Blender from the Target Tool Preset drop-down. This preset automatically sets the FBX format to work well with Blender (unit scale in meters, Y-Up axis, and compatible bone orientations).
- Choose Export Type: Under FBX Options, select “Character” if you want just the static character, or “Character with Motion” if you want to include animations. (If you only need the mesh, you could choose Mesh only, but generally “Character” covers mesh + rig.)
- Texture Settings: Set Max Texture Size (e.g. 4K) and format. For a Blender workflow, 4K textures ensure high quality. You can opt to convert to JPEG to reduce file size with minimal quality loss, or use PNG for lossless textures. CC4 will export all maps (albedo, normal, roughness, etc.) into a folder.
- Include Animation (Optional): If exporting an animation, check “Include Motion” and choose the current animation or range. Click “Current Animation” to export the timeline animation. CC4 will then embed the motion in the FBX. For characters without animation, ensure export type is just Character (mesh+rig).
- Export: Choose an export directory and hit Export. CC4 will generate an FBX file and a folder of textures. It’s wise to export into a new folder to keep the character’s FBX and texture images together.
After this, you’ll have a ready-to-import FBX. The next step happens in Blender, where you’ll import this FBX using the specialized add-on to get your character into the scene with materials and rig intact (covered in a later section).
Tip: If you plan to create clothing in Blender later, export your character without deleting hidden meshes. In the FBX export panel, uncheck “Delete Hidden Mesh” so that body parts under clothing remain, which is important for weight transfer or re-fitting clothes later. Conversely, if you only need the outer appearance and want to reduce polycount, you can enable hidden mesh deletion or even use CC4’s remesher/decimator (lod) on export – but note that remeshing alters topology. For most Blender workflows, stick with the default CC4 mesh and full rig for maximum fidelity.
Which file format should I use for Character Creator to Blender export?
The recommended file format for exporting from Character Creator to Blender is FBX. FBX is a widely supported 3D exchange format that carries mesh, armature (skeleton), skin weights, animations, and blendshapes together. Character Creator’s pipeline is built around FBX for transferring characters to other tools, and it provides presets that tailor the FBX for Blender, Unity, Unreal, etc.. Using FBX with the Blender preset ensures your character’s scale, orientation, and bone hierarchy are correctly interpreted by Blender.
Other formats and their considerations:
- OBJ: An OBJ export provides only the static mesh (no rig, no animation, no morphs). You would lose the rigging and would have to re-rig in Blender or use it just as a static model. OBJ might be useful for exporting just a morph target or a static prop, but for a character it’s not ideal if you need animation.
- glTF/GLB: glTF is a modern format for real-time and web. CC4 doesn’t directly export glTF, but you can export FBX then use Blender to convert to glTF. Keep in mind, some CC4 materials (especially eyes or digital human shader effects) may not translate perfectly to glTF without tweaking. If your end goal is a web or Unity project that needs glTF, using Blender as the conversion step is fine, but do your main export as FBX first. (Reallusion has acknowledged the demand for glTF support, but as of now the FBX->Blender route is the stable solution.)
- USD/Omniverse: Not directly supported from CC4 at this time (though iClone has some USD workflows). Stick to FBX for Blender.
- GoZ (ZBrush): This is not exactly a file format but a one-click pipeline for ZBrush. It’s great for high-poly sculpting workflows (more on GoZ vs Blender later), but it’s not a general interchange format for Blender.
In summary, use FBX for Character Creator to Blender exports. It’s the format that retains the most data (rig, weights, morphs). Specifically, use the FBX Clothed Character export with the Blender preset – this combination is tested to work with Blender’s CC add-ons. By doing so, you ensure a hassle-free import with everything from bone constraints to facial blendshapes carried over.

What are the best settings for FBX export from Character Creator to Blender?
When exporting FBX from CC4 to Blender, fine-tuning the export settings will save you headaches in Blender. Here are the optimal FBX export settings for a smooth Blender workflow:
- Target Tool Preset: Set to Blender. This preset automatically configures axis orientation (Blender uses Z-up, CC4 uses Y-up internally) and unit scale so your character doesn’t appear rotated or too small/large in Blender. The preset also selects the compatible FBX version for Blender.
- Mesh Options: Choose “Character” or “Character + Motion” depending on whether you have an animation. For static characters, “Character” (which includes the mesh, skin, and rig) is enough. For animated exports, use “Character with Motion”. Avoid “Motion” alone unless you are exporting only animation data to retarget onto a character already in Blender.
- Include Blendshapes (Morphs): Ensure that facial morphs/blendshapes are included. CC4 by default will include expression morphs when using the Blender preset. However, double-check if there’s an option for “Include Expression” or “Include Morphs” – enable it if present. This will export facial expression sliders (visemes, ARKit blendshapes, etc.) as shape keys in Blender. For example, CC4 can export a unified Open Mouth morph that moves jaw, teeth, and tongue together for convenience. Make sure such options are enabled if available in the advanced settings.
- Texture Settings: Set Max Texture Size to 4096 (4K) for highest quality, especially if you plan close-up renders or detailed texture work in Blender. Under Format, you can pick PNG or JPEG. PNG keeps full quality (useful if you might tweak textures), while JPEG is fine for smaller files (the CC4 Blender preset actually converts to JPEG by default for lighter exports). All exported textures will be organized in folders named after the material, which the Blender add-on will use to auto-link images.
- Delete Hidden Mesh: Disable this if you want the full character mesh including parts under clothing. As noted, this is important for later adjusting clothing or using Blender’s shrinkwrap/cloth simulations. Enable it only to optimize for final export (e.g., if you are sure you won’t need the body under clothes).
- Merge Materials: Usually keep this off for highest quality. CC4 has a Merge Material option to combine multiple material elements into one texture sheet (for example, merging head, body, limbs materials to one). While this reduces drawcalls for games, it also lowers texture resolution and can complicate editing. For Blender rendering or edits, it’s best to preserve separate materials.
- Use Subdivided Mesh: Leave this off unless you explicitly need a higher poly mesh exported. CC4 can apply a subdivision (like a Catmull-Clark) on export to smooth the mesh. If you plan to do high-res sculpting in Blender, you might export a subdivided mesh and the original. But note: if you export a subdivided mesh and sculpt it, you likely cannot re-import it to CC4 as a morph (vertex count mismatch). So for most workflows, export the base mesh (you can always add a Subdivision Surface modifier in Blender non-destructively).
- Animation Settings: If exporting animations, set the Frame Rate (e.g., 30 or 60 FPS) and ensure the Animation Range covers the motion. In CC4, selecting Current Animation with range “All” will include the entire timeline animation. Also, consider enabling “Reset Motion Root” if CC4 offers it, to reset the character’s root motion (this ensures the character isn’t offset if using root motion; this is more relevant for game engines though).
Once these settings are configured, export the FBX. The result will be a folder containing an FBX file (character and rig) and subfolders for textures. The Blender Auto Setup add-on will read the FBX and automatically load all these textures onto the materials in Blender. In short, using the Blender preset with 4K textures, including morphs, and not decimating or merging things prematurely, is the best practice for a clean import into Blender.

How do I import Character Creator characters into Blender with full rig?
To import a CC4 character into Blender with a full rig, the recommended method is to use Reallusion’s CC/iC Blender Tools (Blender Auto Setup) add-on. This ensures the character arrives in Blender with a functional armature and even sets up a Rigify control rig for easy animation. Here’s how to do it:
- Install the Blender Auto Setup Add-on: Download the “Auto Setup for Blender” tool (the Blender plugin) from Reallusion. The current version (as of 2025) is v2.2.x which supports Blender 3.4.1 and above (including Blender 4.x). In Blender, go to Edit > Preferences > Add-ons > Install and install the .zip file. Enable the add-on. Also ensure Blender’s native Rigify add-on is enabled, since the CC tool uses Rigify.
- Use the CC/iC Pipeline Panel: In Blender, press N to open the side panel. There will be a tab for CC/iC Pipeline (or it might be labeled CC Tools). Within that, find the Import options. The add-on provides specific import buttons such as “Import Character” or “Import All” which handle CC4 FBX files. For example, click Import Character and select the FBX you exported from CC4.
- Automatic Rig and Material Setup: The add-on will import the character. Do not use Blender’s default File > Import > FBX for CC characters, as that will bring in the skeleton in a raw state without the nice controls. The CC Tools add-on does several things automatically:
- It applies the armature to the mesh and sets the correct bone orientations and hierarchy. The imported armature is essentially the CC skeleton.
- It then can generate a Rigify rig on top of that. Typically, you’ll click a button like “Build Rig” or it may auto-build. This creates a Rigify control rig (with proper bone shapes, IK controls, etc.) that is linked to the CC skeleton. Essentially, the character ends up with two rigs: the original deform rig and a Rigify rig that drives it via constraints or drivers.
- It loads all materials and textures onto the character. The add-on reads the texture folder structure and creates Blender shader nodes for skin, eyes, hair, etc. (e.g., plugging in normal maps, roughness maps, and applying appropriate alpha blend modes for transparency where needed).
- Result – Full Rig: After import, you should see your character in Blender with a fully functional rig. The Rigify rig controllers will be visible (if not, you may need to switch to Pose Mode on the Rigify armature). You can hide or show the control rig. The character’s mesh is skinned to the deform rig, which is controlled by Rigify. All bones (including facial bones for jaw/eyes if applicable) will be present, or facial expressions will be available as shape keys (see next section). You can verify in the Object Data Properties that shape keys (blendshapes) like visemes or expressions are listed, ensuring facial performance capabilities.
- Importing Animations: If your FBX had animation, it should have imported as an action on the armature. You can press play and see the animation. If not, the add-on also often provides a way to import separate motion files (e.g., if you exported animation separately or want to bring iClone animations over). These can be retargeted to the character’s rig. The CC/iC Blender Tools can retarget the imported animation onto the Rigify rig with one click, preserving the motion. This means even complex animations from iClone or CC4 come in correctly.
In summary, to get a full rig in Blender, always use the CC Auto Setup add-on instead of Blender’s raw FBX importer. This will save you from a partially rigged character. Earlier versions of CC (CC3) did not have an official Blender pipeline, and users had to rely on tools like Auto-Rig Pro to get a rigged character. But with CC4 and the Blender 4.x pipeline, it’s essentially one-click: export FBX with Blender preset, then import via CC Tools in Blender for a ready-to-animate character with a full rig.

How do I apply materials and textures in Blender after importing from Character Creator?
When you import using the CC Blender Tools add-on, the materials and textures are applied automatically. The add-on reads the CC4 export’s file structure and reconstructs the materials in Blender. You should see your character appear with correct skin shading, eye materials, clothing textures, etc. However, if you are not using the add-on or need to troubleshoot materials, consider the following:
- Automatic Material Setup (via Add-on): Each object (body, clothing, eyes, hair) will have a material with textures hooked up. For example, the skin material will have the base color (diffuse) map, normal map, roughness map, and any micro normals or specular maps plugged into a Principled BSDF shader in Blender. The CC add-on often creates a node group or complex setup to mimic CC’s Digital Human Shader as closely as possible. This includes sub-surface scattering settings for skin, dual lobe specular for skin sheen, and alpha masked textures for things like eyebrows or eyelashes.
- Manual Material Setup (if needed): If you find an object is pink or textures aren’t showing, it may be that Blender can’t find the image files. Ensure the texture images are in the same folder structure as exported, or manually locate them. You can assign them in the Shader Editor:
- Import the FBX (if you did so without the add-on). Blender will create materials slots but might not link images. Select the character mesh, open Shader Editor, select a material (e.g., Skin_Body).
- Add Image Texture nodes for each map: Color, Normal (with a Normal Map node), Roughness, Metallic, etc. Use the texture images from the CC4 export folder (they are usually named clearly, like Body_Diffuse, Body_Normal, Body_Roughness, etc.). Connect them to the Principled BSDF inputs accordingly (Color to Base Color, Normal to Normal Map node -> Normal input, Roughness to Roughness, etc.).
- For transparency (e.g., eyelash planes, hair cards): switch the material’s Blend Mode to Alpha Blend or Alpha Hashed (in Material Properties > Settings) and plug the Opacity map (if provided) into the Alpha of the shader.
- Wrinkles and Micro Details: CC4 can export wrinkle normals or micro normal maps if the character uses SkinGen effects. The Blender add-on can handle these by creating additional normal map mixing in the node tree. If you don’t see the fine skin details, check if those textures were exported and manually add them if needed.
- Eye Shader: Eyes in CC4 use complex layering (cornea, iris, occlusion shadow). The CC Blender add-on will set up eye materials, but you might need to adjust them in Blender’s Eevee or Cycles for best results. For instance, the eye occlusion mesh (a fake shadow caster) might be brought in – it should use an additive or multiply shader. If it looks wrong (like dark patches in the eyes), you can hide or remove the eye occlusion mesh, or tweak its shader.
- Adjusting Materials for Blender Render: Sometimes, even after auto-setup, the materials might look too shiny or too flat compared to CC4. This is because different render engines (CC4 vs Blender Cycles/Eevee) handle PBR slightly differently. You may need to adjust roughness or specular values. For example, skin might appear too oily; lowering the specular map’s influence or adjusting roughness can help. According to experts, the raw specular from CC might need to be reduced for external renders. Use Blender’s viewport to inspect and tweak in real time.
- UDIMs or Multiple Material Tiles: If the character uses UDIM textures (e.g., separate UV tiles for head, body, limbs), ensure you use Blender’s UDIM support. CC4 typically doesn’t use UDIM by default (it uses multiple materials instead), but if you merged materials and got UDIM, you’d need to load the UDIM sequence.
In summary, the fastest way to get correct materials is to use the official Blender Auto Setup add-on, which will automatically apply all textures and set material options. If something doesn’t look right, manually adjust the shader networks. With the proper setup, Blender’s render (whether Eevee for real-time or Cycles for realistic) can closely approximate CC4’s look. Remember that some special shader effects in CC (subsurface scattering intensities, digital human eye shader) might need manual fine-tuning in Blender’s materials to get an exact match.

How do I preserve facial expressions and blendshapes in Blender?
To preserve facial expressions, visemes (lip-sync shapes), and other blendshapes from CC4 in Blender, you need to ensure that morph data is exported and imported as Blender shape keys:
- Exporting Morphs from CC4: When exporting the FBX from Character Creator, use the Blender preset which by default includes the character’s expression blendshapes. CC4’s characters come with a full set of facial morphs (smile, frown, phonemes, etc.). In the FBX export options, there might be an Advanced section where you can tick options like “Export Facial Morphs” or ensure “Viseme/Expression” sliders are included. Also, CC4 has a feature Mouth Open as Morph – enabling this merges the jaw open bone movement with a morph so the entire mouth opening is driven by a single morph slider. This is useful in external tools so you don’t have to animate both the jaw bone and morph separately.
- Using Blender Auto Setup to Import Morphs: The Blender CC add-on will import the morphs as shape keys. After import, click on the character’s mesh and look in the Object Data Properties (the triangle icon) under Shape Keys. You should see a list of keys like “EyeBlink_L”, “EyeBlink_R”, “Joy”, “Anger”, “Viseme_A”, etc., depending on the profile. If these are present, your facial expressions are preserved. You can move the sliders to see the mesh deform (e.g., JawOpen will open the mouth). If you exported an animated facial performance, those shape keys can even have keyframes (though note, sometimes the FBX will include only the existence of morphs but not the animation curves for them – you might need to bake those animations separately).
- Animating Expressions in Blender: With shape keys present, you can animate them in Blender by keyframing their values. For example, to have the character smile, key the “MouthSmile” shape key from 0 to 1. These shape keys can be combined with the armature animation. They are essential for detailed facial animation since the CC3/CC4 character rigs typically use blendshapes for the nuances instead of a full face bone rig.
- Preserving Custom Blendshapes: If you created custom morphs in CC4 (like body morphs or an expression), ensure they were part of the export. CC allows custom morph sliders; to get those into Blender, they need to be exported in the FBX. Check the Custom or Extended Morphs boxes if available. Once in Blender, they’ll appear as shape keys as well.
- Round-trip Edits: If you want to edit a blendshape in Blender (say fix a facial expression shape), you can do so by selecting the shape key, going into Edit Mode, and adjusting vertices. The shape key will then reflect the new shape. You can even create entirely new shape keys in Blender (sculpt a new expression) and export them back to CC4. CC4 has a feature to import morph targets from FBX: you import the FBX via Update Morphs and it can populate an expression or a custom slider. This way, Blender can be used to tweak or create morphs that CC4 will use (advanced pipeline, but good for custom expressions or viseme correction).
- Troubleshooting: If you find that no shape keys came through, double-check your export settings. In older workflows (e.g., CC3 without the Blender tools), the FBX might not bring morphs unless “Include Morphs” was checked. Also, Blender’s default FBX importer sometimes doesn’t import all shape keys correctly. The CC Auto Setup plugin is better at this. Some users have noted confusion when certain morphs (especially ARKit ones) don’t appear; ensure you’re using the latest versions of CC4 and the add-on, as updates improved the coverage of morph imports.
In essence, to preserve facial expressions, use the proper export settings and the Blender add-on. This will give you all the facial blendshapes as shape keys in Blender, allowing you to drive complex expressions and lip-sync. With those preserved, your CC character in Blender can be just as expressive as in iClone/CC, enabling high-quality facial animation in your Blender pipeline.

Can I edit Character Creator meshes in Blender without breaking the rig?
Yes, you can edit Character Creator meshes in Blender (for example, tweak the body shape, adjust topology, or sculpt details) without breaking the rig, as long as you follow some guidelines:
- Do Not Remove or Reorder Vertices: The CC4 character’s mesh is skinned to the rig by vertex indices. If you delete vertices or substantially change the vertex order, the skinning (weights) and morphs can break. Simple edits like moving vertices, scaling parts, or sculpting detail are generally safe – the rig will still deform the mesh correctly since vertex groups remain. For instance, if you sculpt a more muscular arm on the character, the arm bones will still move it because the vertex groups (weights) are intact.
- Use Shape Keys for Major Shape Changes: If you intend to send the changes back to CC4 as a new morph, it’s best to apply your edits on a shape key. In Blender, you could duplicate the basis shape key and sculpt on that (or use the basis if you don’t need to preserve original). That way, the base mesh vertex order remains the same. After editing, you can export the mesh as FBX and re-import as a morph in CC4 (which expects the same vertex count). If you directly sculpt the base mesh and change vertices, you can still use it in Blender, but you won’t be able to load it as a morph target in CC4 if the topology changed.
- Preserve Rig and Weights: The armature modifier on the character in Blender holds the skin weights. If you add geometry (say, subdivide or extrude), those new vertices won’t have weights and the rig won’t move them until weighted. Minor operations like loop cuts or sliding edges are fine (the new vertices will interpolate weights). If you do something like adding a subdivision modifier without applying it, the rig will still work (the modifier applies after the armature in the stack). But if you apply a Subdivision (which bakes new geometry), you’ll need to re-weight those new vertices (Blender can automatically weight via heat weights or you can copy weights from the original mesh).
- Keep the Armature Object and Bone Names Untouched: When editing the mesh, do not rename the bones or detach the armature. As long as the mesh remains parented to the same armature and vertex groups correspond to bone names, the rig will function. The CC4 Blender add-on’s generated rig (Rigify controls) can also be preserved; you can still use it after mesh edits since it drives the deform bones, which in turn move the mesh.
- Editing Clothing or Accessories: If your CC character has clothes and you want to edit those meshes in Blender (like fix a poke-through or alter the style), you can. The clothing are separate meshes skinned to the same armature. Ensure you don’t delete critical parts that might be needed for re-conforming in CC4. If you keep the vertex count same, you could send the edited clothing back as an updated asset.
- Using Modifiers Safely: Non-destructive Blender modifiers can be used to edit the mesh without breaking rigging:
- Subdivision Surface (on viewport) will smooth the mesh but the underlying rig is still on the low-poly cage; Blender will deform the high poly accordingly. Good for rendering smoother characters in Blender.
- Shrinkwrap could be used for adjusting clothing to body etc. If you shrinkwrap a mesh onto the body for a tighter fit, it doesn’t break the rig per se, but if applied, you should then transfer weights from the body to that mesh (or it likely already had weights if it was clothing).
- Mirror: If you edit one side and want it symmetrical, use the Mirror modifier in Blender. Just ensure it’s applied before or in edit mode symmetrical to keep weight painting symmetric too (Blender’s X-mirror in weight paint helps maintain left-right symmetry on weights).
- Round-trip Consideration: Blender’s CC/iC Tools add-on has a “Round Trip” feature which allows you to send the character back to CC4 after modifications. This works best if the topology is unchanged. For example, if you sculpted a new facial feature, you can round-trip it and have CC4 generate a new morph slider for that change. If you did change topology (e.g., decimated or added lots of geometry), CC4 will likely import it as a new accessory or static mesh rather than as the same character, since it can’t map it onto the original rig without the identical vertex structure.
In summary, you can safely edit CC meshes in Blender – move verts, sculpt details, or even add modifiers – and the rig will still work as long as you don’t fundamentally alter the mesh’s identity (vertex count and names). This freedom allows you to refine the character (add fine sculpting details, adjust proportions) using Blender’s modeling toolkit, then either use the character in Blender for rendering or send the changes back to CC4 as morphs for further use.

Can I use Blender modifiers like Subdivision or Shrinkwrap on CC characters?
Yes, you can apply Blender modifiers like Subdivision Surface or Shrinkwrap to Character Creator characters, but use them wisely:
- Subdivision Surface Modifier: This can be applied to a CC character mesh to increase its mesh density for smoother results. For example, if you have a game-resolution character but want high-quality renders in Blender, adding a Subdivision modifier (without applying it) will smooth the character during render time. The rig will still deform the low-poly cage, and Blender will subdivide that deformation, resulting in a smoother animation. This is non-destructive and won’t break anything. However, do not apply the subdivision if you plan to export the character back to CC or elsewhere, because applying it changes vertex count. If you just need it for Blender renders, it’s fine to leave it. Character Creator does have an option to export a subdivided mesh directly, but doing it in Blender via a modifier is more flexible (you can choose to turn it off for faster viewport, on for final render).
- Shrinkwrap Modifier: This is useful primarily when creating or adjusting clothing, or fitting one mesh to another. You can use Shrinkwrap to stick a piece of mesh (like a belt or armor) onto the body surface of the CC character. This doesn’t directly affect the rig; it’s a modeling aid. If you shrinkwrap clothing and then want it to move with the body, you’ll still need to ensure the clothing is rigged (skinned) to the armature. Often, the workflow is: use Shrinkwrap to conform the shape, apply the shrinkwrap, then use weight transfer (from body to cloth) or manual weight paint so the cloth follows the rig. As long as you rig the clothing, the Shrinkwrap edit will hold and animate correctly. For the base character mesh, you typically wouldn’t shrinkwrap it to something else (unless projecting onto a different body, which is rare).
- Solidify Modifier: If you want to give thickness to a piece of clothing or accessory, you can use Solidify. This will create interior faces (like making a shirt have cloth thickness). It doesn’t break rigging unless applied (which just doubles the vertices; you’d then want to copy weights to the new inner faces if needed, or often you keep it unapplied for render).
- Mirror Modifier: If you want to model edits symmetrically (e.g., adjust ears or horns on both sides), you can use Mirror. CC characters are typically symmetrical in topology, so a Mirror (with clipping at center) can be applied to cut modeling time in half. Just ensure not to apply it if one side had unique detail you need to preserve. For weight painting, Blender’s X-Mirror option can help keep weights symmetric as well.
- Armature Modifier: Technically the character already has an Armature modifier (the rig). You usually don’t add a second one. But if you duplicate or separate parts, ensure they have an armature modifier pointing to the CC armature so they follow animation.
- Physics Modifiers: Not exactly modifiers, but Blender has things like Cloth or Collision. You can use a CC character in Blender’s physics by adding a Cloth simulation modifier to clothing or Soft Body to hair, etc., without issues. These operate on top of the rig animation. Just be mindful of order (e.g., Armature deform then Cloth sim or vice versa depending on desired result).
One caution: if you use modifiers that change the topology and then apply them, you should be aware of the consequences:
- Applying Subdivision on the base body = new dense mesh, rig still partly works but you’ll have lost all the pre-made shape keys (since those were for the old mesh). You’d essentially freeze the character in that subdivided form for Blender use only.
- Applying Mirror = doubles one side, rig will work if weights copied, but you might have duplicate shape keys etc. Usually avoid applying mirror on a rigged mesh; instead, incorporate symmetrical edits via sculpting or shapekeys.
In practice, many artists use Subsurf and Shrinkwrap freely while working on CC characters in Blender to refine the model or fit clothing. These modifiers are great for offline rendering workflows (where fidelity is key and you don’t return to CC). For a real-time game workflow, you’d want to eventually collapse modifiers and optimize, but only after making sure the rig and weights are updated accordingly.
So, feel free to use Blender’s modifiers on CC characters as part of your workflow. They won’t harm the rig as long as they’re used in moderation and applied (if at all) at the right time. Non-destructive modifiers can always be removed or tweaked, making them a safe way to experiment with the model in Blender.

How do I fix rigging or weight painting issues in Blender with Character Creator characters?
When bringing CC characters into Blender, you might encounter some rigging or weight issues. Here’s how to address common problems:
- Incorrect or Broken Rig (No IK controls, etc.): If the imported rig doesn’t have the expected controls (for example, you only see the raw skeleton and not the Rigify rig), it could be that the auto-setup add-on wasn’t used or didn’t run completely. In that case, the first “fix” is to re-import using the CC Tools add-on with Rigify enabled. This will properly set up the rig with IK/FK. If you already have the character in Blender with the deform rig, you can still generate a Rigify rig from it using the add-on’s functions (there’s usually a button like Generate Rig or Build Rig). This is easier than trying to animate the raw bones.
- Weights issues (strange deformations): Sometimes parts of the mesh deform weirdly when posing. This is usually due to weight painting needing adjustment:
- Enter Weight Paint mode on the mesh. Use Blender’s tools to inspect weights. If the shoulder is collapsing oddly, check if the shoulder bone’s weight is too strong or if an adjacent bone (like an upper arm or clavicle) lacks influence.
- Use Auto Normalize option while painting to keep total weights per vertex equal to 1. You can paint to smooth out harsh transitions.
- Blender has a Weight Paint > Smooth tool that can relax weights in an area.
- If an area is influenced by the wrong bone, you can manually erase that group’s weight or assign it correctly.
- Common areas that might need tweaking: shoulders, wrists, hips, and fingers – depending on the character’s outfit and proportions.
- Clothing weight issues: If the character is wearing clothing (either exported from CC or added in Blender), you might see the body poking through the clothes when posing. Solutions:
- In CC4, usually the Hide Body Mesh tool is used to mask out body under clothing, and if you exported with Delete Hidden Mesh, the body under clothes is gone. If you didn’t delete it, you’ll see poke-through. In Blender, you can manually delete or hide those inner body faces, OR you can adjust weights so the cloth moves better with the body.
- Use Blender’s Transfer Weights: If you imported a custom cloth object onto the character, you can rig it by copying weights from the body. In Object mode, select the cloth, then the body, and use Weight Paint > Transfer Weights (or the Data Transfer modifier with vertex group option). This gives the clothing the same weight as the body underneath, which usually fixes most clipping since it will move identically to the body.
- After transferring, check weight paint on the clothing for any needed refinements (like perhaps stiffening some parts if cloth is meant to be rigid, or removing influence of fingers on a long coat, etc.).
- Facial weight/rig issues: CC characters use blendshapes for expressions mostly, but some bones like the eyes, jaw, and tongue are present. If the eye bones aren’t rotating the eyes properly, ensure the eye objects are skinned (weighted 100%) to their respective eye bones. CC exports usually have the eyeballs as separate objects parented to the armature (or weighted). If they came in as separate with constraints, check those constraints. If you find the jaw bone not moving the vertices, it might be because the jaw openness is handled by morphs instead (check shape keys for JawOpen). Using the provided morph slider is the intended way to open the mouth in Blender.
- Twist Bones and Roll: CC rigs often have twist bones (for arms, legs). If using Rigify, these are managed. But if you notice wrist or forearm distortion, ensure the twist bones (if any) are properly driving the mesh. They usually are weighted to the forearm area to reduce candy-wrapper twisting. The auto-setup should have done this correctly.
- Bone Roll or Orientation: A subtle issue could be bone orientation differences causing local rotation issues. The Blender preset largely avoids this. If you manually imported and the rig has weird rotation axes, you might consider re-export with the correct preset. Otherwise, you’d have to adjust bone roll in Edit Mode which is advanced and not recommended unless you know what you need to fix.
- Re-rigging vs. Fixing: In extreme cases (like using CC3 base in Blender without tools), you might have just an unrigged or poorly rigged mesh. Instead of painting weights from scratch, a quick fix is to use an autorigger like Auto-Rig Pro or Blender’s Rigify by aligning a metarig and transferring weights. However, with CC4, this is usually unnecessary because the official pipeline provides the rig and decent default weights.
In short, fixing rigging/weight issues involves either using the correct import tools to avoid issues upfront or manually tweaking the weight paint. CC characters come with production-quality weighting, but minor adjustments can be needed, especially after custom edits or adding custom clothes. Blender’s weight painting tools, coupled with features like weight transfer, will allow you to fine-tune the deformations so your character bends naturally.

How do I animate Character Creator characters in Blender?
Animating CC characters in Blender can be done just like animating any rig in Blender, with some additional benefits due to the Rigify integration:
- Using the Rigify Control Rig: If you imported the character with the CC Blender Tools, you likely have a Rigify rig. Select the Rigify armature (usually a green bone layer in Blender) and enter Pose Mode. You’ll see controls for various parts: e.g., circle controllers for the hips, feet, and hands, facial bone widgets if enabled, etc. You can use these controls to pose the character. IK/FK: Rigify rigs have switches for IK (inverse kinematics) on limbs. For example, you might find a slider (often on the arm controller or in a custom UI panel) to switch IK for arms and legs. IK is useful for grounding feet or hands, FK is good for swinging arms in arcs.
- Keyframing: Pose the character at your start frame, set keyframes for the bones (select all relevant controls, I -> LocRot or LocRotScale). Move to another frame, create a new pose, keyframe again. Blender will interpolate between keyframes. The character’s mesh will deform according to those bone animations. Thanks to the rig, you have access to advanced controls like pole targets for elbows/knees (to control bend direction), and perhaps custom properties for finger curls, etc.
- Facial Animation: Facial expressions on CC characters in Blender are typically handled via shape keys. To animate the face, go to the mesh’s shape key panel. For example, if you want the character to blink, insert keyframes on the “EyeBlink_L” and “EyeBlink_R” shape keys (value 0 at open, 1 at closed). For talking, keyframe visemes like “Viseme_A”, “Viseme_O” corresponding to phonetic sounds. You can do this manually or use Blender’s dope sheet (shape key editor or even Drivers if connecting to an audio file via add-ons).
- Using Existing Animations: Instead of manual posing, you can also import animations from other sources:
- If you exported the character with an iClone animation or motion capture, that animation might already be attached. Use the Timeline or Action Editor to play it. You can further tweak it using Blender’s animation editors.
- You can import BVH or FBX animations (from Mixamo or other libraries) and retarget them to the CC rig. The CC/iC Tools add-on has features to retarget external animations onto the character. Alternatively, you could use Blender’s NLA (Non-Linear Animation) editor to mix animations.
- The add-on might also allow you to import an iClone motion file (for example, a MotionPlus or iMotion) directly onto the character if you have one, simplifying retargeting.
- Graph Editor and Fine-Tuning: For polished animation, use Blender’s Graph Editor. Clean up any jitter by smoothing curves. On imported animations, you may find extraneous keyframes on every frame (if baked). Blender’s Graph Editor can simplify those. The Onur’s guide suggests deleting unnecessary keyframes (like scale keys) to make the animation curves cleaner. This can be done by selecting all bones and deleting scale keys if they aren’t needed.
- NLA Editor: Blender’s Non-Linear Animation Editor lets you layer animations. For instance, you could have a base walk cycle, then layer a head-turn on top. Change the NLA strip blend mode to “Add” or “Combine” so it adds on top of the underlying motion. This is powerful for combining motion capture with hand-keyed adjustments.
- Auto IK for quick posing: Blender has an Auto IK toggle in pose mode which, when enabled, allows you to grab an end effector (like a hand bone) and move it, and Blender will IK solve the chain temporarily. This is a quick way to pose without setting up formal IK, useful for rough blocking.
- Frame Rate and Units: Make sure your Blender project frame rate matches the one from CC4 export (typically 30 FPS unless you chose otherwise). This avoids timing issues.
- Playback performance: CC characters can be high-poly with many shape keys which might slow viewport playback. You can improve performance by switching to Solid viewport display, or hiding subdivision modifiers, etc., while animating.
Once your animation is done, you can render in Blender (using Cycles/Eevee) or even export the animation data out (to Unity/Unreal or back to iClone). If you need to get the animation back into CC4 or iClone, you could export an FBX from Blender with the armature and see if CC4 can import the motion (though typically, animating in Blender means you’ll render in Blender or export to game engine rather than go back to CC4).

Can I use Blender to create clothing or accessories for Character Creator characters?
Absolutely – Blender is a fantastic tool for modeling custom clothing, hair, or accessories which you can then bring into Character Creator. The workflow is generally:
- Export Reference from CC4: To create a piece that fits your CC character, first export your character (or at least the body) to Blender as a reference. You can export a nude character or one wearing minimal clothing in an A-pose or T-pose that you want to model around. Import this into Blender (via the CC Tools add-on or even as OBJ if you prefer static reference). This gives you the exact body shape and size to model the clothing on.
- Model the Clothing/Accessory in Blender: Use Blender’s modeling tools to create the item. For example, if making a shirt, you might duplicate the torso faces of the body as a base, or start from a new mesh shaped around the torso. For accessories like a belt or necklace, you can model from primitives and shape them to the character. Keep the origin of the new object at the world origin for now (which aligns with character’s origin). For complex outfits, you can use Blender’s sculpting, cloth simulation (to drape clothing) or any technique to achieve the desired shape.
- Maintain Proper Pose: Ideally, keep the clothing modeled in the same pose as the character was exported (usually a T-pose or A-pose). CC uses A-pose by default for CC4 characters. This ensures when you import the clothing back, it will fit correctly. If you modeled it in a different pose, you might have trouble aligning it later.
- Import the Clothing as Accessory in CC4: Once the modeling is done, export the item from Blender. Export as FBX (or OBJ). For FBX, apply transformations (so it’s not offset) and ensure only the clothing mesh is in the file. In Character Creator, go to Create > Accessory and import the FBX. The clothing will come in as an accessory attached to the character. At first, it’s just a static object parented to the character (usually parented to the pelvis or root by default).
- Position and Attach: Usually, if you modeled in place on the exported character, it will appear perfectly in position in CC4 (e.g., the shirt will align with the body). If not, you can adjust position, rotation, scale in CC4 to fine-tune the fit.
- Convert to Cloth (Skin Weights): In CC4, an accessory can be converted to clothing by transferring skin weights. Select the accessory (your imported cloth) and use Transfer Skin Weights. CC4 will ask what the item is (upper body, lower body, glove, etc.) to apply an appropriate binding. It then copies the weights from the character’s body to the clothing (similar to Blender’s weight transfer, but built into CC). After this, the item becomes a clothed skinned mesh – meaning if you pose the character in CC4, the new clothing moves with it.
- Hide Underlying Body Mesh: If the clothing covers parts of the body, use CC4’s Hide Body Mesh tool to mask those parts when the clothing is worn. For example, hiding torso skin under a shirt to avoid clipping. This can also be set to auto-hide those parts whenever the clothing is applied to any character.
- Refine in CC4 if needed: CC4 provides some mesh editing and weight paint adjustment tools. You can use the Skin Weight Editor to fix any minor issues (e.g., if a skirt’s bottom is affected by a leg bone when it shouldn’t, you can remove those weights). You can also assign the cloth to cloth physics in iClone if needed.
- Save to CC Library: Now your item is a proper CC cloth. You can save it as an
.ccClothasset in CC4 for reuse. It will conform to other characters as well, with CC’s auto-conforming adjusting the size for different body shapes (if the characters are derived from CC base).
A few tips:
- When modeling, try to maintain a reasonable polycount. CC can handle high-poly clothes, but if it’s for games, you might want to retopologize in Blender to a lower poly version and bake details.
- UV mapping: Create UVs for your clothing in Blender. CC will use those UVs for baking AO or for you to apply textures. If you don’t unwrap, CC4 might auto-unwrap on import, but better to control it yourself.
- Materials: CC4 will import the material zones from the FBX. If you have multiple materials (say different material for sleeves vs body of shirt), those will come through. You can later apply CC4 substance materials or manually assign textures in CC.
This workflow is commonly used by artists to expand CC’s wardrobe with custom pieces. For example, an artist might sculpt a fantasy armor in Blender, then import to CC4, weight it, and use it on any CC character. Blender provides the freedom to model anything, and CC4 provides the rigging and compatibility environment.
In short, Blender is an excellent companion to CC4 for content creation: model in Blender, then import as accessory and weight it in CC. The result: your Blender-made item becomes a native CC asset, fully rigged and ready to animate on your characters.

How do I send custom Blender assets back into Character Creator?
Sending assets or character modifications from Blender back to Character Creator is often referred to as a round-trip workflow. Depending on what you’re sending back, the process differs slightly:
- Clothing/Accessory Assets: As described in the previous section, the pipeline for custom clothing or accessories involves importing the model into CC4 as an accessory and then skinning it. Essentially, after modeling in Blender, export as FBX and use CC4’s Create > Accessory import. Once in CC4, apply skin weights and hide body mesh if needed. Finally, save it to your CC library. There isn’t an automatic one-click from Blender to CC for arbitrary meshes; you do it via FBX and CC’s import dialogs. However, the Blender Auto Setup add-on can help in one way: when you import your character to Blender for asset creation, use the “Import for Accessory” option, which prepares the scene in Blender in a way that’s easier to export the new item back (ensuring correct orientation and scale).
- Morphs (Shape Changes to Character): If you modified the character’s shape in Blender (without changing topology), you can send that back as a morph slider:
- One method is using CC4’s Transformer / Morph Import. Export the altered character as FBX from Blender (include only the mesh, no armature needed for a morph). In CC4, go to Create > Morph Slider, and import that FBX as a new morph target. CC4 will compare it with the base it was derived from and create a morph slider that the user can then apply on any character of that base. For example, if you sculpted a more muscular version of the CC4 character, you can import as a morph and dial it in CC4.
- Alternatively, the CC/iC Blender Tools have a Round Trip feature.This involves a script in CC4 that can import a character coming from Blender. Typically, you’d export the character from Blender via the add-on’s Export to CC4 function. Then in CC4, use File > Python > Run Script (if provided by Reallusion) to import that FBX and update the character. This automates the morph creation behind the scenes. It’s a somewhat advanced pipeline but exists for users doing frequent back-and-forth.
- Full Character (Mesh and Rig): If you created or heavily modified a character in Blender (e.g., you made a character from scratch or kitbashed outside CC4), you can still bring it into CC4 to use CC4’s features (facial animation, clothing system). CC4 has a “Create Character (FBX)” import, which uses AccuRIG or the Humanoid rig template to rig and convert an imported model into a CC character. However, that’s more for non-CC characters. If your character started as CC and just got some changes, using morph import as above is better to retain all CC functionalities.
- Exporting Animations or Poses back: If you animated the character in Blender and want to get that animation into iClone or CC4, you can export just the animation: in Blender’s FBX export, select the armature and mesh, and export Animations only (there’s an option to only export animation). Then in iClone or CC4, you can import the FBX as a motion (in iClone’s 3D Exchange or CC4’s Motion import). However, many users simply keep the animations in Blender or export to game engines, since CC4 is usually the start of the pipeline and Blender the end for rendering.
- Using GoZ for ZBrush vs Blender: With ZBrush, CC has a direct GoZ link where you click “Send to ZBrush”, sculpt, and “Send back to CC”. Blender doesn’t have an official one-button link like that. The round-trip with Blender involves a few manual steps as described (export FBX, import, or using the pipeline plugin’s export/import functions).
In practice, sending Blender assets to CC4 is a mix of manual import and using CC4’s tools to integrate those assets:
- Models (clothes, props) -> import as accessories, weight them.
- Morphs -> import as morph sliders.
- Characters -> use Transformer or AccuRIG if new.
Reallusion’s documentation and forums have detailed guides on these processes, and the Blender pipeline plugin documentation covers the round-trip morph workflow in depth. Once set up, you can iterate: e.g., tweak in Blender, export FBX, import morph, test in CC, and repeat. This enables Blender as a powerful extension of CC4’s modeling capabilities.

What are the best tools or add-ons for a smooth CC-to-Blender workflow?
To streamline the Character Creator to Blender pipeline, a few key tools and add-ons can be utilized:
- Reallusion CC/iC Blender Pipeline Add-on (Blender Auto Setup): This is the official free add-on provided by Reallusion. It’s arguably the most important tool for this workflow. It handles importing characters, setting up materials, and generating a Rigify rig automatically. It also has options for importing animations and doing round-trips. Make sure to use the latest version (v2.2+ supports Blender 4.x). This add-on drastically reduces manual work and errors.
- Rigify (Blender add-on): Blender’s built-in Rigify add-on works in tandem with the CC Auto Setup. Rigify provides a feature-rich control rig. Ensure it’s enabled so that the CC Tools can create a Rigify rig for your imported character. Rigify alone is generic, but combined with the CC pipeline scripts, it becomes specific to the CC skeleton. If for some reason you import without the CC plugin, you could manually use Rigify by aligning a meta-rig to the CC character and generating, but the CC plugin automates that.
- Auto-Rig Pro (Blender add-on, paid): Before the official tools were mature, some artists used Auto-Rig Pro to rig CC3 characters in Blender. Auto-Rig Pro can still be useful if you have a character in Blender with no rig or a custom character. It’s a powerful auto-rigging and retargeting tool. However, for CC4 characters, you usually won’t need this unless you want to retarget to a different rig style or game engine specific skeleton.
- Blender Morph Tools (ShapeKey utilities): There are community scripts to help with shape keys, such as ShapeKeyGen for generating ARKit blendshapes or other utilities. If you want to add Apple ARKit 52 face shapes to a CC character for use in AR/VR, you might use these to generate the needed shapekeys in Blender, then send them back to CC or directly use in Blender.
- Reallusion Transformer & AccuRIG: Not Blender add-ons, but relevant tools. If you bring a Blender-modeled character into CC4, the Transformer (for Daz, etc.) or the AccuRIG tool can rig and integrate it. Conversely, the Blender pipeline plugin on the CC4 side (an extension that sits in CC4) might help to send character and motion data to Blender. Ensure you install the CC4 side “Blender Pipeline Plugin” as well (it comes with the download) – this provides the preset and maybe some UI in CC4 (like a direct export button for Blender).
- Material Baking Add-ons: If your goal is to take the CC character out of Blender into a game engine, you might want to bake materials into simpler textures (because CC materials can be complex). An add-on or script that automates texture baking can help. For example, Victor Soupday (developer of the CC Blender tools) mentioned working on an add-on script to bake the complex CC skin shader down for Sketchfab. While not publicly released, you could use Blender’s built-in Bake functions or third-party tools like Substance Painter. This is tangentially related, but useful in a full pipeline.
- Blender Forums/Community Rigs: Some users create custom Blender rigs for CC characters (for example, if someone prefers a different rigging system). There might be Python scripts on forums that adjust or simplify the CC rig. For most, Rigify does the job, but keep an eye on the Blender community for any custom tools specifically for CC characters.
- GoZ for Blender?: There is no official GoZ for Blender, but some people have custom solutions. Generally, you’d use FBX for Blender as we do.
By using these tools, you’ll ensure a smooth, optimized workflow: design in CC, one-click send to Blender, tweak/animate, and potentially return assets to CC, with everything staying consistent.

What are common issues when combining Character Creator and Blender workflows?
Even with a robust pipeline, users may run into some common issues when integrating CC and Blender. Here are those issues and how to address them:
- Material Appearance Mismatch: The character might look different in Blender vs CC4. For example, skin might appear too shiny or dull. This happens because CC4’s Digital Human Shader doesn’t directly translate to Blender’s Principled BSDF. As noted earlier, you might need to manually tweak things like specular intensity or SSS in Blender. If eyes look odd (glassy or too dark), it could be the eye occlusion mesh not working well in Blender’s renderer. The solution is usually to adjust or remove that occlusion, and double-check normals and transparency settings.
- Rig Issues: If not using the official add-on, the skeleton might import with incorrect orientation (e.g., rotated 90 degrees), or bones not connected properly. The Blender preset prevents this by doing a Y-to-Z up conversion. Always using the preset and add-on avoids most rig issues. Another rig issue might be the presence of extra bones like “twist” bones or end bones (sometimes FBX import adds end bones). The add-on usually strips unnecessary end bones. If you have extra bones that complicate animation, you can remove them in Edit mode (just ensure weights are reassigned if needed).
- Weight Painting Glitches: As mentioned, certain extreme poses might reveal imperfect weighting, especially if the character has an unusual body shape or the clothing isn’t perfectly conformed. These require manual weight paint fixes in Blender or adjustments in CC (then re-export). There’s also an issue if a user exported with “Delete Hidden Mesh” for clothing – the body parts under clothes are gone, which is fine, but if the clothing doesn’t cover an area fully during motion, you might see gaps. The fix is to not delete hidden mesh on export if you anticipate needing those areas for animation.
- Shape Keys Missing or Not Animating: Sometimes users find the shape keys (morphs) present, but if they import an animated FBX, the shape key animation didn’t come through (the body animation did). This is an FBX limitation – not all tools export morph animation easily. CC4’s MotionPlus can store facial animation, but Blender might not read it automatically via FBX. If you face this, you might have to animate the facial keys manually in Blender, or use iClone’s Face pipeline and then reapply in Blender. It’s a known puzzle that some morph animations export and some don’t. A potential workaround is exporting the animation in Alembic or point cache for just the face, but that’s heavy. Most just re-key the face in Blender if needed.
- Performance Issues: CC characters can be resource-heavy (tens of thousands of polygons, 4K textures, many shape keys). In Blender, this can cause slow viewport playback. Common issue: slow interaction because subdivision mod is on or because Rigify rig generates lots of bone constraints. Solution: turn off subdivision in viewport, or use Blender’s Simplify options. Also, hide any rig layers or objects not needed. If things are still slow, consider using proxy (a low-res version for animating, then switch to high-res for render).
- Version Compatibility: Using mismatched versions of the CC add-on and Blender can cause errors (for instance, using an older CC add-on on Blender 4.0 might throw Python errors or fail to rebuild materials). If you see errors like “Rebuild Material failed” or missing UI panels, check for an updated add-on. Always get the latest from Reallusion’s site or GitHub releases.
- Character Scale: Less common now, but ensure scale consistency. Blender’s unit system should be in meters (the CC Blender preset exports in Blender-friendly scale). If you find your character tiny or huge, you might have used the wrong preset or applied a scale. You can rescale in Blender, but better to export correctly. CC characters should come in around 1.8 Blender units tall for a human.
- Retargeting Issues: If you bring in external animations (like Mixamo to Rigify), you might encounter bone mapping issues. Tools like Rokoko’s Blender plugin or Auto-Rig Pro’s retarget can help map Mixamo (or other) skeleton to CC’s. The CC add-on itself can retarget iClone motions well, but for third-party, be prepared to adjust bone mapping.
- Stylized Character Proportions: When using CC4 to create a very stylized character (e.g., very short, big head, etc.), the standard rig and animations might not directly work perfectly. Poses from the motion library could look off. You may need to adjust the rig (e.g., tweak Rigify bone positions, use IK to keep feet on ground if legs are short). It’s not a “bug” per se, just a natural issue when using motions across different proportions. Custom weight painting or additional corrective shape keys (for elbows/knees) can help maintain volume on extreme deformations.
By anticipating these issues, you can usually solve them without too much trouble. The key is to use the right presets and keep everything updated. The Blender-CC user community (forums, Reddit) is also very active; often someone has encountered a similar problem and can offer a solution or script to fix it. Overall, once set up, the CC-Blender workflow is stable, and these issues become minor bumps in an otherwise efficient pipeline.

Is Character Creator compatible with Blender 4.x versions?
Yes, Character Creator (particularly CC4 and above) is compatible with Blender 4.x, thanks to updates in the Blender pipeline add-on. Reallusion actively maintains the CC-to-Blender tools to support the latest Blender releases. For example, the Blender Auto Setup add-on v2.2.4 explicitly supports Blender 3.4.1 and above, which includes Blender 4.0 and the subsequent 4.x versions. Many users in the community have reported successful use of CC4 characters in Blender 4.0, 4.1, etc., as long as they use the latest add-on.
However, there are a few things to keep in mind:
- Update to Latest CC4 Pipeline: Make sure you have updated Character Creator 4 to the latest version (e.g., CC 4.5 or whatever is current). Reallusion sometimes updates the FBX export or adds features specifically to improve Blender compatibility. The release notes often mention pipeline improvements. Using the newest CC ensures you have the latest preset and export bug fixes.
- Install the Latest Blender Auto Setup: If you had a previous version of the add-on (for Blender 3.x), uninstall it and install the latest for Blender 4.x. The add-on is backward compatible in terms of content, but Blender 4 introduced some Python API changes, which the newer add-on versions address. For instance, if you attempt to use an old add-on in Blender 4, you might get errors (like material node errors or UI not showing).
- Blender 4 New Features: Blender 4+ might have new rendering or geometry nodes features. These don’t conflict with CC, but if you plan to use them (for example, a new hair system on CC hair, or geometry nodes for crowd duplicates of CC characters), know that CC’s content is just a regular mesh once in Blender, so it should work with new features. Just test things like hair materials in new rendering systems.
- Operating System: The official CC Blender tools are currently Windows-only (since CC4 itself is Windows). Blender runs on Mac/Linux too, but the add-on (particularly the CC4 side plugin) might be Windows-centric. If you use Blender on a different OS, you can still import the FBX and even use the Blender-side add-on features, but you obviously need Windows to run CC4 in the first place.
- Future Updates: As Blender continues to evolve (with perhaps 4.2, 5.0 in the future), Reallusion has shown commitment to updating their pipeline tools. It’s good to check Reallusion’s download page or GitHub for any newer versions if Blender gets a major update. They have a feedback tracker where users can report issues with new Blender versions, and those tend to get addressed by the dev team or the community (the CC Blender tool is open-source on GitHub, which helps with community fixes).
In summary, Blender 4.x compatibility is solid as long as you have the appropriate plugin versions. Many artists are already using Blender 4 with CC4 characters for their projects without issue. Always double-check that your export preset in CC says “Blender” (new versions label it accordingly for current Blender), and that the add-on UI loads in Blender 4. If everything is set up, you can enjoy the new features of Blender 4.x with your CC characters seamlessly integrated.

How do I optimize Character Creator models in Blender for game engines?
Optimizing a CC character in Blender for game engines (Unity, Unreal, etc.) is crucial for performance. Here are strategies to optimize:
- Polygon Count Reduction (LOD): CC characters can be high-poly, especially with premium assets. Apply Blender’s Decimate modifier to reduce polygons on dense meshes like hair or accessories. Alternatively, use CC4’s Remesher during export to generate lower LODs, though it alters topology. For precise control, perform manual retopology in Blender to create a custom low-poly mesh, then project weights from the original using Data Transfer. For mobile platforms, aim for under 20k triangles, which may require significant simplification of clothing or accessories.
- Material Drawcall Reduction: CC characters often have multiple materials (skin, eyes, teeth, clothing), each adding a draw call in engines. Use CC4’s Merge Material option to combine materials like torso, arms, and legs into one UV set. In Blender, manually pack UVs of separate parts into a single texture atlas and bake textures (diffuse, normal, roughness) to reduce material count (e.g., from 10 to body, clothing, hair). Use 2K textures for merged maps to balance quality and memory usage.
- Texture Resolution and Format: High-res 4K textures may be excessive for games. Downscale to 2K or 1K for smaller objects using Blender’s image editor or rebake at lower resolution. For engine import, use compressed formats like DDS or engine-specific compression. CC4’s JPEG exports are suitable, as game engines apply further compression during import.
- Rig Simplification: Game engines don’t use Rigify control rigs, only the deform skeleton. CC rigs may include extra bones (twist, finger, facial) unnecessary for some games. Remove unneeded bones in Blender or during export. Reallusion’s Blender tools can bake animations to a simplified rig, stripping control bones and preserving motion in a clean hierarchy compatible with engine requirements.
- Morph Targets vs Bones: For facial expressions, choose between morph targets (shape keys) or bone animations. Game engines may limit morph targets due to performance; select essential ones (e.g., eye blink, visemes for lip-sync) and delete others in Blender to reduce file size. If only basic jaw movement is needed, skip morph exports to minimize runtime overhead.
- Physics Colliders: For ragdoll or physics, add simple collider objects (boxes, capsules) in Blender, parented to the rig’s bones. Place them on a non-render layer to avoid visibility and include them in the FBX export if required by the engine.
- Final FBX Export from Blender: Export using Blender’s FBX exporter, selecting the armature and meshes. Set “Apply Scalings: FBX All -> 1.00,” disable “Add Leaf Bones” to avoid extra end bones, and enable “Only Deform Bones” (Blender 4.x) to exclude Rigify controls. This ensures a clean skeletal mesh import in the target engine.
- Test in Engine: Import into Unity or Unreal and verify animations, materials, and scale. Unreal requires a single root bone (CC skeletons include one). Use Blender’s UE preset (scale 100) or CC’s preset for Unreal; for Unity, apply default unit scale. Adjust if scaling issues occur.
- LOD Setup: Use CC4’s auto-generated LODs (separate FBX or combined with LOD groups) or create LODs in Blender by duplicating meshes and applying Decimate. Import and configure LODs in-engine; Unreal supports auto-LOD generation for further optimization.
In essence, optimize by reducing polycount, merging materials, and cleaning rigs/morphs. Use CC4 for initial LODs and material merging, then Blender for detailed adjustments to balance visual fidelity and performance for real-time applications.

Can I use Blender to bake textures for Character Creator characters?
Yes, Blender can bake textures for CC characters to simplify complex material setups for game engines or other platforms. Here’s how:
- Why Bake?: CC4’s skin materials use layered textures (base color, blush, eyebrows, etc.), creating complex shader networks. Baking consolidates these into flat maps (diffuse, normal, roughness, metalness) that capture the combined effect, making them compatible with game engines or simpler renderers unable to replicate CC’s shaders.
- Setting up for Bake: Import the character with the CC add-on to retain the full material network. Decide on maps to bake (e.g., Diffuse, Normal, Roughness, Metalness, AO, Emissive). In Blender, create new images (e.g., 4K “BakedDiffuse”) for each map. In Shader Editor, add Image Texture nodes for each bake target, select the corresponding image, and ensure it’s active for baking.
- Blender Bake Settings: Switch to Cycles render engine (required for baking). In the Bake section, configure:
- Diffuse/Albedo: Use Combined or Diffuse bake type. Disable Direct/Indirect lighting for raw color or include AO for subtle shadowing, depending on needs.
- Normals: Select Normal bake. If combining multiple normal maps (e.g., base and wrinkle), temporarily modify the shader to output a composite normal to a single node.
- Roughness/Metalness: Bake by plugging roughness or metalness into an emission shader and selecting Emit, or use Combined with only the glossy pass enabled. Create temporary material setups to isolate the desired map (e.g., roughness as emission).
- High Poly to Low Poly Baking: For game-optimized low-poly CC characters, bake from the high-poly mesh (original CC model) to the low-poly version. Unwrap the low-poly mesh, place both meshes in Blender, and use Bake with “Selected to Active” enabled, optionally with a cage for accurate projection. This captures fine details like wrinkles or pores into normal maps.
- Bake Each Material: Bake separately for each material zone (head, body, arms) unless UVs are merged. For a single texture set, re-UV map the character into one UV space before baking to create unified textures. Otherwise, bake each zone to maintain separate textures.
- Importing Baked Textures to CC or Engine: Apply baked textures in CC4’s Appearance Editor by manually assigning maps (e.g., baked diffuse to skin diffuse channel), though CC4’s shader may not fully support single-texture setups. Baked textures are better suited for game engines, where they work with standard PBR shaders. Ensure textures align with engine requirements.
- Baking for Sketchfab or glTF: Bake simplified PBR maps (diffuse, normal, roughness) for platforms like Sketchfab or glTF, which require streamlined materials. Community scripts are being developed to automate baking multiple channels and materials due to the process’s complexity.
- Tips: Use 16-bit images for normal map baking to prevent banding. Test baked maps by applying them to a mesh copy with a Principled BSDF shader to verify accuracy. Ensure UVs don’t overlap unless intentional, and check tangent space for normal maps to avoid errors.
In conclusion, Blender’s baking condenses CC’s detailed shaders into game-ready textures, essential for engine compatibility. It’s time-consuming for multiple maps and materials but ensures correct visuals outside CC’s native environment with standard PBR materials.

What’s the difference between GoZ and Blender pipeline for Character Creator users?
GoZ and the Blender pipeline are two integration methods for CC4, each with distinct purposes:
- GoZ (ZBrush GoZ Pipeline): A specialized bridge between CC4/iClone and ZBrush. Send a character (or parts like head, clothing) to ZBrush with one click for high-resolution sculpting or detailing (e.g., wrinkles, facial structure). Return the updated model to CC4 as morph sliders or normal maps. GoZ is fast, preserves rigging (minimal topology changes), and excels for high-poly sculpting with millions of polygons.
- Blender Pipeline: Uses FBX and the CC Auto Setup add-on for a broader workflow covering rigging, animation, rendering, and modeling. It supports:
- Mesh editing and sculpting (handles fewer polygons than ZBrush, up to a few million).
- UV creation, texture baking, animation, and rendering, which ZBrush cannot do.
- Scene setup with physics or environments, enabling full projects like short films.
- Requires manual export/import, not a live link, but versatile for most tasks.
- When to use which:
- GoZ: Ideal for sculpting high-detail characters or morphs for use in CC4/iClone animations (e.g., custom creature head morphs).
- Blender: Best for animating, rendering, or building scenes outside CC4, or when ZBrush isn’t available.
- Coexistence: Combine both workflows. Sculpt in ZBrush via GoZ, return to CC4, then export to Blender for animation or rendering. Alternatively, model in Blender, send to CC4, and refine details in ZBrush.
- Licensing/Cost: ZBrush is a costly, separate tool requiring a license; Blender is free and open-source, accessible to all CC4 users.
- Ease of Use: GoZ offers seamless one-click transfers with no export settings. The Blender pipeline, while simplified by the add-on, involves manual export/import but is straightforward once configured.
To put it succinctly: GoZ is for sculpting/detailing, Blender pipeline is for animation, rendering, and scenes. They’re complementary, with CC4 as the hub. Blender suits most needs without ZBrush; GoZ excels for ultimate detail.

Where can I find tutorials for Character Creator and Blender integration?
Many resources exist for learning the CC-Blender workflow, including official and community content:
- Official Reallusion Tutorials and Manuals: Reallusion’s website, YouTube channel, and Learning Center provide detailed tutorials. The Character Creator 4 Online Manual covers FBX export and pipeline integration. Videos demonstrate exporting CC4 characters to Blender (e.g., with facial shape keys) and using the Blender add-on for basic and advanced tasks like morph slider creation.
- Reallusion Magazine Articles: Features in-depth guides, such as “Master Character Creator to Blender: Ultimate Auto Setup Guide” by Onur Erdurak, detailing character export, motion capture integration, and optimization. Other articles cover stylized workflows (e.g., creating a Viking) and modeling clothing/accessories in Blender for CC4.
- YouTube Channels:
- Markom3D: Offers a series on the Blender pipeline, including Auto-Rig Pro with CC characters and Blender-to-iClone animation workflows.
- Freedom Arts: Provides step-by-step guides, such as importing CC4 characters to Blender with shape keys for facial animation.
- Reallusion: Hosts webinars, like “Blender Pipeline Workflow with iClone & Character Creator,” showcasing live demos of the workflow.
- Forums and Community Q&A: The Reallusion Forum has a Character Creator section with Blender workflow discussions. Threads address troubleshooting, like exporting rigged CC3 characters or fixing shape key issues. Blender StackExchange occasionally answers specific CC-to-Blender questions (e.g., materials, shape keys).
- GitHub Documentation: The open-source CC/iC Blender Tools documentation on GitHub explains add-on functionality, including basic usage, advanced tasks like character round-trip, and Unity export. It’s technical but valuable for understanding the add-on’s mechanics.
- BlenderNation and Other Blogs: BlenderNation features occasional articles on CC/iClone with Blender, often as project breakdowns. Medium articles, like one on FaceBuilder integration with CC4, explore niche workflows combining AI tools and Blender.
- FAQ and Support: Reallusion’s FAQ and support knowledge base include Blender-related entries (e.g., add-on setup, common issues). The community on Discord and the Reallusion Forum is responsive for unresolved questions.
By leveraging these resources, you can learn everything from the basics of export/import to advanced techniques like custom morph creation or complex material baking. Start with official tutorials to nail down the intended workflow, then explore community content for creative tricks and troubleshooting. With the wealth of tutorials available, even a newcomer can become proficient in the Character Creator and Blender workflow in a short time.

FAQ Questions and Answers
- Do I need the Reallusion Blender add-on to import CC characters, or can I use Blender’s default FBX importer?
Technically you can use Blender’s default FBX importer, but it’s not recommended. The default importer will bring in the mesh and armature, but you’ll have to manually fix materials and rigs (and shape keys might not come through). The free CC/iC Blender Tools add-on automates all of that – it sets up materials, applies the correct bone orientation, and even adds a Rigify control rig. Using the add-on saves a ton of time, so it’s highly advisable for a proper import. - My Character Creator character looks shiny/wet in Blender. How can I fix the skin material?
Skin appearing too shiny is usually due to the specular and roughness settings. CC’s skin shader uses multiple maps that Blender’s Principled BSDF might interpret differently. To fix it, check the roughness map connection – make sure it’s not inverted. Also reduce the specular level if it’s high. In some cases, the add-on might have plugged a micro normal map incorrectly, causing a wet look – you can adjust or remove that. Essentially, tweaking the material by increasing roughness and decreasing specular intensity will reduce the wet sheen. You can compare with how the character looked in CC and aim for that by adjusting nodes. - The FBX I exported from CC4 has no facial blendshapes in Blender – the shape key list is empty. What did I do wrong?
The morphs likely weren’t exported. Use CC4’s Blender preset with “Include Expression” or morph options enabled to export facial morphs. Ensure import via the CC add-on, as Blender’s default FBX importer may skip shape keys. Avoid exporting as “Mesh” only; select “Clothed Character” with morphs. Re-export correctly and import with the add-on to see shape keys like Blink, Smile, etc. - Why is my CC4 character so small in Blender?
A scale mismatch, likely from not using the Blender preset, causes CC4 to export in centimeters (100x too small for Blender’s meters). The Blender preset ensures correct scale. Fix by scaling the FBX 100x in Blender or re-exporting with the preset. Always use the Blender target preset for real-world scale (1.8 units for an adult). - The imported CC character has two armatures in Blender – one seems to be the deform skeleton and another is the Rigify rig. Which one do I animate?
Animate using the Rigify control rig (with custom shapes/controls), not the deform skeleton. The CC add-on creates a Rigify rig that drives the original bones via constraints. Use the Rigify rig (e.g., rig_CC) for posing/animating; the deform skeleton (Bip001, CC_Base) maintains skinning. Hide the deform rig to avoid confusion. - I made some edits to the CC character’s mesh in Blender (sculpted the face). Can I get those changes back into Character Creator?
Yes, export the edited mesh (same vertex count) as FBX from Blender. In CC4, use Create > Morph Slider Editor to import the FBX as a new morph target, creating a custom slider. The CC/iC Blender Tools’ “Round-trip” function streamlines this. For topology changes, import as a new character, which is more complex. - When I import my character’s FBX into Unity/Unreal, the materials are pink/missing. How do I get the textures to the game engine?
FBX doesn’t embed textures; transfer CC4’s PNG/JPG texture files to Unity/Unreal. In Unity, place textures in Assets and assign to material slots. In Unreal, import textures and link to materials, or create new ones. CC-Blender’s organized naming (e.g., _SkinBody_Diffuse) simplifies matching. Alternatively, use Blender’s glTF exporter with embedded textures. - My character’s hair in Blender doesn’t move at all when I pose, it stays behind. What did I miss?
The hair isn’t bound to the armature. The CC add-on should parent hair to the skeleton with weights. Check for an Armature modifier on the hair; if missing, add one and bind with automatic weights or weight paint for head bone movement. Export as “Clothed Character” in CC4 to include hair. Re-export if body-only was selected. - Should I animate in iClone and then send to Blender, or animate in Blender directly?
iClone offers fast animation with motion libraries and mocap; export to Blender for tweaking/rendering. Blender provides fine control and scene integration, ideal for physics or hand-crafted animations. Use iClone for quick animations, refine in Blender’s Graph Editor, or animate solely in Blender with Rigify. Both can complement each other based on needs. - Are Character Creator characters and assets okay to use in Blender for commercial projects (any license issues)?
With CC4’s Pipeline version and export licenses for premium content, you can use characters in Blender for commercial images, animations, or games (no royalties on rendered outputs). Selling 3D models directly is generally not allowed. Ensure export licenses for purchased assets. Self-created or licensed characters can be animated/rendered in Blender for commercial distribution.

Conclusion
Character Creator 4 (CC4) and Blender combine to create a powerful 3D character workflow, merging CC4’s advanced character generation and rigging with Blender’s versatile modeling, animation, and rendering. This pipeline supports realistic or stylized characters for real-time engines, films, or VR. Exporting from CC4 using the Blender preset and FBX ensures rigs and morphs transfer correctly, while Reallusion’s Blender add-on automates rig conversion and material setup. In Blender, CC characters can be edited, textured, and animated with full fidelity, using shape keys for facial expressions and Rigify for body deformations. The workflow allows round-tripping, enabling clothing or morph creation in Blender for import back to CC4, with best practices like consistent poses and weight transfers ensuring success.
Advanced optimization for game engines involves reducing poly counts, merging materials, and baking textures to make CC assets game-ready. Troubleshooting tips address scale mismatches, material issues, missing shape keys, and weight painting errors to maintain a smooth workflow. Essential tools, including the Auto Setup add-on and community solutions like Auto-Rig Pro, streamline the process, while Blender’s modifiers and physics enhance CC characters without breaking rigs. CC4 and Blender 4.x integrate seamlessly, with Reallusion’s tools keeping pace with Blender’s updates. This growing synergy enables efficient character movement across software, making this workflow a valuable skill for future projects.
In conclusion, a seamless CC-Blender workflow empowers you to take a character from initial concept to final production with unmatched flexibility. You can model in one, animate in another, and iterate freely. By following the practices outlined in this article – export correctly, use the right import tools, preserve rigging and morphs, optimize when needed – you’ll be able to integrate Character Creator and Blender into a unified pipeline that suits both real-time projects and high-end rendering. Embrace the strengths of each platform, and you’ll find your character creation process becomes more efficient and your creative possibilities expand.
Sources and Citations
- Reallusion Magazine – “Master Character Creator to Blender: Ultimate Auto Setup Guide” (2024) – Onur Erdurak’s detailed guide on using the Blender Auto Setup plugin for CC4 to BlenderReallusion Magazine – Master Character Creator to Blender: Ultimate Auto Setup Guide
- Reallusion Manual – Character Creator 4 Online Manual: Exporting FBX Files – Official documentation describing FBX export options and advanced settings (morphs, mesh, etc.)Reallusion – Character Creator 4 Online Manual
- Reallusion Forum – “Can we export a rigged character from CC3 to Blender?” – Community discussion highlighting the need for tools like Auto-Rig or the improved CC4 pipeline to get a full rig in BlenderReallusion Forum – Export Rigged Character CC3 to Blender
- Reallusion Forum – “Export from CC3 to Blender to .GLTF” (Thread) – Victor Soupday’s explanation of texture complexities and the need for baking when moving CC characters to formats like glTFReallusion Forum – Export CC3 to Blender to .GLTF
- Reallusion Magazine – “Creating Clothing and Accessory in Blender for Character Creator” (2021) – Tutorial on modeling clothes in Blender and importing them into CC4, including steps like import as accessory and transferring skin weightsReallusion Magazine – Creating Clothing and Accessory in Blender for Character Creator
- Reallusion Magazine – “Fastest Way from Static Mesh to Fully Animated Character” (2022) – Article illustrating a Blender-to-CC4 pipeline using MetaRig and GoZ, with notes on GoZ vs FBX exportReallusion Magazine – Fastest Way from Static Mesh to Fully Animated Character
- Reallusion Auto Setup – Blender Pipeline Add-on Download Page – Information on the Blender add-on version 2.2.4 compatibility with Blender 3.4.1+ (which includes Blender 4.x) and requirementsReallusion – Blender Auto Setup Download
- CC/iC Blender Tools Documentation (Victor Soupday’s GitHub) – About & Basic Usage – Details on how the Blender add-on reconstructs materials, sets up Rigify, and allows round-trip export back to CCGitHub – Victor Soupday CC/iC Blender Tools
- Reallusion Forum – “Export FBX with morphs” – User query and answer about exporting morph animations from iClone/CC4 to Blender and issues with shape key keyframesReallusion Forum – Export FBX with Morphs
- Reallusion Magazine – “Master Character Creator to Blender: Auto Setup Guide” – Excerpts on enabling Rigify and tips for animating (cleaning keyframes, using NLA and Auto IK) in BlenderReallusion Magazine – Master Character Creator to Blender: Auto Setup Guide
Recommended
- MoCap Online: Top Motion Capture Resources, Tools, and Animation Packs for Game Developers and Animators
- Blender Rendering Made Easy: Using The View Keeper for Multi-Shot Projects
- How to Convert a Real Human to Metahuman Using Photogrammetry: Complete Workflow Guide for Unreal Engine 5
- How to Create Warhammer Sisters of Battle Characters with MetaHuman in Unreal Engine 5
- How do I align the camera to an object’s surface in Blender?
- What Are the 7 Basic Camera Movements in 3D Animation? A Complete Guide
- How to Auto Retopology in Blender: A Step-by-Step Guide for Clean 3D Meshes
- Love, Death and Robots New Season: Release Date, Episode List, Studios, and Everything We Know So Far
- How to Retarget Mixamo Animations to Metahuman in Unreal Engine Using the IK Retargeter
- What 3D Program Did Arcane Use? An In-Depth Look at the Animation Tools Behind Riot Games’ Hit Series
