


How Unity physics works (PhysX vs Unity Physics vs Havok Physics)
Unity offers multiple physics systems. For traditional object-oriented projects, Unity uses NVIDIA’s PhysX engine for 3D physics and Box2D for 2D. In newer DOTS/ECS projects, Unity provides Unity Physics (a lightweight, deterministic engine built on Burst and the Job System) and Havok Physics for Unity (an optimized, high-performance physics engine suitable for large-scale worlds). You can swap between Unity Physics and Havok Physics without changing content, as both integrate with the ECS workflow. In summary, use built-in PhysX for standard 3D projects, Unity Physics (DOTS) for data-oriented performance, and Havok Physics when you need AAA-quality stability and scale.
Rigidbody vs CharacterController in Unity: which one to use
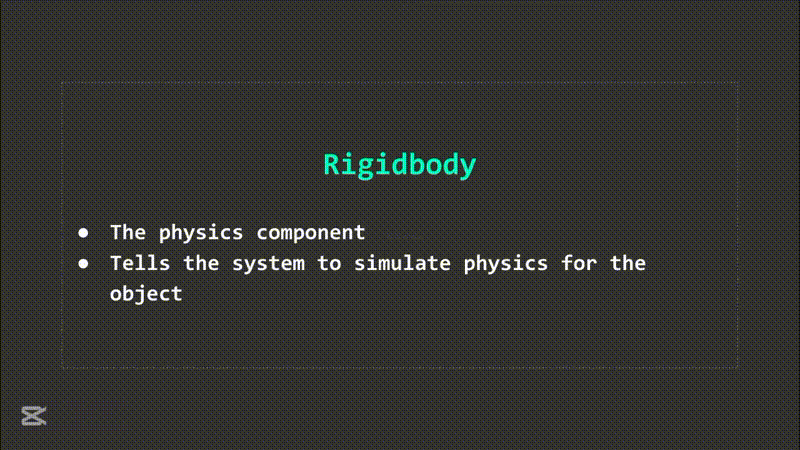
A Rigidbody is a physics component that makes a GameObject respond to forces and gravity via the physics engine. It can be dynamic (fully simulated) or kinematic (moved by script), and it participates in collision with other Rigidbodies. In contrast, a CharacterController is a specialized collider used for player/movement without using physics forces.
It is not affected by physics forces by default – you move it via CharacterController.Move or similar, and it does not automatically push or be pushed by Rigidbodies. Use a CharacterController for precise, script-driven player movement (e.g. FPS controls) where you handle collisions manually. Use a Rigidbody (with a Collider) if you want the GameObject to be influenced by physics (gravity, forces) and to physically push or be pushed by other objects.
Rigidbody collision detection modes in Unity (Discrete vs Continuous)
Unity Rigidbodies have a Collision Detection mode. The default is Discrete, meaning the engine only checks collisions at fixed physics steps. Fast-moving objects can “tunnel” (pass through) thin colliders with Discrete mode. To prevent this, use Continuous or Continuous Dynamic modes, which perform additional checks between frames.
Continuous collision detection sweeps the collider along its path so it hits objects it would otherwise skip. Continuous Dynamic should be used on the fast-moving Rigidbody itself, and Continuous on the objects it collides with. There is also Continuous Speculative (a lower-cost CCD) that works with kinematic bodies. In summary, use Discrete by default for best performance, and switch to Continuous or Continuous Dynamic when an object’s velocity is high enough to risk tunneling.

FixedUpdate vs Update in Unity physics: best practices
Unity’s game loop separates frame updates and physics updates. Update() is called once per rendered frame (variable timing), while FixedUpdate() runs on a regular fixed timestep (default 0.02s) for physics calculations. Best practice is: read input and perform non-physics work in Update(), and apply physics forces or move Rigidbodies in FixedUpdate(). For example, capture player input in Update(), then in FixedUpdate() call rb.AddForce() or rb.MovePosition() using that input. This keeps physics deterministic. Unity’s documentation advises: “read input in Update, apply it to physics in FixedUpdate”. Using FixedUpdate for physics ensures consistent simulation (even if frame rate fluctuates), while Update is synced with rendering and is ideal for UI, input, and animations.
Unity physics materials explained (friction and bounciness)
Unity uses PhysicMaterials (3D) or Physics Materials 2D to define surface friction and bounce. A PhysicMaterial lets you set Dynamic Friction (friction when sliding) and Static Friction (when at rest), both typically 0–1. It also has Bounciness (0 to 1) determining how “elastic” collisions are: 0 means no bounce, 1 is fully elastic. When two objects collide, their friction and bounciness combine according to the chosen combine mode (Average, Min, Max, or Multiply).
For example, an ice PhysicMaterial might have near-zero friction and low bounciness, while a rubber one has high friction and bounciness. Note that PhysX’s friction model is tuned for stability, not real-world accuracy: surfaces touching over a large area yield about twice the expected friction. In practice, tweaking these values (and combine modes) lets you simulate various materials (ice, rubber, metal, etc.).
Colliders in Unity: BoxCollider, SphereCollider, CapsuleCollider, MeshCollider
A Collider defines the shape of an object for physics collisions. The cheapest colliders are primitive types: BoxCollider, SphereCollider, and CapsuleCollider in 3D (and Box/Circle Collider 2D in 2D). These primitives are fast and efficient for most objects. You can combine multiple primitive colliders (even on child objects) to approximate complex shapes with minimal cost. For detailed shapes, a MeshCollider matches an object’s mesh exactly.
MeshColliders are more expensive and can only collide with other MeshColliders if marked Convex. A common approach is to use MeshColliders for static level geometry and simple primitive colliders (or convex meshes) for moving objects, to balance accuracy and performance. Remember that a Collider attached to a GameObject without a Rigidbody is static (non-moving), while adding a Rigidbody makes it dynamic. Use as few complex colliders as possible to keep physics fast.

Trigger colliders in Unity: OnTriggerEnter vs OnCollisionEnter
A collider can be marked Is Trigger to detect overlaps without a physical collision response. With triggers, objects pass through each other and trigger events. When a collider set as a trigger is entered, Unity calls the script function OnTriggerEnter(Collider other) on that object. In contrast, a normal (non-trigger) collider produces physics collisions: if at least one object has a non-kinematic Rigidbody, OnCollisionEnter(Collision collision) is invoked.
The key difference: OnCollisionEnter reports a solid physics collision (with Collision data, e.g. contact points), while OnTriggerEnter fires when one collider enters another marked as trigger (passing a Collider reference, with no physics forces applied). Use triggers for things like pickups or zones (you usually don’t want physics reactions), and normal colliders for physical interactions like bouncing or blocking movement. Note one rule: exactly one object must have IsTrigger checked; if both are triggers nothing happens. Also, triggers will call OnTriggerEnter for kinematic objects, whereas OnCollisionEnter only fires if a non-kinematic Rigidbody is involved.
Unity Layer Collision Matrix setup for performance and gameplay
Unity’s Layer Collision Matrix (in Project Settings → Physics) lets you enable or disable collisions between layers. By assigning GameObjects to layers and toggling their interactions, you can prevent whole groups of objects from ever checking collisions. This dramatically reduces physics workload: when a layer pair is unchecked, the engine skips checking those objects entirely. For example, you might disable collisions between “PlayerWeapons” and “Player” layers so your player’s own projectiles don’t hit them.
Best practice is to only enable layer collisions that are necessary for gameplay and disable all others. Unity recommends revisiting the collision matrix as your game grows and profiling the physics broad-phase pairs and contacts. In summary, using collision layers smartly reduces the number of potential contacts each frame, improving performance without changing gameplay, and is an essential optimization for larger projects.
How to prevent tunneling in Unity (fast moving objects)
Tunneling occurs when a fast object “skips” through a collider between physics steps. To prevent this, Unity offers Continuous Collision Detection (CCD) modes. On a Rigidbody’s Collider Detection setting, choose Continuous Dynamic for the fast-moving object itself, and Continuous on the objects it should hit. Continuous Dynamic sweeps the collider along its trajectory to catch collisions that would be missed. Unity also provides Continuous Speculative, a lightweight CCD that can handle kinematic objects and has lower overhead than traditional CCD.
In short: switch from Discrete to a continuous mode for any rigidbody with high velocity. Additionally, increasing the physics update rate (Time.fixedDeltaTime) can help if objects still tunnel, but at a higher CPU cost. Unity’s manual states CCD “ensures that fast-moving bodies collide with objects instead of passing, or tunneling, through those objects”. So use CCD wisely (only where needed) to avoid tunneling.

Unity joints explained (HingeJoint, SpringJoint, ConfigurableJoint)
Unity provides several joint components that constrain Rigidbody movement. A HingeJoint connects two Rigidbodies so they rotate around a shared axis (like a door on hinges). You set the anchor point and axis, and the joint can optionally use motors or limits. A SpringJoint ties two Rigidbodies with spring-like behavior: as they move apart, the spring applies forces to pull them back, like a rubber band or slingshot. Properties let you adjust spring strength and damping.
The ConfigurableJoint is the most versatile: it can mimic any other joint or create new ones by allowing drives and limits on each axis. Configurable Joints have settings for linear and angular motion on X/Y/Z axes, with drive forces, springs, and limits. In essence, ConfigurableJoints are “extremely customisable” as they combine all other joint types’ functionality. Use HingeJoints for simple one-axis rotation (doors, wheels), SpringJoints for elastic connections, and ConfigurableJoints when you need fine-grained, multi-axis control or unique joint behaviors.
Raycasting in Unity physics (Raycast, SphereCast, BoxCast)
Physics raycasts are queries that shoot shapes into the scene to detect colliders. The most common is Physics.Raycast, which casts an infinitesimally thin line (a ray) from a point in a direction and reports the first collider hit. Raycasts are used for line-of-sight, shooting, or any straight-line detection. Unity also offers SphereCast and BoxCast, which cast a volume along a path. A SphereCast sweeps a sphere (radius and direction) like a “thick raycast,” useful when you need to check if a moving object of some size (e.g. player or character controller) will hit anything.
A BoxCast similarly casts an oriented box (with given half-extents) forward. Both return detailed hit information via RaycastHit. In practice, use Raycast for precision (bullet hits), SphereCast when you need to account for object radius (characters, obstacles), and BoxCast for rectangular volumes (e.g. wide field-of-view). All these methods allow filtering by layer masks and can optionally hit trigger colliders.
Physics interpolation and extrapolation in Unity: smoother movement
If a Rigidbody’s motion appears jerky because the rendering frame rate doesn’t align with physics updates, Unity provides interpolation and extrapolation options to smooth it. Interpolation uses the Rigidbody’s positions from the previous physics updates to render a smooth transition in the current frame. This makes the object’s movement slightly lag behind the physics simulation (one-step delay), but it greatly reduces visible jitter when the camera follows it.
Extrapolation uses the current velocity to predict the next position, so the object appears slightly ahead of its physics position. Extrapolate can overshoot (since it doesn’t account for future collisions), but it avoids lag for objects moving steadily. Generally, Interpolate is recommended for most cases (especially when velocity varies) because it’s more accurate. Extrapolate is useful if a consistent offset is acceptable (e.g. constant velocity) and you want to avoid the one-frame delay. Both settings are found on the Rigidbody component in the Inspector. Use them only when you notice visual stuttering at runtime, as Unity advises.

Unity 2D physics vs 3D physics (Rigidbody2D and Collider2D differences)
Unity’s 2D physics is a separate system (Box2D) from 3D physics (PhysX), and it uses distinct components. For 2D, you use Rigidbody2D, Collider2D (like BoxCollider2D, CircleCollider2D), and the Physics2D API. In 2D, objects move only in the XY plane and rotate around the Z axis. Many Rigidbody properties (mass, drag, gravity) carry over, but 2D bodies ignore any Z movement/rotation. Importantly, 2D colliders will only collide with other 2D colliders on the same Z=0 plane, and likewise 3D colliders only collide in 3D. You cannot mix 2D and 3D colliders.
In summary, 2D physics is optimized for side-scrollers or top-down games: it’s lighter and restricted to 2D movement, whereas 3D physics handles full 3D simulation. Use the matching Rigidbody/Collider type for your game. Unity’s manual notes that Rigidbody2D “carries over” many concepts from Rigidbody but confines motion to XY only.
Physics settings in Unity Project Settings (solver iterations and queries)
Unity’s Project Settings → Physics panel contains global parameters that affect simulation accuracy and queries. Two important settings are the Solver Iteration Count and Solver Velocity Iterations. These determine how many passes the physics solver takes each physics frame to resolve contacts and joints. Higher values make constraints and jointed systems (like ragdolls or stacked objects) more stable, at the cost of CPU time.
For example, if you see jittery joints or unrealistic behavior, increasing solver iterations can help. Another pair of options, Queries Hit Backfaces and Queries Hit Triggers, control raycasts and other physics queries. If Hit Triggers is enabled, raycasts and spherecasts will detect trigger colliders by default. By default Unity enables trigger hits, but you can disable it if you want queries to ignore trigger objects. Adjust these project-level settings to balance performance versus simulation fidelity in your game. Always profile after changes to ensure the impact is acceptable.
Unity physics optimization tips (collision layers, callbacks, and CPU cost)
To optimize physics performance, first use collision layers (as above) to skip unnecessary collisions. Next, be mindful of collision callbacks: every OnCollisionEnter/Stay/Exit allocates a new Collision object by default. In heavy physics scenes, these allocations can hurt performance. Unity provides a “Reuse Collision Callbacks” setting (enabled by default) which reuses a pool of Collision data rather than allocating new ones.
Ensure it’s enabled (it is by default) to reduce garbage collector overhead during many collisions. Finally, limit physics calculations to what’s needed: disable rigidbodies or colliders on inactive objects, use Physics.IgnoreCollision for exceptions, and profile the CPU cost of physics in Unity’s Profiler. Broad-phase collision checks scale with object count, so keeping redundant colliders inactive (or off hidden layers) cuts CPU load. In short, optimize by culling collisions via layers, reusing collision data to reduce GC impact, and minimizing active physics components.

Frequently Asked Questions (FAQs)
- What is the difference between Rigidbody and CharacterController?
A Rigidbody uses Unity’s physics simulation (responding to forces, gravity, and collisions). A CharacterController is a special collider not driven by physics forces; you move it via script commands (e.g.Move()). Use CharacterController for controllable player movement (with manual collision handling), and Rigidbody for physics-driven behavior. - How do Discrete and Continuous collision detection work?
Discrete (the default) only checks collisions at fixed updates, which can miss fast objects. Continuous modes sweep the collider through its path between frames. Set a fast object to Continuous Dynamic and its targets to Continuous to catch high-speed collisions. Continuous Speculative is an alternative with lower cost. - Why use FixedUpdate instead of Update for physics?
FixedUpdate()runs on a consistent, fixed timestep synchronized with the physics engine, making force application stable.Update()runs every frame (variable rate). The rule of thumb is to read input in Update and apply it to physics in FixedUpdate. This ensures smooth, deterministic physics simulation. - What is a PhysicMaterial and how do I use friction/bounciness?
A PhysicMaterial asset defines surface friction (static and dynamic) and bounciness. Assign it to a Collider to control sliding and bounce. Friction values (0–1) reduce motion, and Bounciness (0–1) adds energy on impact. You can also set combine modes (Average, Min, Max, Multiply) to define how two colliding materials mix. - When should I use a MeshCollider?
Use a MeshCollider for precise collisions with complex geometry (level scenery, static environment). But MeshColliders are expensive. For moving objects or gameplay characters, prefer primitive colliders (Box/Sphere/Capsule) or convex MeshColliders for performance. A convex MeshCollider can collide with other MeshColliders, while a non-convex one cannot collide with another mesh. - How do trigger colliders differ from normal colliders?
Trigger colliders (IsTrigger enabled) let objects pass through and invokeOnTriggerEnter/Stay/Exit. Normal colliders cause physical collisions and invokeOnCollisionEnter/Stay/Exit. Use triggers for non-physical interactions (collectibles, zones) and regular colliders for physics contacts. Recall: triggers pass a Collider to your script, collisions pass a Collision object with contact data. - How do I configure the Layer Collision Matrix for performance?
In Unity’s Physics Project Settings, find the Layer Collision Matrix. Assign layers (e.g. “Player”, “Enemy”, “Environment”) to GameObjects, then uncheck layer pairs that should not interact. This stops Unity from checking collisions between those layers entirely. For example, disable “Bullet” vs “Bullet” if bullets don’t hit each other. Only leave enabled the interactions needed for gameplay. - How can I avoid fast objects tunneling through colliders?
Enable continuous collision detection on the rigidbody: set its Collision Detection mode to Continuous or Continuous Dynamic. This makes Unity sweep the collider each frame to catch collisions. Alternatively, reduceTime.fixedDeltaTimeor use thicker colliders. Continuous modes (and the newer Continuous Speculative) are the recommended solution to prevent tunneling. - What are common types of joints in Unity and when to use them?
- HingeJoint: locks two objects to rotate around one axis (e.g. doors, wheels). – SpringJoint: connects two objects with spring force (like a tether or rubber band).
- ConfigurableJoint: fully custom, can mimic hinges, sliders, etc. with drive and limit controls. Use Hinge for one-axis rotation, Spring for elastic connections, and Configurable for complex or multi-axis constraints.
- How do Rigidbody2D and Rigidbody (3D) differ?
Rigidbody2D (with Collider2D) is the 2D physics body. It only moves in the XY plane and rotates about Z. It uses a separate engine (Box2D). Rigidbody (3D) is for three-dimensional physics and can move/rotate in all axes. You cannot mix them: 2D colliders only hit 2D, and 3D colliders only hit 3D. Choose the appropriate type based on your game’s dimension.

Conclusion
Unity’s physics system is powerful and flexible, combining NVIDIA PhysX (for 3D), Box2D (for 2D), and new DOTS-based options (Unity Physics, Havok). Understanding how and when to use Rigidbodies, Colliders, and Joints is key for realistic movement and interactions. Use continuous collision detection for fast objects, interpolate motions for smooth visuals, and organize layers to cut costs. Applying forces in FixedUpdate and leveraging physics materials (friction, bounce) allows nuanced behavior. Finally, profile and optimize: disable unnecessary collisions, reuse collision callbacks, and tweak solver iterations as needed. By following Unity’s best practices and tooling (Layer Collision Matrix, Physics Settings), you can achieve stable, performant physics in your game.
Sources and Citations
- Unity Manual — Rigidbody component reference
https://docs.unity3d.com/6000.4/Documentation/Manual/class-Rigidbody.html - Unity Manual — Introduction to rigid body physics
https://docs.unity3d.com/6000.4/Documentation/Manual/RigidbodiesOverview.html - Unity Manual — Rigidbody physics section
https://docs.unity3d.com/6000.3/Documentation/Manual/rigidbody-physics-section.html - Unity Scripting API — Rigidbody
https://docs.unity3d.com/6000.4/Documentation/ScriptReference/Rigidbody.html - Unity Scripting API — Collider
https://docs.unity3d.com/6000.4/Documentation/ScriptReference/Collider.html - Unity Scripting API — Physics
https://docs.unity3d.com/6000.3/Documentation/ScriptReference/Physics.html - Unity Manual — Joints
https://docs.unity3d.com/2022.3/Documentation/Manual/joints-section.html - Unity Manual — Physics Profiler module
https://docs.unity3d.com/6000.4/Documentation/Manual/ProfilerPhysics.html - Unity — Enhanced physics performance for smooth gameplay
https://unity.com/how-to/enhanced-physics-performance-smooth-gameplay - Unity — Best practice guides
https://docs.unity3d.com/6000.4/Documentation/Manual/best-practice-guides.html
Recommended
- Tech and Artistic Inspirations Behind No Rest for the Wicked: Moon Studios’ Handcrafted Vision Explained
- Vampire Crawlers: All Relics and Where To Get Them (Complete Relic Locations Guide)
- Netflix On Why It Gave Up On Buying Warner Bros: The Real Reasons the Deal Collapsed
- Devil May Cry Vergil: Complete Guide to Dante’s Iconic Rival, Powers, and Storyline
- Howler 2026.5 Adds 3D Landscape Generator Fractal Garden: Procedural Low-Poly Terrain, Biomes, and Exports
- Escape From New York Reboot Confirmed: StudioCanal’s New Reimagining, Cast Rumors, and Everything We Know
- Crimson Desert Female Character Creator Mod Lets Players Move Beyond Premade Kliff
- The Animal Crossing Where Villagers Bully You Is Now (Unofficially) Available On PC: How It Works, Download Guide, and What’s Different
- The Boys Returns for Season 5: Release Date, Cast, Trailer, Episode Schedule, and Final Season Story Details


