


Introduction to Digital Fashion Design in Blender and Marvelous Designer

Digital fashion design creates virtual 3D clothing using tools like Blender and Marvelous Designer (MD). Blender offers versatile modeling and rendering, while MD excels in realistic cloth simulation. Together, they enable detailed garment design for digital models. Fashion houses like The Fabricant showcase virtual clothes as assets. This synergy allows artists to craft clothing unbound by physical limits. From concept to render, designers achieve creative freedom. Blender and MD streamline workflows for indie developers and professionals. The result is stunning digital fashion visuals.
Understanding Cloth Simulation and Animation Techniques
Here are key aspects of cloth simulation and animation:
- Material properties: Settings like bending stiffness and damping define fabric behavior, such as silk’s flow or denim’s rigidity. These properties simulate realistic cloth responses to forces. Adjustments create distinct garment textures and movements. They are critical for achieving lifelike draping effects.
- Collision settings: Self-collision prevents cloth from passing through itself, while friction controls surface sliding. High-quality settings avoid intersections during fast movements. These ensure natural garment interactions with characters. Proper tuning balances realism and performance.
- Animation constraints: Pins or hooks fix parts like waistbands during simulation. These constraints maintain garment structure under motion. They allow precise control over specific areas. This ensures realistic behavior in dynamic scenes.
Cloth simulation mimics fabric movement using physics solvers for realistic draping. Interactive simulations enable real-time design, while precomputed ones bake animations for precision. Techniques blend simulation with manual adjustments, like shape keys for fine-tuning. Proxy sims optimize performance by transferring low-res motion to detailed models.
Mastering simulation requires balancing realism and computational cost. Subtle parameter tweaks, like cloth resolution, significantly impact wrinkle detail and performance. MD excels in complex sewing, while Blender integrates simulations for final animations. These tools together create natural, dynamic garment motion.
Workflow for Creating 3D Clothing: From Concept to Final Render
Here is a typical concept-to-render pipeline:
- Concept & Reference: Sketches and fabric references guide the outfit’s style and behavior. Real-world cloth inspires realistic drape and trends. This informs pattern and texture choices. Inspiration ensures designs feel authentic.
- 3D Pattern Creation or Modeling: In MD, 2D patterns are sewn into 3D garments on avatars. Blender’s Garment Tool mimics this with 2D curves. Patterns form sleeves or bodices intuitively. This creates a tailored 3D outfit.
- Cloth Simulation & Draping: Garments are simulated in A-pose to settle naturally. MD’s solver generates lifelike wrinkles, while Blender uses Cloth Modifiers. Adjustments fix clipping or tension. Gravity ensures realistic sagging and folds.
- Iteration & Detail Refinement: Pattern shapes and fabric properties are tweaked for fit. Real-time simulation in MD allows interactive adjustments. Details like pleats or buttons are added. This refines the garment’s design early.
- Export to Blender: Garments export as OBJ or Alembic, with scale adjustments to match Blender. Auto Scale or manual scaling prevents size issues. Static or animated exports suit different needs. This ensures compatibility for further editing.
- Retopology of the Garment: Dense simulation meshes are retopologized for cleaner, low-poly quads. Tools like ZRemesher or Blender’s Quad Remesh assist. This optimizes animation and deformation. Normal maps preserve detail with fewer polygons.
- UV Unwrapping: Retopologized meshes are unwrapped, often following garment seams. MD’s UVs may transfer if shapes align. Tidy UVs enable precise texturing. This prepares the garment for material application.
- Texturing & Materials: PBR textures, like scanned cotton weaves, add realism. Blender’s Principled BSDF with Sheen enhances cloth visuals. Textures modulate roughness and color accurately. Logos or prints are applied here.
- Rigging & Animation: Garments are rigged to character bones or simulated for motion. Combined workflows bake simulations then attach to rigs. Cloth Modifiers follow Armature Modifiers in Blender. This ensures dynamic, realistic movement.
- Lighting, Rendering, and Post-Production: HDRI and area lights highlight fabric properties. Cycles renders detailed materials, Eevee uses baked lighting. Poses showcase designs in high-res renders. Post-production adds color grading for polish.
This workflow mirrors real-world fashion in a virtual space, creating professional visuals. Artists refine techniques with shortcuts like scripting exports for efficiency.

Utilizing Photogrammetry for Realistic Cloth Textures
Here are approaches to using photogrammetry for cloth textures:
- Scanning Fabric Surfaces: Multiple photos of fabric under consistent lighting create texture maps. Photogrammetry software like RealityCapture generates diffuse and normal maps. These capture weave and wrinkle details accurately. Applied to models, they achieve lifelike realism.
- Full Garment Scans: Scanning garments on mannequins yields 3D models or textures. Loose cloth challenges scanning due to movement. Body scanning extracts outfit geometry from dressed figures. Phone apps simplify this for accessible texture capture.
- Fabric Material Libraries: Scanned material libraries like Quixel Megascans provide ready-to-use textures. These include diffuse, normal, and opacity maps for fabrics. They save time for matching materials like tweed. Specialized collections enhance realism efficiently.
Photogrammetry captures subtle fabric details, enhancing digital clothing authenticity. It delivers texture realism unmatched by hand-painted or procedural methods.
Retopology: Optimizing 3D Clothing Models for Animation
Key Retopology Strategies for Clothing:
- Even Quad Distribution: Aim for evenly sized quads across the garment’s surface to ensure smooth deformation. More polygons are placed in bending areas like elbows, knees, or underarms, while flat areas use fewer polys. This approach prevents distortion during animation and maintains visual quality. Tools like MD’s quadrangulate algorithm or Blender’s Remesh and poly build assist in achieving this.
- Edge Flow Along Seams and Hems: Edge loops are aligned with structural lines such as necklines, cuffs, or waistlines to preserve their shapes. This facilitates assigning different materials, like trims versus main fabrics, and supports animations like tightening belts. It ensures crisp, defined features during motion. The topology enhances predictability and control in deformation.
- Preserve Important Wrinkles: Distinct folds or wrinkles from high-poly simulations, like sleeve drapes, are incorporated into the retopo mesh via edge loops. Alternatively, wrinkles are baked into normal maps to reduce polycount while retaining detail. Baking from a high-poly (e.g., particle distance 2) to a low-poly mesh captures fine shading. This balances visual fidelity with performance for animation.
- Maintain UV layout if possible: MD’s pattern-based UVs can be transferred to the retopo mesh to preserve texturing work. If not, new UVs are unwrapped along garment seams for consistency. Retopologizing before texturing avoids the need to redo textures or use transfer tools. This ensures seamless texture application and maintains design integrity.
- Use Retopo Tools: Blender’s Shrinkwrap and Snap to Face, or add-ons like RetopoFlow, enable manual quad creation over high-res meshes. MD’s Remesh feature in version 10+ generates quad topology with adjustable density, though manual cleanup is often needed. ZBrush’s ZRemesher uses seam polygroups to align edge loops effectively. These tools streamline the process while ensuring animation-ready meshes.
Retopology converts dense, triangulated meshes into quad-based, animation-friendly models. It’s essential for smooth deformation and optimized polycounts, reducing a 200k-triangle dress to 10k quads. Context influences optimization—films allow higher polys, while games demand low-poly meshes with normal maps. This step ensures garments perform well in motion and real-time engines.
By investing in retopology, designers create production-ready assets that render efficiently. The process enhances deformation quality and simplifies future edits, critical for digital clothing.

Integrating AR Technology in Digital Fashion Presentations
Here’s how AR is influencing digital fashion presentations and how you can leverage it:
- Virtual Try-Ons: AR try-on filters, like Zalando’s Snapchat feature, overlay 3D garments onto user selfies for virtual fitting. The technology adjusts size and fit automatically, creating a realistic preview of the outfit. Users can share these images for feedback, enhancing the online shopping experience. This bridges the gap between virtual try-ons and physical fitting rooms effectively.
- AR Fashion Shows and Exhibits: AR enables immersive shows, such as Vogue’s 2022 Snapchat exhibition, showcasing virtual couture by Balenciaga and Dior. Visitors use phone lenses to see digital dresses mapped onto live video in real-time. These experiences blend physical and digital fashion, creating interactive showcases. They make high-end designs accessible in innovative, engaging formats.
- In-Store AR Mirrors: Retailers like Lily deploy AR mirrors in public spaces, projecting outfits onto users’ reflections. Users input height for accurate sizing, and QR codes facilitate purchases. These mirrors transform areas like subway stations into virtual changing rooms. They increase customer engagement and drive sales through interactive marketing.
- Social Media AR Filters: Platforms like Instagram and Snapchat offer tools like Spark AR and Lens Studio for custom filters. Designers create filters allowing users to “wear” virtual streetwear, promoting designs virally. Brands like DressX leverage these for shareable, free try-on experiences. This boosts brand visibility and audience interaction on social media.
- Tech Integration: Digital clothing is exported as GLB/GLTF or USDZ for AR compatibility, with optimized polygons and textures for mobile performance. Game engines like Unity and Unreal support AR frameworks, enabling apps for virtual runways. These ensure smooth integration into AR platforms and apps. Compatibility delivers seamless, immersive user experiences.
- Examples & Case Studies: AR fashion shows, like holographic displays during the pandemic, allow home-based virtual collections. Gucci’s AR sneakers, sold as Roblox digital assets, exemplify metaverse integration. These experiments highlight AR’s potential for virtual fashion events. They redefine accessibility for global audiences, transforming fashion week.
- Benefits of AR in Digital Fashion: AR provides interactive try-ons, letting users pose and view garments from all angles, surpassing static renders. Global AR shows on platforms like Instagram Live extend reach without physical event costs. It’s ideal for digital-only outfits in social media or virtual calls. AR boosts purchase confidence and reduces online shopping returns.
To integrate AR, designers learn tools like Spark AR Studio for Instagram filters, attaching 3D garments to body meshes. Future AR glasses may enable real-time outfit overlays, making digital fashion mainstream. Current uses focus on social media filters and try-on apps, rapidly growing fields. These technologies bridge fashion and tech, enhancing engagement.
AR transforms digital fashion into interactive, globally accessible experiences. It elevates presentations beyond static images, shaping the future of fashion showcases.

Creating Fashion Video Reels for Social Media Using Blender
Here are strategies and tips for creating fashion video reels in Blender:
- Leverage the Popularity of Short-Form Video: Social media platforms prioritize Reels, TikToks, and Shorts, offering greater reach than static images. A 15-30 second video of a 3D outfit acts as a mini runway, attracting more viewers. These formats align with algorithms favoring engaging, short content. For designers, reels significantly boost visibility and audience interaction.
- Use Blender’s Animation Tools for Dynamic Content:
- Turntables and Camera Moves: A 360° turntable with a circular camera path showcases garments from all angles. Dramatic ease-in/ease-out timing adds a polished, professional look. Subtle camera shake or zoom can enhance stylistic appeal. This approach highlights the outfit’s design comprehensively and dynamically.
- Character Animation: Animating characters with walks, poses, or dances via Mixamo or manual rigging shows cloth in motion. A spinning gown creates a mesmerizing, looping visual effect. Motion emphasizes fabric flow, bringing designs to life. Short animations align with fashion’s emphasis on movement and presentation.
- Physics and Effects: Exaggerated cloth physics with wind or slow-motion billowing adds drama, baked for perfect loops. Particle effects like sparkles or abstract shapes enhance visual interest. These can be created using Blender’s particle systems or geometry nodes. Such effects make reels stand out with striking, memorable visuals.
- Optimize for Social Platforms: Render in 9:16 vertical resolution (e.g., 1080×1920) to fit Reels and TikTok formats, framing characters appropriately. Videos should be under 30 seconds, with key moments in the first three seconds to grab attention. Seamless looping enhances viewer retention and satisfaction. Vertical framing ensures compatibility with mobile-centric platforms.
- Edits and Audio: Finalize reels in editing apps, adding trendy music or voiceovers for vibe and discoverability. Popular tracks boost visibility but shouldn’t overshadow visuals. A behind-the-scenes to final reveal format creates an engaging narrative. Sound complements the reel, enhancing its appeal and impact.
- Engage Through Storytelling: Thematic reels, like sci-fi or retro designs, use tailored transitions or overlays to convey mood. Text overlays highlight details like “100% digital” or design inspirations. Purposeful visuals differentiate reels in crowded social feeds. Storytelling ensures the reel communicates a clear, compelling message.
- Community and Trends: Join trends like #DigitalFashionWeek, tailoring reels to hashtags for relevance. Tagging #Blender3d or #MarvelousDesigner attracts artists and collaborators. Consistent posting builds a growing audience over time. Engaging with trends and communities drives visibility and networking opportunities.
Blender’s Eevee engine produces quick, high-quality animations suitable for social media compression. Fashion reels showcase expertise, impressing clients and boosting engagement.
Designing Cloth Materials and Textures for 3D Models
Let’s go through best practices for designing convincing cloth materials:
- Utilize Physically-Based Shading for Fabrics:
- Base Color: Texture images like plaids or floral prints define the fabric’s primary appearance and pattern. These ensure color accuracy aligns with the intended design vision. UVs must be set to prevent pattern distortion during application. This forms the foundation of the material’s visual identity.
- Roughness: Silk uses low roughness for a shiny finish, while cotton has high roughness for a matte look. Roughness maps add variation, like shinier worn areas, for realism. This parameter simulates how light interacts with the fabric’s surface. Proper settings avoid unrealistic reflectivity common in non-fabric materials.
- Sheen: Sheen parameters create a soft, velvet-like shine at glancing angles, ideal for satin or cotton. Subtle settings mimic the light bloom of cloth fibers, enhancing realism. This distinguishes fabrics from plastic or metal surfaces effectively. Sheen is critical for capturing the tactile quality of textiles.
- Normal/Height: Normal maps simulate weave patterns or seams, adding depth without extra geometry. Procedural or image textures represent twill, knits, or embroidery details accurately. These ensure light catches the fabric’s micro-details realistically. They enhance visual richness while maintaining performance efficiency.
- Subsurface Scattering (SSS): Thin fabrics like lace use minimal SSS to simulate light bleed for depth. Sheen or transparency often suffices for most cloths, avoiding overuse. This adds realism to light-colored knits without excessive translucency. SSS is applied sparingly to maintain fabric opacity.
- Create or Source High-Quality Texture Maps: Plain fabrics use procedural noise for subtle dye variations, like denim’s unevenness. Patterned fabrics require designed 2D images, such as polka-dots, created in Photoshop or sourced online. MD’s Graphic tool applies logos, preserving them in exported UVs. Normal maps bake high-poly details like seams for low-poly meshes.
- Specialty Materials (Leather, Latex, Fur):
- Leather: Mid-low roughness with grain normal maps creates a shiny, worn look in creases. Slight SSS or sheen simulates oily depth, with fresnel for realism. Roughness varies to show wear patterns, enhancing authenticity. This balances diffuse and glossy for a natural leather appearance.
- Latex/Vinyl: High specular and low roughness produce a mirror-like, rubbery shine reliant on environment reflections. A subtle subsurface tint adds depth to the material’s appearance. These settings mimic the glossy, reflective nature of latex. Realism depends on accurate lighting and reflection integration.
- Fur/Feather: Short fur uses sheen or normal maps to fake velvet-like textures efficiently. Particle hair or geometry nodes scatter fibers for close-up fluff details. These create soft, tactile appearances without heavy geometry. Fur shaders balance performance and visual fidelity for realism.
- Realism through Tiny Details: Stitches are modeled or bump-mapped, with curves for close-ups or normal maps for distance. Wear effects like fraying use alpha maps or lighter gradients at edges. Logos adjust sheen or normals for ink or embroidery effects. MD’s PBR Map Generator creates raised graphic maps automatically.
- Testing and Iteration: Test renders under studio and HDRI lighting to fine-tune sheen and roughness for realism. Avoid glossy or flat appearances by balancing settings carefully. High-res textures prevent visible tiling, maintaining seamless visuals. Reference photos of real fabrics guide accurate shader adjustments.
Convincing cloth materials combine macro patterns with micro-details like weaves and stitches. Physically-based shaders and high-quality textures create lifelike digital fabrics.

Incorporating Logo Designs and Accessories into 3D Clothing
Here’s how to integrate logos and accessories into 3D garments:
- Adding Logos, Prints, or Graphics to Clothing:
- Marvelous Designer Approach: MD’s graphic tool imports PNG images onto 2D patterns, placing logos or prints precisely. The graphic integrates into texture outputs, with adjustable weight or stiffness for realism. MD generates bump or specular maps for raised effects like embroidery. This ensures accurate UV placement and realistic simulation behavior.
- Blender Approach: Logos are added via texture painting or UV mapping, using a second UV channel or mask. An Empty object projects logos without altering UVs, controlled by node-based mixing. Transparency in logo images ensures only the design appears. This method allows flexible positioning and blending with base textures.
- Embroidery vs Print: Printed logos blend with fabric reflectance, following cloth deformation naturally. Embroidered logos use normal or displacement maps for thread thickness and distinct sheen. Stitching can be modeled or bump-mapped for patches. This differentiates material properties for visual authenticity.
- Avoid Distortion: Logos stretch with cloth animation, but extreme folds may distort graphics unnaturally. Rigs or anchors can stabilize graphic areas to minimize warping. For still shots, minor distortions are fixed in post-production. Careful simulation planning ensures logos remain visually coherent.
- Adding Accessories (Buttons, Zippers, Buckles, etc.):
- Marvelous Designer Libraries: MD provides button and zipper libraries, including functional zippers that simulate zipping/unzipping. These accessories sew onto cloth, moving naturally with simulations. Models mimic real-world fasteners like YKK zippers for authenticity. This automates placement and ensures dynamic interaction.
- Manual in Blender: Accessories are parented to cloth vertices or surfaces post-simulation using Child Of constraints. Surface Deform modifiers bind accessories to deforming cloth meshes. Proxy colliders during simulation ensure proper cloth draping. This allows precise attachment for animated or static garments.
- Rigidity and Collision: Large accessories like buckles are set as collision objects in MD or Blender. Proxy spheres prevent cloth interpenetration during simulation, replaced later with detailed models. This ensures realistic draping over rigid elements. Collision settings enhance visual and physical accuracy.
- Zippers: Closed zippers are stiff seams with unique textures; open zippers use modeled teeth aligned to edges. MD’s zipper tool generates teeth and sliders along drawn lines. Add-ons in Blender align zipper geometry to cloth edges. These methods create functional and aesthetic zipper effects.
- Jewelry or Dangling Accessories: Chains or straps are simulated as cloth or rigid bodies, interacting with garments. Straps press into cloth via collision settings for realism. Rigid body constraints attach accessories to characters. This adds dynamic, lifelike interactions to the outfit.
- Logo Placement on Accessories: Logos on buckles are embossed via displacement or normal maps for raised effects. Boolean modeling engraves logos for detailed designs. Rigid accessories use metal shaders for realism. This ensures logos integrate seamlessly without deformation concerns.
- Consider Physics of Accessories: Scarves or handbags are simulated as separate cloth or rigid bodies with pinned attachments. Constraints or manual animation position them realistically. These elements add character but increase simulation complexity. For stills, manual placement achieves appealing visuals.
Logos and accessories enhance digital garments’ authenticity and branding. Careful integration ensures physical and visual consistency, elevating design credibility.

Exploring Cloth Topology for Enhanced Simulation Accuracy
Here are key considerations for optimizing cloth topology:
- Uniform, Grid-like Topology: Even quad grids ensure uniform simulation behavior, avoiding weak or stiff areas. MD uses triangle grids based on particle distance, like 10 mm for quads. Blender’s subdivision before simulation creates dense, even meshes. This reduces artifacts and improves collision reliability.
- Topology aligned with Cloth Behavior: Edge alignment with fold lines, like skirt pleats, guides natural folding patterns. Consistent poly distribution minimizes simulation artifacts without explicit anisotropy. In Blender, tension/shear scaling via vertex groups can enhance this. This approach supports predictable, realistic cloth motion.
- Avoiding Common Topology Issues:
- Tearing or Crumpling: Uneven resolution causes crumpling; refining coarse areas or decimating dense ones balances the mesh. Even face sizes ensure reliable collision calculations. This prevents numerical imbalances in the simulation. Topology adjustments stabilize cloth behavior effectively.
- Self-Collision Accuracy: Smaller, consistent faces improve self-collision detection, reducing intersections. Finer topology relative to scale enhances accuracy. MD’s particle distance or Blender’s mesh scaling achieves this. This ensures cloth layers interact realistically without passing through.
- Stiffness Along vs Across: Anisotropic fabrics use UV-aligned topology for directional stiffness in Blender. MD’s pattern grainlines inform UV orientation for warp/weft settings. This simulates stretch differences, like horizontal-only stretch. Proper alignment enhances realistic fabric behavior.
- Particle Distance / Resolution in MD: Lower particle distances create denser meshes for finer wrinkles but risk instability. A 10 mm quad resolution balances detail and performance. Initial draping uses higher distances for speed, finalized with lower ones. This optimizes simulation efficiency and visual quality.
- Mesh Layering and Thickness: Single-layer simulation with post-simulation thickness via Solidify avoids inner-outer layer collisions. MD exports thin surfaces, thickened later in Blender. Disabling self-collision on inner vertices prevents errors. This simplifies topology for stable, realistic results.
- Using Vertex Groups for Topology Control: Neat edge loops at waistbands or cuffs define pinned or stiff vertex groups. Topology aligned with garment sections facilitates precise simulation control. This enables targeted adjustments, like stiffer knees. Clean topology simplifies vertex group assignments.
- Special Topology: Seam Lines and Panels: MD simulates sewn edges with strain, supporting virtual tearing. Blender’s Molecular add-on breaks edges for tearing effects, requiring sufficient subdivision. Topology must support tear propagation for dynamic effects. This enables advanced, dramatic cloth interactions.
- Example – Optimizing Topology for a Skirt: Dense topology at the waist and hips supports fold concentration, with radial edge loops for natural pleats. Uniform quads prevent collapse during motion. A weighted hem loop stabilizes fluttering. This topology enhances realistic skirt behavior.
Optimized topology ensures stable, accurate cloth simulations with minimal artifacts. Planning mesh structure enhances realism and supports advanced effects like tearing.
Simulating Cloth on 3D Characters in Blender: Step-by-Step Guide
Here’s a step-by-step guide for simulating cloth on characters:
- Prepare the Character and Garment:
- Scale and Pose: Ensure the character is scaled correctly (1.6-1.8 units tall) with transforms applied. Start in T-pose or A-pose to avoid initial cloth interpenetration. Position garments to fit without poking through the body. This establishes a stable simulation starting point.
- Settling Frames: Include 10 settling frames where the character is static, allowing cloth to drape under gravity. This prevents initial collisions before animation begins. MD-imported garments may need slight adjustments for fit. Settling ensures a natural, collision-free starting state.
- Enable Collision on the Character: Add a Collision modifier to the character’s body with 0.015m outer thickness. Increase Collision Quality for fast motions to prevent tunneling. Merge body parts into a proxy for seamless collisions. This ensures cloth interacts realistically with the character.
- Cloth Settings on the Garment: Apply a Cloth modifier with presets like silk or denim for initial settings. Set Quality Steps to 8-12 for accuracy, adjust mass (0.3 for silk, 5 for leather). Enable self-collision with 0.01m distance to prevent layer intersections. Pin vertex groups anchor parts like waistbands.
- Integrate with Character Animation:
- Hybrid Approach: Skin cloth to the rig with an Armature modifier before the Cloth modifier. This ensures the cloth follows primary rig motion, with simulation adding secondary effects. Weight painting stabilizes the cloth’s response to character movements. This balances realism and performance for dynamic animations.
- Pure Sim Approach: Rely solely on cloth simulation driven by body collisions, without rigging. Increase friction to prevent slipping and use Internal Springs for shape retention. Higher substeps ensure the cloth keeps up with fast motions. This maximizes realism but risks lag in complex scenes.
- Baking and Troubleshooting: Bake the simulation to cache frames, checking for intersections or jittering. Adjust collision distance or quality steps to fix penetrations. Scale the scene up by 10 to reduce jitter, then scale down post-simulation. Tweak damping or mass to correct lag or floatiness.
- Iteration: Refine parameters like damping or gravity for problem areas, re-baking as needed. Use Viewport Display to visualize collision thickness and adjust settings. Split troublesome parts into separate simulations for control. Iteration ensures a polished, artifact-free result.
- Finalizing: Keep the Cloth modifier for flexibility or apply it to freeze the simulation. Add shape keys or sculpting for artistic tweaks post-simulation. Export or render the animation with finalized cloth. This completes the dynamic cloth integration process.
Following these steps mimics real garment behavior on moving characters. The result is a realistic, dynamic cloth animation enhancing character appeal.
Top Addons for Creating 3D Clothing in Blender
Here are top Blender add-ons for 3D clothing creation:
- Garment Tool: Enables MD-like pattern sewing by drawing 2D curves and triangulating them into cloth meshes. Includes templates and simulation presets for rapid design. Features like limb wrapping and button binding streamline fitting. This integrates pattern-based creation within Blender’s environment.
- Simply Cloth Pro: Simplifies cloth simulation with a user-friendly UI and preset materials like denim or silk. One-click pinning, wind effects, and garment mesh libraries speed up workflows. Enhances Blender’s cloth settings for efficiency. Ideal for frequent simulation tasks with minimal setup.
- Bystedt’s Cloth Builder: Free add-on for interactive cloth sculpting, allowing real-time wrinkle posing. Sets up Cloth modifiers with vertex groups and self-collision presets. Enables art-directed draping for stills or specific looks. Mimics MD’s cloth dragging within Blender’s viewport.
- Cloth Weaver: Offers garment templates and sewing tools for quick character dressing. Automatically fits meshes with preset Cycles shaders for fabrics. Simplifies prototyping for non-artists via a catalogue-based UI. Time-saving for background characters or initial designs.
- Modeling Cloth (by Rich Colburn): Interactive simulation add-on for live cloth editing, dragging vertices like fabric. Combines modeling with physics for manual fold design. Supports shrink/expand effects and soft-body mixing. Perfect for static drapery or learning cloth behavior.
- Molecular Script (for advanced effects): Physics add-on for cloth tearing, treating edges as breakable constraints. Enables dramatic effects like ripping shirts via particle-based simulation. Requires technical setup but achieves unique results. Essential for dynamic, destructive cloth interactions.
Add-ons like Garment Tool and Simply Cloth streamline clothing creation and simulation. They enhance Blender’s capabilities, reducing reliance on external software for professional results.

Drawing Inspiration from Cloth References and Design Styles
How to Draw Inspiration and Incorporate It Effectively:
- Study Real Cloth Behavior and Anatomy: Observing real-life fabric behavior, like silk’s smooth waves or linen’s angular folds, is critical for 3D modeling. Reference images show fold types and drapery, guiding accurate simulation settings. For example, heavy wool forms rounder, gravity-dominated folds, replicated by adjusting cloth parameters. This builds a mental and visual library for realistic or stylized cloth designs.
- Keep a Reference Library (Physical and Digital): Collect garment images, noting seams and shapes for precise 3D modeling. Pattern books reveal how flat patterns become 3D garments, aiding construction understanding. For a 1950s dress, study its cinched waist and full skirt, often using stiff taffeta. These references ensure accurate simulation, like adding a crinoline for skirt volume.
- Draw from Diverse Design Styles:
- Historical Fashion: Victorian or Renaissance garments, with bustles or corsets, inspire unique structures for fantasy or sci-fi designs. Star Wars costumes blend historical robe elements for richness. These references guide 3D modeling to enhance authenticity. Incorporating such elements adds depth and visual impact to digital creations.
- Cultural Clothing: Traditional garments like kimonos or saris offer distinct drapery and construction for inspiration. A sari’s wrapping technique can inform futuristic outfit designs. Studying these forms broadens creative possibilities in 3D modeling. This leads to innovative, culturally rich digital fashion.
- Contemporary Fashion Trends: Following current designers and digital fashion platforms sparks new ideas. Game and film concept art showcases detailed outfits for inspiration. Platforms like Behance display innovative digital fashion projects. These sources keep 3D designs fresh and aligned with modern trends.
- Film and Media: Sci-fi films like Blade Runner or period dramas like Bridgerton provide rich clothing references. They inspire futuristic or retro designs with distinct aesthetics. These visuals guide 3D cloth creation for specific stylistic goals. Referencing such media ensures compelling, contextually appropriate designs.
- Public Domain Resources: Museum collections offer historical garment patterns, detailing seams and supports for 3D modeling. These inform mesh splits or collision settings for authenticity. Digital forums share recreations of historical dresses, aiding digital garment creation. Studying these resources ensures accurate and detailed 3D designs.
- Moodboards and Concept Sketches: Moodboards combine references, like techwear and medieval cloaks, to define a design’s vibe. Sketching over character images plans reference use for each part. This guides accurate 3D modeling and texturing processes. It ensures a cohesive and intentional design outcome.
- Community Feedback: Sharing WIPs with artists identifies unnatural cloth behavior, like folds resembling rubber instead of silk. Feedback prompts revisiting references to adjust 3D simulations. This improves realism and material accuracy in designs. Community input refines the final cloth appearance.
- Inspiration Beyond Fashion: Non-clothing sources, like architectural structures or jellyfish forms, inspire avant-garde fashion shapes. In 3D, ignoring gravity allows creative cloth forms, like flower-inspired dresses. These references guide innovative design choices. They lead to unique, imaginative digital garments.
- Keep Up with Digital Fashion Trends: Emerging aesthetics, like AR try-ons or retro-futuristic holographic fabrics, inspire fresh designs. Blending Victorian silhouettes with modern materials creates innovative looks. Following these trends informs cutting-edge 3D creations. This keeps designs relevant and visually striking.
- Documenting and Organizing: Categorize references by folds, materials, or eras for efficient project access. Internalized knowledge, like bias-cut silk’s clinging waves, aids 3D simulation settings. Organizing references streamlines the creative process. This ensures quick, informed design decisions.
References ground creative decisions, ensuring realistic or intentional stylistic outcomes. Studying and organizing inspiration enriches digital garment designs, preventing creative blocks and achieving convincing results.

Designing Sci-Fi, Retro, and Futuristic Clothing in 3D
Explore These Styles and How to Approach Them:
- Sci-Fi Clothing Design:
- Fabrics and Materials: Sci-fi uses futuristic materials like holographic textiles or glowing fabrics, achieved with emission shaders in 3D. Hard-surface elements, like armor plates, blend with soft cloth for dynamic designs. Games like Mass Effect or Star Wars’ Jedi robes inspire these hybrids. This creates visually striking sci-fi garments with a futuristic edge.
- Silhouette: Sci-fi allows extreme silhouettes, from structured shoulders to flowing robes, like Star Wars’ samurai-inspired tunics or royal gowns. Tech-wear features tactical, modular designs with straps and masks. These shapes guide 3D modeling for unique, otherworldly aesthetics. They ensure garments reflect the intended sci-fi vibe.
- Functional Design: Consider the garment’s purpose, like spacesuits with tubing or cyberpunk jackets with glowing circuits. Use normal and emission maps to add functional details in 3D. The Fabricant’s Xenodata exemplifies fashionable spacesuits with practical elements. This informs thematic and practical design choices.
- References and Aesthetic: Retro-futurism blends 80s chrome and neon with futuristic minimalism or dystopian ruggedness. These aesthetics shape 3D design direction for specific sci-fi worlds. References ensure stylistic accuracy in modeling and texturing. They guide cohesive, immersive garment creation.
- Retro Clothing Design (for Nostalgic Appeal):
- Authenticity: Study era-specific cuts, like 1970s bell-bottoms or polyester shirts with bold patterns, for accurate 3D modeling. Model flares with slight stiffness and use chevron or floral textures. Historical patterns in Marvelous Designer ensure precise tailoring. This creates authentic retro aesthetics in digital designs.
- Mixing Eras: Retro-futurism combines 1950s dresses with sci-fi reflective fabrics or steampunk’s Victorian gowns with brass gears. References for both elements ensure accurate blending in 3D. This approach creates compelling hybrid designs. It balances nostalgia with futuristic innovation for unique looks.
- Execution in 3D: Retro styles feature complex tailoring, like 1950s cone bras or 1890s puffed sleeves, modeled or sculpted in 3D. Use Blender’s sewing function or add-ons for accuracy. Textures like polka dots or paisley enhance era-specific looks. This ensures faithful recreation of historical fashion details.
- Futuristic Fashion (Forward-Looking Avant-Garde):
- Minimalist vs. Extravagant: Minimalist designs use seamless, monotone fabrics, while extravagant ones feature impossible floating shapes. In 3D, model clean materials or ignore gravity for creative forms, inspired by Iris van Herpen. This allows bold, boundary-pushing design exploration. It creates visually innovative digital garments.
- Topology Considerations: Futuristic designs may use non-traditional topology, like interlocking plastic pieces or flexible exosuits. Model rigid bodies or rig parts instead of cloth sims for accuracy. Combine cloth with parented armor for hybrid designs. This ensures functional and visually accurate 3D garments.
- Inspiration: Concept art and runway outfits, like The Fifth Element’s designs by Jean-Paul Gaultier, inspire futuristic attire. Final Fantasy’s armor-fabric mixes offer unique silhouettes for 3D modeling. These guide innovative design approaches. They push the boundaries of digital fashion creativity.
Practical 3D Tips:
- Use Geometry Nodes or Modifiers: Apply geometry nodes or modifiers for repetitive tech patterns, like hexagonal armor tiles on jackets, enhancing sci-fi aesthetics.
- 3D Print Aesthetic: Model intricate lattices for a 3D-printed look, shrinkwrapping them to garments for futuristic overlays, adding visual complexity.
- Emissive & Animated Textures: Use vibrant or animated textures to create futuristic effects, hinting at motion in still renders for dynamic appeal.
Color and Pattern:
- Sci-Fi: Uses blacks, grays, metallics, or neon for futuristic looks, or muted palettes for dystopian settings, defining the aesthetic mood.
- Patterns: Futuristic designs feature circuit-like or fractal patterns; retro uses era-specific polka, plaid, or floral prints for authenticity.
- Storytelling Through Design: Clothing reflects character context, like a time-traveler’s mixed-era outfit or a hacker’s retro-futuristic jacket, adding narrative depth.
Blending genres like cyberpunk or retro-futurism creates striking 3D designs. References anchor imagination, ensuring recognizable aesthetics that balance familiarity and novelty for impactful results.

Best Practices for Exporting and Importing 3D Clothing Assets
Best Practices for Exporting/Importing 3D Clothing:
- Choose the Right Format:
- For DCC Tools and Marvelous Designer: OBJ or FBX is used for static meshes; OBJ for geometry and UVs, FBX for rigging and animation. These formats ensure compatibility between tools like Blender or Maya. They support seamless transfer of clothing assets. Choose based on whether rigging or animation is needed.
- For Animated Cloth: Alembic (.abc) caches mesh per frame, ideal for transferring simulations, like Marvelous Designer to Blender. This preserves cloth animation accuracy. It’s suited for film rendering pipelines. It ensures precise animation playback in the target software.
- For Real-Time Engines or AR: FBX or glTF/GLB are common; glTF is efficient for web and AR with PBR materials. USDZ suits Apple ARQuickLook applications. These formats optimize real-time performance. They ensure compatibility with game engines or AR platforms.
- Maintain Scale and Units:
- Scale Mismatches: Marvelous Designer uses mm (1 unit = 1 mm), while Blender may use meters. Check export/import scale settings to align units, like cm for game engines. Proper scaling ensures correct garment proportions. This prevents resizing errors during asset integration.
- Game Engine Units: Unity and Unreal typically use cm as default (1 unit = 1 cm). Adjust export scale (e.g., scale down by 0.01 for meters) to match. This ensures character and cloth align correctly. Consistent units avoid import scaling issues.
- Apply Transforms Before Export: Apply rotation/scale in Blender (Ctrl+A) to avoid import distortions, especially for rigged clothes. This sets a rest scale of 1 for correct bone deformation in animations. It ensures meshes align properly in new environments. This step prevents unexpected scaling or rotation issues.
- Preserve UVs and Textures:
- UV Maps: Export UV maps correctly; FBX supports multiple UV sets, unlike OBJ’s single set. This ensures UV integrity across platforms. Multiple UV sets are useful for complex materials. It prevents texture misalignment in the target environment.
- Procedural Textures: Bake procedural textures to images for cross-platform compatibility, as shader nodes aren’t universal. Collect all texture files for glTF exports to maintain material fidelity. This ensures consistent material appearance. It avoids texture loss during import.
- Rigging and Weight Painting:
- Exporting Rigged Clothes: Include armatures in FBX exports with “Export Armature” and “With Weights” enabled for rigged clothes. Verify weights transfer correctly in the target engine. Respect engine bone limits, like Unity’s four per vertex. This ensures smooth deformation in animations.
- Marvelous Designer Workflow: Retopologize and weight paint in Blender after MD export for game engine compatibility. Test deformation in the engine to ensure proper movement. This prevents animation issues with character rigs. It ensures garments move correctly with the character.
- Cloth Simulation Data:
- Film Animations: Use Alembic for baked cloth animations in films, preserving frame-by-frame mesh data for accurate playback. This is ideal for transferring simulations across software. It ensures visual fidelity in rendering pipelines. It avoids simulation recalculation in the target tool.
- Real-Time Engines: Rig garments to skeletons and apply engine cloth systems like Unreal’s Chaos or NVCloth. Paint weights for targeted simulation areas to balance realism and performance. Avoid exporting baked meshes due to size. This optimizes real-time cloth behavior.
- Optimize Mesh for Target:
- Games/AR Optimization: Reduce polycount via retopology, like 50k to 5k tris, for engine-friendly meshes. Bake high-res details into normal maps to retain visual quality. This ensures performance on mobile or AR platforms. It maintains the garment’s appearance efficiently.
- Rendering in DCC Tools: Keep higher polycounts for rendering if memory allows, preserving detail. Remove hidden body mesh parts to prevent clipping in games. This optimizes performance without sacrificing visuals. It ensures compatibility with the target platform.
- Material Conversions:
- Blender to Engines: Recreate Blender materials in Unity/Unreal using PBR workflows with BaseColor, Roughness, and Normal maps. Export these maps for consistency (glTF automates this). This ensures material fidelity across platforms. It aligns with engine-specific rendering needs.
- Translucent Fabrics: Set opacity for fabrics like lace using alpha masks (white = solid, black = hole). Engines handle alpha differently (blend vs. clip), so set manually. This ensures correct rendering of translucent areas. It prevents material errors in the target environment.
- Importing into Marvelous Designer:
- OBJ Export: Export triangulated OBJs, scaled to cm for MD compatibility (1 unit = 1 cm). Scale up by 100 if exporting from meters in Blender. This ensures correct sizing in MD. It prevents import scale mismatches.
- Object Types: Set imported objects as avatars or garments in MD workflows. Imported garments may serve as 3D trim, like buttons or accessories. This ensures proper integration into MD’s simulation system. It aligns with MD’s arrangement point functionality.
- Trouble Spots:
- Normals and Double Sided: Recalculate normals for consistency; enable two-sided rendering for open garments like jackets. Marvelous Designer exports two-sided meshes with thickness for realism. Engines may require manual two-sided settings for correct rendering. This ensures both cloth surfaces display properly.
- Animations: Include all bones in FBX exports with animations, avoiding excessive bones in rigged clothes. Simulate cloth in-engine for better performance than baked animations. This prevents animation issues in target platforms. It ensures smooth integration with character rigs.
- Naming Conventions: Use clear names like “Shirt_low_mat” for meshes and materials to aid texture assignment. Maintain consistent scale across multiple garments for alignment. This streamlines asset management in new environments. It reduces errors during import and setup.
- Example Workflow: Marvelous to Blender to Unity:
- Marvelous Designer Export: Export garment as OBJ (thin, unwelded, particle distance 15 for lighter polycount). Export a normal map from MD’s high-res mesh for detail. This ensures a manageable mesh for further processing. It prepares the garment for Blender import.
- Blender Processing: Import OBJ, scale to fit the custom character, and retopologize if needed for Unity. UV unwrap, bake normal map to the quad mesh, and weight paint to the rig. Test deformation to ensure proper movement. This prepares the garment for engine export.
- Unity Integration: Export FBX with mesh, skeleton, and weights to Unity as a skinned mesh renderer. Add a cloth component for in-engine simulation if needed, painting simulation areas. Test for clipping and adjust weights or collisions. This ensures smooth performance and visual fidelity.
- Source Control and Format Preservation: Keep original .blend or .zprj files as high-quality masters for future tweaks. Exports can be lossy, so maintain versions with consistent units to avoid rescaling. This preserves design integrity across pipeline iterations. It ensures flexibility for adjustments without quality loss.
Following these practices ensures smooth asset transitions across platforms. They maintain design quality, minimizing errors and preserving creative intent in renders, games, or AR applications.

Optimizing 3D Clothing for Real-Time Applications
How to Make Your Digital Fashion Real-Time Friendly:
- Polycount Budgeting:
- Retopology & Decimation: Reduce high-poly garments, like 100k tris to 5k-10k, for game compatibility and performance. Bake details into normal maps to maintain silhouette and fold visuals. This ensures smooth real-time rendering on target platforms. It balances visual quality with engine constraints for efficiency.
- LOD Models: Create high, medium, and low-detail versions, like 10k tris for close-ups and 2k for distance shots. Engines swap models to reduce GPU load in dense scenes. This optimizes rendering across varying camera distances. It enhances performance without sacrificing key details.
- Remove Hidden Polygons: Delete unseen faces, like inner shirt areas, to avoid clipping and save resources in games. This is standard optimization to reduce unnecessary geometry. It improves real-time rendering speed significantly. The result is faster performance without visual loss.
- Texture Optimization:
- Texture Atlasing: Combine textures, like shirt and pants, into one 2048×2048 sheet to reduce draw calls. This improves engine efficiency for character models in real-time. Atlasing minimizes memory usage for better performance. It’s a standard practice for optimized game assets.
- Right Resolution: Use the lowest resolution for acceptable detail, like vertex colors for solid fabrics instead of textures. High-res textures are needed only for fine patterns or weaves. This reduces memory load for mobile/AR applications. It ensures efficient rendering without quality loss.
- Mipmap and Filtering: Ensure textures have mipmaps for efficient distance rendering in real-time engines. Use appropriate filtering to avoid oversampling large textures unnecessarily. This prevents performance hits during rendering. It maintains visual clarity at varying distances.
- Compression: Apply engine compression like DXT or ASTC to save memory with minimal quality loss. This is critical for AR apps requiring fast loading and runtime. Compressed textures reduce performance demands significantly. They ensure smooth operation on mobile devices.
- Material Draw Calls:
- Merge Materials: Combine materials into one PBR shader to minimize draw calls for efficiency. This reduces rendering overhead in real-time engines. It streamlines material processing significantly. Fewer materials improve performance across platforms.
- Avoid Complex Features: Avoid heavy transparency or multi-shader setups, which increase rendering costs. Simple PBR materials are preferred for real-time performance. This ensures efficient rendering in games or AR. It prevents performance bottlenecks from complex shaders.
- Single-Sided Rendering: Use single-sided rendering unless needed, like for open jackets where both sides show. Two-sided rendering doubles draw cost, so apply selectively. This optimizes material performance in engines. It ensures only necessary faces are rendered.
- Real-Time Cloth Physics Considerations:
- Limit Simulated Vertices: Paint cloth masks to simulate only moving parts, like a coat’s lower half, reducing CPU cost. Unity/Unreal supports targeted simulation weights for efficiency. This balances realism with performance for real-time. It’s ideal for background characters or mobile platforms.
- Simplify Collision Shapes: Use low-poly colliders, like capsules, for cloth interactions to avoid jitter and improve efficiency. High-poly colliders are computationally expensive in real-time. Simplified shapes enhance simulation stability significantly. This optimizes physics performance for smoother rendering.
- Optimize Solver Settings: Use low-quality iterations for acceptable physics in VR/mobile to meet tight frametime budgets. Fewer iterations reduce CPU load for faster processing. This suits less critical elements like NPC clothing. It ensures smooth performance without noticeable lag.
- Rigging vs. Simulation: Rig garments with bones for simple motion, like coat tails, instead of full physics simulations. This is cheaper than cloth sims for real-time applications. Procedural bone animations minimize runtime costs significantly. It offers a practical trade-off for performance efficiency.
- Occlusion and Culling: Ensure engines cull unseen geometry via frustum culling for rendering efficiency. In dense scenes, use occlusion culling to hide distant characters with clothes. This benefits detailed clothed models in games. It’s less critical for AR with single-model focus.
- Profiling: Use Unity/Unreal tools to detect bottlenecks, like overdraw from transparency or heavy physics. Adjust texture resolution or physics settings if frame rates drop. Iterative testing refines performance targets for smooth rendering. This ensures garments meet real-time requirements.
- Use Lighter Shaders: Stick to simple PBR shaders with diffuse, normal, and roughness maps for efficiency. Approximate sheen with Fresnel effects instead of heavy features like sub-surface scattering. This maintains visual quality in real-time applications. Normal maps fake detail without geometry cost.
- Minimizing Physics Interactions: Avoid multiple simulated cloth layers, like skirts and coats, due to costly cloth-cloth collisions. Simulate only the outer layer or bake inner ones for efficiency. This reduces computational load in real-time. It prevents performance lag in complex scenes.
- Example – Optimizing a Dress for a Mobile Game:
- Retopology: Retopo a 30k tri MD dress to 5k quads, using an alpha mask for lace instead of geometry. This reduces polycount for mobile compatibility. It maintains visual quality efficiently. The mesh is optimized for real-time rendering.
- Normal Map Baking: Bake wrinkles to a 1024px normal map with atlassed accessories like buttons. This preserves detail without high geometry costs. It ensures efficient rendering in games. The normal map enhances visual fidelity.
- Material Setup: Use one material with an alpha test for lace patterns, avoiding blending for performance. Atlas small accessories into the texture to minimize materials. This reduces draw calls significantly. It ensures mobile-friendly rendering efficiency.
- Simulation or Rigging: Rig or simulate only the bottom for sway, keeping the top fixed to avoid leg collisions. Use two bones for simple motion or limited cloth sim. This balances realism and performance. It ensures smooth operation on mobile devices.
- Testing: Test on various devices to meet frame budgets, reducing texture to 512px if needed. Trim polycount or disable shader details if performance lags. This ensures compatibility across platforms. It maintains a smooth user experience.
- Reducing Overdraw: Minimize overlapping transparent layers, like sheer fabrics, to reduce overdraw and GPU load. Bake layered looks into one texture to lower rendering costs. This is critical for mobile performance optimization. It ensures efficient rendering without visual compromise.
Optimization balances geometry, texture, and physics for real-time efficiency. Iterative simplification and testing ensure performant digital fashion that retains design essence across platforms.
Case Studies: Successful Digital Fashion Projects
Examining real-world digital fashion case studies reveals how techniques combine for impactful results. Below are notable projects and their success factors.
Let’s Look at a Few Notable Projects and What Made Them Successful:
- Case Study 1: The Fabricant’s “Iridescence” – The $9,500 Digital Dress: In 2019, The Fabricant’s “Iridescence,” a translucent, iridescent digital dress, sold for $9,500 on the blockchain as the first digital-only couture. Designed in 3D with tools like Marvelous Designer and custom shaders, it was tailored to the buyer’s photo.
- Why It Succeeded: Its artistic value and blockchain NFT sale proved digital fashion’s collectible worth. The dress’s fluid, otherworldly design showcased digital freedom, earning massive press. Technical excellence enabled realistic rendering for bespoke fitting. This project highlighted the marketability of innovative tech and design.
- Case Study 2: Carlings “Neo-Ex” Digital Collection: In 2018, Carlings launched Neo-Ex, a 19-piece digital streetwear collection ($10-$30), fitted onto customer photos by 3D designers, featuring futuristic patterns and animated textures.
- Why It Succeeded: Affordable pricing and sustainability appealed to influencers for Instagram use. Manual AR fitting ensured convincing visuals, proving consumer demand for digital self-expression. The collection sold out, generating buzz. It demonstrated a viable business model for social media fashion.
- Case Study 3: Hanifa’s 3D Virtual Fashion Show: In May 2020, Hanifa’s Pink Label Congo collection debuted via a 3D Instagram Live show, with invisible models wearing realistic 3D garments created in Blender, inspired by Congolese culture.
- Why It Succeeded: The viral, ghost-like presentation and high-quality cloth physics captivated viewers. A pre-show documentary added cultural depth, while detailed simulations ensured realistic fit, boosting media coverage and sales. This showed small brands can achieve global impact. It set a template for virtual showcases.
- Case Study 4: DressX and Digital-Only Retail (Multiple Projects): DressX sells digital garments ($30-$50) from various designers, auto-fitted to photos, including collaborations like The Fabricant and Moschino’s Sims looks.
- Why It Succeeded: Scalable AI fitting and cross-platform integration (Instagram, Roblox) attract diverse consumers. High-quality designs and sustainability messaging build a digital fashion ecosystem. DressX standardizes formats for accessibility. It fosters a community for mainstream digital wardrobes.
- Case Study 5: Atacac and Virtual Prototypes: Atacac uses CLO3D/Marvelous for 3D-first design, selling digital patterns before physical production, with dynamic pricing based on pre-orders.
- Why It Succeeded: 3D prototyping reduces waste and enables bold designs, engaging customers in the process. Faster development cycles enhance efficiency. This hybrid model improves traditional fashion. It shows digital skills yield ROI for physical brands.
Each case study highlights unique strengths, from artistry to scalability, driving digital fashion’s success.
Each of These Case Studies Underscores Different Facets:
- The Fabricant’s NFT Dress: Emphasizes uniqueness and artistry, proving digital fashion’s collectible value.
- Carlings’ Collection: Showcases consumer utility and brand modernity through accessible digital outfits.
- Hanifa’s Show: Combines creativity and storytelling to solve logistical issues, reaching global audiences.
- DressX Platform: Demonstrates scalability and partnerships, pushing digital wardrobes mainstream.
- Others like Balenciaga x Fortnite or Gucci x Roblox: Extend brand reach through gaming, generating revenue and marketing value.
These projects validate digital fashion’s entrepreneurial potential. High-quality 3D execution, novel concepts, and technology integration ensure creative and commercial success.

Community Feedback and Tips on Digital Fashion Creation
The digital fashion community actively shares knowledge on forums like Blender Artists and Reddit. Below are key community-sourced tips for creating digital fashion.
Here Are Some Pieces of Community-Sourced Wisdom and Tips Regarding Digital Fashion Creation:
- Blender Cloth Troubleshooting: Scale models up 10x for stable Blender cloth simulations, then scale down, adjusting gravity. This reduces jitter by aligning with collision distance limits. Users report significant stability improvements. It’s a counterintuitive but effective workaround.
- Preventing Body Clipping: Delete or hide hidden avatar faces under clothes to avoid clipping and save computation. Shrinking the collision body slightly creates a gap, reducing collision issues. This optimizes simulations in Blender and Marvelous Designer. It ensures clean renders without artifacts.
- Marvelous Designer vs Blender Workflows: Use Marvelous Designer for complex garments due to its superior collision handling, then import to Blender for rendering. Blender with add-ons like Garment Tool can suffice for simpler tasks. Choose tools based on project needs. This balances ease and accessibility.
- Retopology and Rigging Effort: Retopologize Marvelous Designer exports before rigging to avoid issues with dense meshes. Use ZRemesher or MD’s auto-remesh, then transfer body weights to clothes. Simulate a bind pose for initial weighting. This streamlines animation and rigging processes.
- Simulation Layering: Simulate layered outfits (e.g., shirt + jacket) sequentially, using the inner layer’s final shape as collision for the outer layer. This prevents unwanted collisions in Blender or Marvelous Designer. It simplifies complex simulations. The approach ensures realistic layering effects.
- Gravity and Scale Stylization: Adjust gravity for creative effects, like low gravity for floaty fantasy cloth or high damping for underwater looks. Simulate at slower speeds for silky motion. This enhances stylistic flexibility. It allows unique, artistic cloth behavior.
- Use of Reference and Feedback: Share WIPs on forums to get feedback on unnatural folds or proportions. Community suggestions, like adding seams or adjusting stiffness, refine designs. References guide realistic draping. Iterative feedback accelerates improvement.
- Hardware Considerations: Use GPU cloth solvers or bake simulations in passes for heavy scenes to improve performance. Increase substeps for stability over quality steps. Baking caches ensures consistent playback. This optimizes simulation times for complex projects.
- Don’t Over-Simulate – Art Direct: Manually tweak simulations for artistic results, like pinning cloth or sculpting wrinkles post-sim. Convert sims to shape keys for fine control. This hybrid approach balances realism and aesthetics. It prioritizes visual impact over physical accuracy.
- Learning Resources: Study Marvelous Designer’s YouTube tutorials or Blender StackExchange guides for cloth simulation. Learn sewing basics to understand garment construction. These resources enhance technical skills. They bridge digital and traditional fashion knowledge.
- Collaboration Between Disciplines: Engage fashion designers for draping insights and 3D artists for rendering tricks. Cross-disciplinary collaboration improves garment realism. For example, tailors suggest flowy fabric settings, while artists add displacement maps. This enriches design outcomes.
Community advice emphasizes tool selection, optimization, and collaboration. Engaging with forums accelerates learning and refines digital fashion projects.

Future Trends in Digital Fashion and 3D Clothing Design
Digital fashion is evolving rapidly, with technology and style converging. Below are key trends shaping 3D clothing design and digital fashion.
Here Are Some Future Trends and Developments to Watch:
- AR and VR Integration Becomes Mainstream: AR glasses and VR will normalize digital wardrobes for virtual meetings or events. Real-time 3D body tracking will enhance AR try-ons, displaying dynamic designs on physical clothes. This will drive demand for high-quality 3D assets. Retailers will expand virtual fitting capabilities.
- AI-Assisted Fashion Design: AI will generate patterns, optimize fits, or create designs from mood boards in tools like CLO or Blender. Consumers may co-design unique digital garments via AI personalization. This enables mass customization based on user preferences. It streamlines and democratizes design processes.
- Sustainable and Functional Focus: Digital fashion reduces waste, appealing to eco-conscious consumers. Brands may offer digital outfits as sustainable alternatives, while virtual try-ons cut returns. In VR, clothes could adapt dynamically with animated textures. This enhances sustainability and functionality in virtual worlds.
- Virtual Fashion Shows & Retail Spaces: Virtual fashion weeks in VR or Unreal Engine presentations will become common. Virtual showrooms will showcase cloth physics, while metaverse stores enable avatar-based browsing. This raises the bar for 3D artistry. It creates immersive retail experiences.
- Improved Tools and Workflows:
- Blender’s Physics: New node-based solvers may rival Marvelous Designer’s cloth simulation quality.
- CLO3D/Marvelous: Enhanced pipeline integration for AR exports and remote team collaboration.
- Real-Time Engines: Unity/Unreal may add fashion-specific features like clothing customization.
- Standards and Formats: USD or USDZ could standardize digital garment files for cross-platform use.
- Fusion of Physical and Digital (Phygital): Physical garments may include AR counterparts, linked via NFTs or embedded LEDs displaying digital designs. This bridges physical and digital fashion. It creates hybrid consumer experiences. Designers must ensure designs translate across realms.
- Virtual Identities and Wearables in Games/VR: Avatar customization in games like Fortnite or Roblox will grow, with interoperable digital wardrobes across platforms. Independent designers may create widely used virtual couture. This fosters a digital fashion economy. It enhances virtual self-expression.
- Enhanced Realism in Simulation and Rendering: Advanced GPU power will improve real-time cloth, eliminating clipping and enhancing layering. Shaders will capture micro-details like fabric fuzz, narrowing the gap between virtual and real photoshoots. This enables cost-effective digital campaigns. It boosts realism for consumer trust.
- Collaboration Platforms: Cloud-based tools may enable multiple designers to co-create garments remotely, like shared Marvelous Designer environments. This follows broader remote collaboration trends. It streamlines team workflows. It fosters innovative, collective design processes.
- Regulation and Digital Fashion Commerce: Licensing frameworks and marketplaces like a “Steam for digital fashion” may standardize sales. AR clothing subscriptions or sponsored designs could emerge. This formalizes digital fashion commerce. It creates new revenue models for creators.
Digital fashion will integrate into everyday life, driven by sustainability and innovation. Staying updated ensures creators capitalize on these evolving opportunities.

Enhancing Your Digital Fashion Workflow
Digital fashion blends artistry and technology, requiring a refined workflow for success. Tools like Blender and Marvelous Designer, combined with techniques like retopology and cloth simulation, boost project quality. Continuous learning and collaboration keep workflows modern, while foresight in planning prevents technical issues. An efficient workflow frees time for creativity, enabling ambitious projects.
Below Are Key Strategies to Enhance Your Workflow:
- Start with Solid Concepts and References: Define clear design goals using references to guide creation. This ensures focused, intentional projects.
- Use the Strengths of Each Tool: Design in Marvelous Designer, refine in Blender, or simulate in-engine as needed. This leverages each tool’s capabilities.
- Iterate with Feedback: Collaborate with peers to refine details, catching issues like unnatural folds. This improves design quality.
- Embrace New Add-Ons or Features: Use garment templates or physics presets to save time. This streamlines repetitive tasks.
An enhanced workflow empowers creators to handle complex projects confidently. By mastering technical pipelines, you unlock creative potential for innovative digital fashion.
Embrace the blend of art and tech – use the precision of 3D tools and the inspiration of fashion design to continually refine your workflow. By doing so, you not only improve efficiency but also open up space to experiment and innovate, which is where truly standout work is born. The world of digital fashion is yours to create, and with an optimized workflow, the only limit is your imagination.

Frequently Asked Questions (FAQs)
- What software is best for digital fashion design – Marvelous Designer or Blender?
Marvelous Designer excels in realistic clothing design with intuitive 2D pattern creation and cloth simulation, making it an industry standard. Blender offers versatile cloth simulation, modeling, and rendering, suitable for complete scenes, often used with MD for refinement. For high realism, start in MD for draping and finish in Blender, though Blender alone with add-ons like Garment Tool can suffice with more effort. - How do I prevent clothes from clipping through the character in animations?
Prevent clipping by enabling collision in Blender with a Collision modifier on the body and Cloth modifier on the garment, adjusting quality steps for fast movements. Pin cloth appropriately (e.g., pants at the waist) and delete hidden body faces to reduce intersections. In game engines, use capsule colliders or manual fixes like shape keys, ensuring proper T-pose fit and pre-roll simulation to avoid initial collisions. - How can I make my 3D fabric look realistic in renders?
Realistic fabric requires natural draping with sufficient mesh resolution, varied folds, and accurate physics settings, guided by reference photos. Use high-quality PBR textures (diffuse, normal, roughness) to capture weave and sheen, with double-sided shading or slight subsurface for thin fabrics. Model hems and stitches, apply realistic lighting (HDRI or area lights), and maintain proper scene scale for authentic light interaction. - My Marvelous Designer garment is too high-poly. What should I do to use it in a game engine?
Retopologize high-poly MD garments in Blender by creating a low-poly mesh (e.g., 5k polys) with good edge loops, baking high-res details into normal maps. In MD, use lower Particle Distance (e.g., PD 20) or Remeshing for lighter exports. Rig the low-poly garment, create LODs, and import to the engine for game-friendly performance while retaining visual detail. - How can I add my logo onto a 3D clothing model?
Add logos via texturing using MD’s Add Graphic feature or Blender’s UV decal technique, ensuring high-resolution images for clarity. For printed logos, use diffuse/normal maps; for embroidered effects, add displacement or adjust glossiness. Alternatively, model raised logos as geometry and shrinkwrap them, though texturing is preferred for games to minimize polygons. Pin cloth under logos during simulation to avoid distorting folds. - My cloth simulation in Blender is jittery and never settles. How do I fix that?
Common fixes:- Increase Quality Steps and/or Substeps: Higher Quality Steps (8-10) and collision quality in Blender’s cloth settings enhance precision, reducing jitter. Enable Self Collision only if necessary, with an appropriate distance to prevent inflation. Increasing substeps ensures accurate calculations for dynamic movements. These adjustments stabilize the simulation significantly.
- Scale Up the Simulation: Scaling the model 10x addresses physics engine limitations with small-scale movements, reducing jitter. Simulate at this larger scale, then scale down the baked result. This technique stabilizes cloth behavior under gravity. It’s a common workaround for tiny objects in Blender.
- Increase Damping: Raising Structural and Bending damping (5-10%) helps cloth lose energy, preventing perpetual wobbling. This mimics fabric friction, allowing the cloth to settle calmly. Adjust damping gradually to avoid overly stiff motion. It’s effective for most jitter issues.
- Check Collision Settings: Set a small collision distance (0.003-0.01) to prevent clipping-induced jitter, and use Impulse Clamping to limit post-collision velocity. Avoid zero-distance collisions, which cause instability. Proper settings ensure smooth interactions with colliders. This improves simulation reliability.
- Simplify Colliders: Use simple collision shapes (e.g., capsules for legs) instead of detailed meshes to reduce instability. Disable collision on non-contact body parts, like fingers for a skirt simulation. Simplified colliders enhance performance and stability. This is crucial for complex character models.
- Smooth out Mesh or Constraints: Avoid sharp mesh angles or rigid springs by smoothing the cloth or relaxing the initial pose. Slightly increased flexibility can reduce jitter by allowing fluid movement. This prevents oscillation at constraint points. It ensures a natural simulation flow.
- Bake and Don’t Loop Sim: Bake the simulation to cache consistent results, avoiding interactive playback variations. Apply a smooth modifier or corrective shape key to freeze minor jitter in the rest pose. Baking ensures predictability in the final output. It’s essential for production workflows.
- How do I handle clothes in Unreal/Unity Engine? Should I simulate in-engine or import animations?
Cloth can be simulated in-engine using Unreal’s Chaos Cloth or Unity’s Cloth component for real-time, interactive results, ideal for player avatars. Alternatively, pre-bake simulations in Blender or Marvelous Designer and import via Alembic for high-fidelity cutscenes. In-engine simulation suits dynamic gameplay, while baked animations offer control for linear sequences, with hybrids used for optimized rigging. - What are some good resources to learn digital fashion design?
Resources include:- Official Software Tutorials: Marvelous Designer’s YouTube and CLO3D’s webinars offer beginner-to-advanced apparel design tutorials. Blender’s documentation and community tutorials (e.g., Blender Guru) cover cloth simulation basics. These resources teach core tools and techniques effectively. They’re ideal for mastering software fundamentals.
- Online Courses/Schools: CG Elves, Udemy, and LearnMD provide structured Marvelous Designer and Blender courses focused on cloth design. DigitalFashionSchool and Marvelous Designer Academy offer emerging learning paths. These platforms cater to various skill levels. They bridge technical and creative aspects of digital fashion.
- Community Forums and Groups: Marvelous Designer’s forum, Discord, and Reddit’s r/MarvelousDesigner or r/blenderhelp connect users for tips and Q&A. Polycount’s threads discuss game clothing techniques. These communities foster collaborative learning and problem-solving. They’re invaluable for real-time feedback and inspiration.
- YouTube Creators: Channels like “Marvelous Designer 101” by Travis Davids and “CG Couture” provide detailed tutorials and presets. Blender’s “Simulation Zone” and “CrossMind Studio” focus on cloth workflows. These creators simplify complex concepts for practical use. Their content accelerates skill development.
- Books and Papers: Technical papers on cloth simulation and fashion textbooks on pattern making enhance 3D understanding. Browzwear’s blog offers digital-physical case studies. These resources provide theoretical and practical insights. They complement hands-on learning for deeper knowledge.
- Practicing with Real Patterns: Replicating real sewing patterns in Marvelous Designer teaches pattern-to-3D translation. Many patterns are available online for free or purchase. This hands-on approach builds practical skills quickly. It connects digital design to traditional fashion principles.
- Communities like The Fabricant’s platform: The Fabricant’s events and virtual fashion competitions (e.g., CLO’s) showcase workflows and provide feedback. These platforms encourage creative exploration and networking. They expose learners to industry trends and techniques. Participation accelerates growth in digital fashion.
- How do I export my 3D clothing from Clo/Marvelous Designer to use in other 3D software?
Exporting requires:- Format: Use OBJ or FBX for static meshes, Alembic for animations, or DXF for 2D pattern data, depending on the target software’s needs. OBJ is common for Marvelous Designer static exports. Choose the format based on whether animation or rigging is required. This ensures compatibility with tools like Blender or Unity.
- Scale: Set correct units (e.g., centimeters) in MD/CLO export settings to match the target software, adjusting the scale factor to avoid size mismatches. Incorrect scaling can cause oversized imports in Blender. Unified Scale options help maintain consistency. Always verify scale post-import for accuracy.
- Thickness and Weld: Export thin, unwelded meshes for flexibility in editing, or thick for modeled thickness, based on the project’s needs. Thin exports allow post-processing control via modifiers like Solidify. Thick exports suit final renders requiring internal surfaces. Choose based on workflow requirements.
- Materials and UVs: Enable “Export UVs” and “Export Textures” to include fabric color maps and UV layouts, ensuring graphics/trims are checked for inclusion. MD’s auto-generated UVs may need optimization. Reconnect textures in the target software’s material editor. This preserves visual fidelity during transfer.
- Triangulate: MD exports triangulated meshes; CLO’s quad OBJ option varies in quality, so retopologize externally for quads if needed. Triangles are fine for rendering but may require cleanup for animation. Plan for retopology in game pipelines. This ensures mesh compatibility and performance.
- FBX with bones: CLO’s FBX export can include a simple rig skinned to the avatar’s bones, though re-skinning in target software is often better. This option is useful for quick setups but less precise. Re-skinning ensures optimal deformation for custom avatars. Verify rigging post-import for accuracy.
- In Blender, after import: Check import scale and orientation, using OBJ’s “Rotate X90” if needed to correct rotations. Adjust material properties, as MD may not export roughness maps. Manual tweaks ensure proper shading. This final step optimizes the garment for rendering or animation.
- Also remember to export the avatar separately: MD doesn’t include the avatar in garment OBJ exports, so export it separately for reference. This ensures accurate fitting in the target software. Parent or align the garment to the avatar post-import. It streamlines the integration process.
- If you used textures in MD: Ensure textures are embedded or saved in a folder, reconnecting them in the target software’s material editor. Adjust roughness or other properties manually for fabric realism. Proper texture management maintains the garment’s intended appearance. This step is critical for visual consistency.
- Can beginners without fashion background succeed in digital fashion design?
Beginners without fashion experience can succeed by leveraging intuitive tools like Marvelous Designer and learning garment concepts gradually through practice. Tutorials and communities (e.g., CLO, Reddit) support self-taught 3D artists, with preset fabrics simplifying textile knowledge. Creativity, 3D software proficiency, and engagement in digital fashion challenges enable impressive designs without a formal fashion degree.
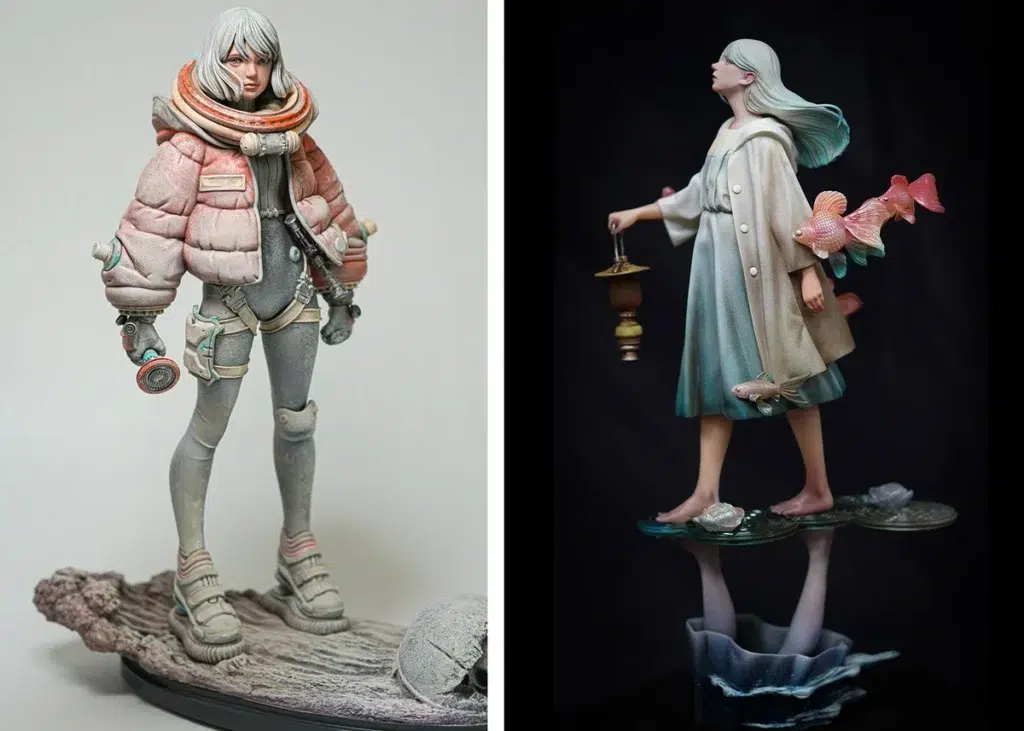
Conclusion
Digital fashion and 3D clothing design represent a revolutionary frontier where technology meets creativity. By leveraging powerful software tools and adhering to the best practices we’ve discussed, creators can bring imaginative garments to life in the virtual realm. From the initial design in Marvelous Designer or Blender, through realistic cloth simulation and material texturing, to final showcase in renders or interactive media, each step is an opportunity to craft something extraordinary.
As we’ve seen, mastering technical skills like retopology, rigging, and optimization is as important as having an artistic vision. Combining these skills enables you to execute your ideas without being limited by the tools. Always remember the value of planning (for topology, for export, for performance) – a bit of foresight can save a lot of revision down the line.
And don’t hesitate to draw on the wealth of community knowledge; even seasoned professionals continue to learn new tips or workflows as the field evolves We stand at a point where future trends — AR wearables, AI-assisted design, virtual fashion marketplaces — are transforming what it means to “get dressed.” Embracing these trends will position you at the cutting edge of digital design. Whether you aim to create hyper-real garments that blur reality, or fantastical outfits that defy physics, the tools and techniques are at your fingertips.
Keep experimenting, remain creative, and enjoy the process of dressing the digital world — it’s a space with room for endless innovation and personal expression. Happy designing!
Sources and Citation
- The Fabricant “Iridescence” ($9,500) sale
- Forbes — World’s First Digital Only Blockchain Clothing Sells For $9,500
- Engadget — A digital “dress” sold for $9500
- Designboom (digital clothes overview incl. The Fabricant + Carlings) — designers are now selling “digital clothes” that don’t actually exist
- Carlings “Neo-Ex” digital collection (Designboom case mention)
- Designboom (same page; contains Carlings “Neo-Ex” section) — designers are now selling “digital clothes” that don’t actually exist
- Hanifa 3D fashion show (IG Live) interview/article
- Teen Vogue (Asia Milia Ware) — Hanifa’s 3D Digital Fashion Show Just Changed the Game
- Blender Artists Community + Blender StackExchange cloth-sim insights
- Blender Artists (cloth sim challenges, stability tips, “industry standard” context)
- Scaling sim up / workflow tip — How to scale down a cloth Simulation?
- Cloth collision jitter troubleshooting — Is there any way of stopping cloth collision jittering all over the place?
- Marvelous in pipeline (“cloth sims in marvelous designer…”) — Why Blender Isn’t Industry Standard (comment #38)
- More general cloth jitter causes/settings discussion — Cloth simulator improvements (page 14)
- Blender StackExchange (jitter fixes)
- Increase quality steps / collision quality — How to remove jitter on cloth simulation?
- Reddit Q&A / workflow tips (retopo after MD, attaching clothing in engine, add-ons)
- r/blenderhelp — Retopology with thick cloth
- r/unrealengine — Quick how-to tutorial to create custom clothes for Metahuman
- r/unrealengine — Import Marvelous Design cloth physics to Unreal
- r/blender (add-ons) — Simply Cloth – Addon… (mentions Cloth Weaver)
- r/MarvelousDesigner — High poly and retopo workflow question
- Marvelous Designer Support Documentation (graphics + maps)
- Apply graphics to patterns — Apply Graphic Image
- Maps generation (normal/opacity/metalness/displacement) workflow note — [Tips&Tricks] Discover Better Workflow with Marvelous Designer and Unreal Engine
- Baking displacement in UV Editor — [Mode] UV EDITOR
- Magic Fabric Blog (photogrammetry & fashion)
- MAGIC FABRIC — Photogrammetry in Fashion
- Designity Blog (2025 social marketing; short-form video)
- Designity (2025) — Social Media Marketing for Fashion Brands
- Blender Manual (cloth physics settings)
- Cloth settings index (quality steps, damping, etc.) — Settings (Cloth)
- Collision settings (distance, friction, etc.) — Collisions (Cloth)
- Academic reference: Atacac + The Fabricant (plus YouTube context)
- Paper PDF (Aalto-hosted) — Särmäkari — Digital 3D Fashion Designers: Cases of Atacac and The Fabricant (PDF)
- YouTube talk referenced in academic contexts — FASHION MADE: The Future of Digital Fashion with Kerry Murphy, The Fabricant
- Medium (Kristina Vilyams + Aditi Agrawal) — AR + digital fashion experiences
- Kristina Vilyams (includes Vogue x Snapchat AR exhibit mention) — How Augmented Reality is Reshaping the Fashion Industry
- Kristina Vilyams (metaverse + AR/AI) — Fashion in the Metaverse: Exploring the Intersection of Digital Fashion, AR, and AI
- Aditi Agrawal — Creating the Future of Fashion: The Rise of Digital Clothing and Wearable Art
- Notable quotes from professionals
- Reddit quote source (“MD is superior in almost every way”) — Is Blender’s cloth simulation comparable to Marvelous Designer?
- The Fabricant’s digital-only wardrobe / reducing physical production vision (interview-style quote) — Digital fashion house The Fabricant plots new path to profitability (Vogue/Vogue Business)
These sources (news articles, forum threads, official docs) underpin the practices and examples covered, providing real-world validation for techniques and trends discussed.
Recommended
- Managing Blender Scenes with Multiple Cameras Using The View Keeper
- How to Simulate Water-Drenched 3D Hair in Blender
- Blender Trim Hair Curves Geometry Nodes Preset: Comprehensive Guide for 3D Hair Grooming
- Brainrot Metahuman Animation for YouTube and Social Media: How to Create Viral Character Content in Unreal Engine 5
- Creating Smooth Camera Transitions in Blender Using The View Keeper
- Simplifying Camera Control in Blender with The View Keeper Plugin
- Marathon: Bungie’s New FPS – Gameplay Details, Developer Insights, and Community Reactions
- Devil May Cry Netflix Series: Release Date, Plot, Cast, and Everything We Know So Far
- Goat Review: GOAT (2026) Movie — Plot, Voice Cast, Age Rating, Scores & Where to Watch
- Metahuman Animation Tutorial: Step-by-Step Guide to Animating Digital Humans in Unreal Engine 5


